45Trail Tech Voyager
Google Earth
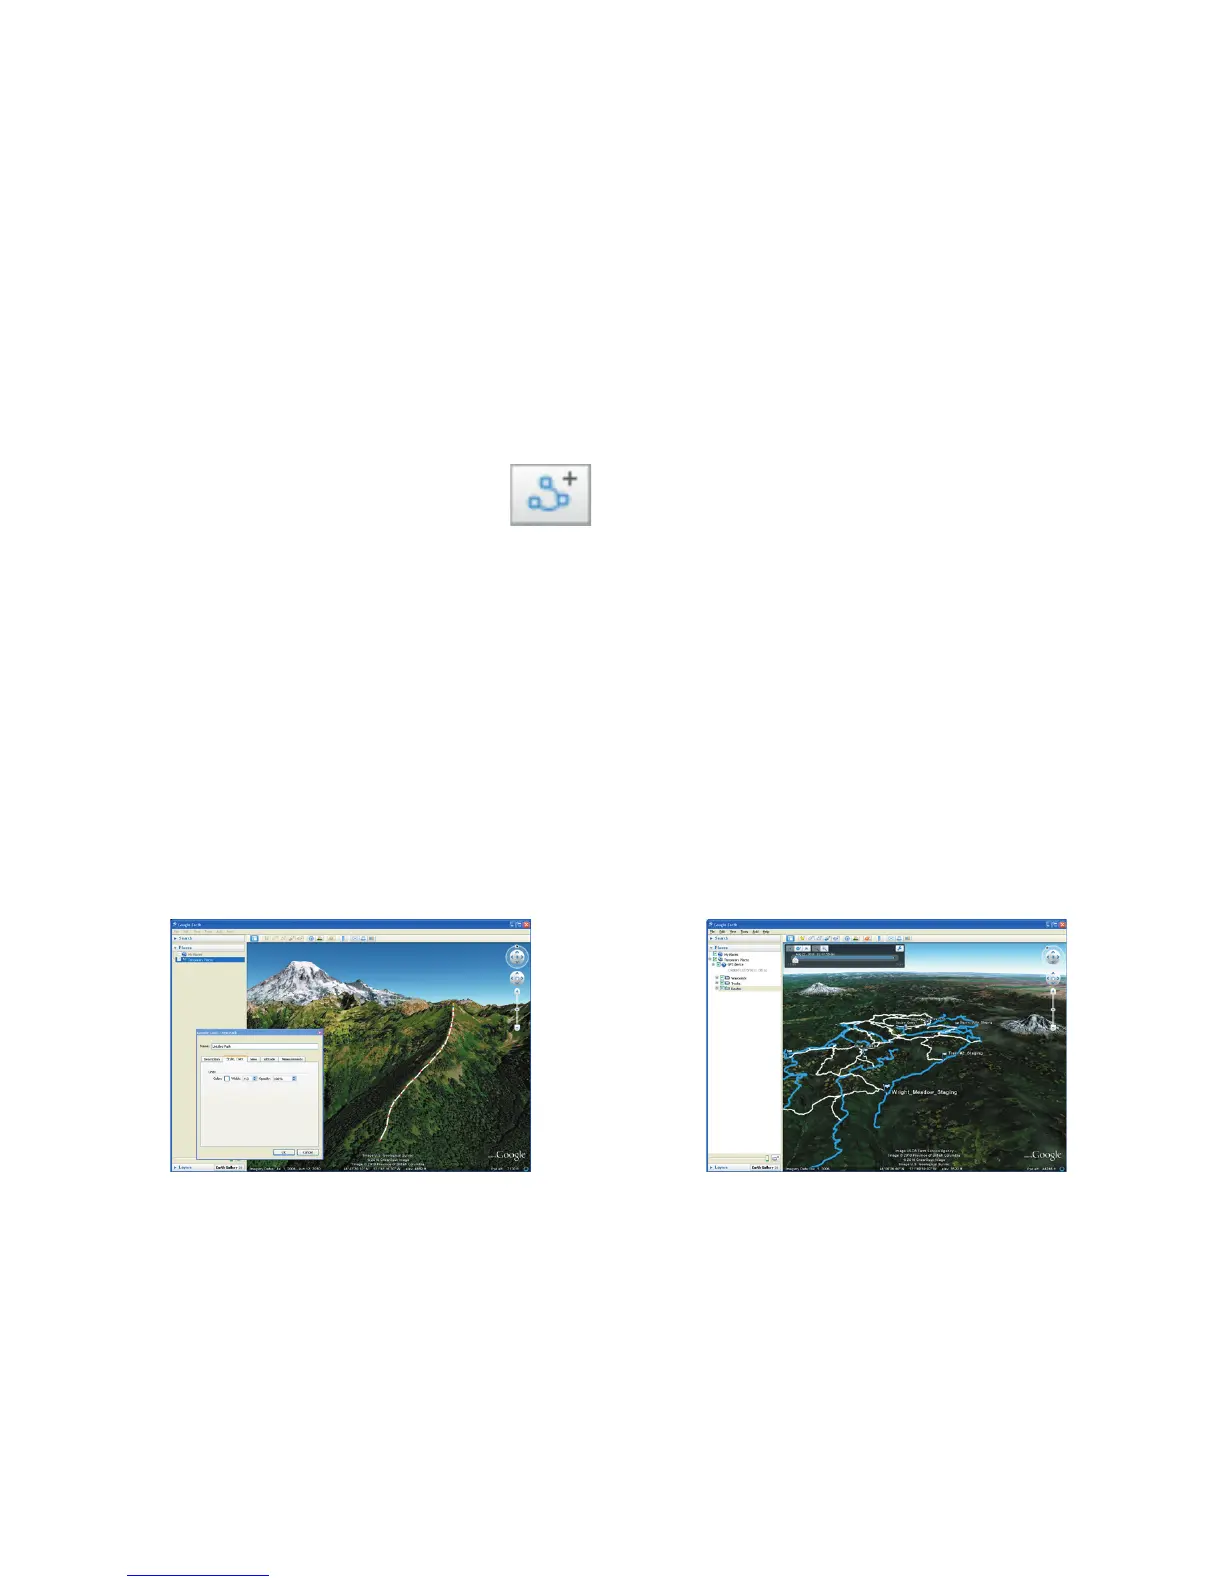
Draw and Export a Track to Voyager
To draw a track, click on the “Add Path”
button in the toolbar. A dialog box
appears (ignore it for now.) Using your
mouse cursor, click along the path right on top
of the Earth. After you have drawn the complete
line, click OK in the dialog box to save the
changes.
On the side of the screen in the Places sidebar,
right-click your new track and select “Save
Place As...” Google Earth will save it as a KML
file. You will need to convert the file to GPX
using GPSBabel, then it is ready to copy to the
MicroSD card for import into Voyager.
Import a Track from Voyager
Google Earth can import GPX files directly from
Voyager. Select Export on Voyager to save the
file to the MicroSD card, then on your PC, drag-
and-drop the GPX file onto Google Earth.
During import, check all three boxes yes,
including Create KML LineStrings. It is likely that
once the track is loaded, there will be a lot of
named points visible that obscure the track line.
To remove them, in the sidebar expand “GPS
device,” then right-click on Tracks and select
Properties. Go to the “Style, Color” tab and click
the “Share Style” button. Modify Label and Icon
scale to 0. Do the same for Routes.