TEW-823DRU
22
© Copyright 2014 TRENDnet. All Rights Reserved.
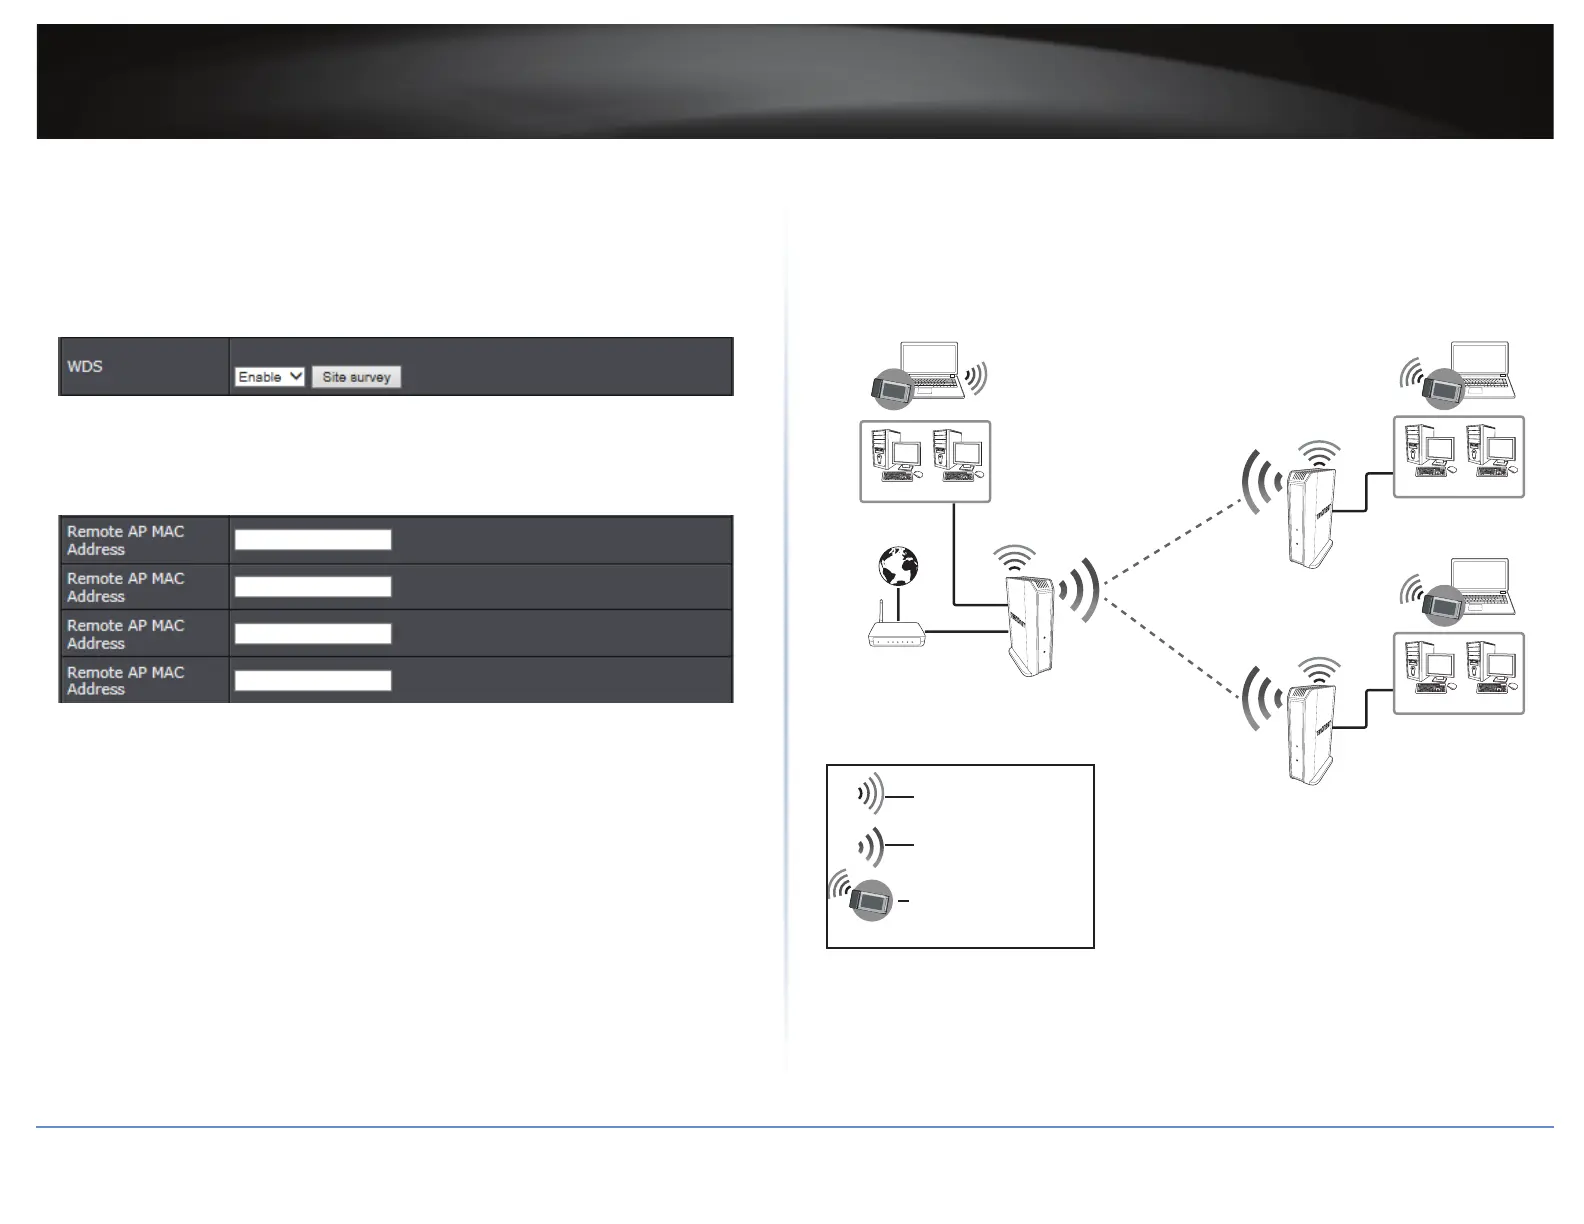
To congure WDS bridging between TEW-823DRU routers, do the following:
1 Log into your router management page (refer to “Log in to Management Page” on page 8).
2 Click on Advanced > Wireless (2.4GHz or 5GHz) > WDS.
3 Click on the WDS drop-down list and select Enable.
IMPORTANT: Ensure the basic wireless security (Basic > Wireless > Security) on router is set
to WEP or Disabled mode. WDS cannot funcon in WPA or WPA2 mode.
ÍNote: Click Site survey to search for Access Point’s MAC address to connect.
4 Enter the MAC address of the other WDS supported wireless device you are bridging. For
example, 00:11:22:AA:BB:CC.
5 Click Apply to save the changes.
ÍNote: To discard the changes, click Cancel.
For addional routers, make sure to disable the DHCP server rst on all addional routers
and congure the LAN IP address to be dierent on each router. You will connect devices to
the LAN ports 1-4 only on all addional routers and the WAN port is not used. Then, repeat
the steps for addional routers you are bridging.
The following illustraon shows the access point with WDS enabled connecon diagram.
Access point mode
connecon
Wireless bridged
connecon
Client 1 (AP2)
Client 1 (AP3)
Client 1 (AP1)
WDS Bridge 1
WDS Bridge 2
Cable DSL
Modem
LAN A
LAN A
AP1
AP2
AP3
TEW-823DRU
TEW-823DRU
TEW-823DRU
(LAN DHCP Server Disabled)
(IP Address: 192.168.10.1)
(LAN DHCP Server Disabled)
(IP Address: 192.168.10.3)
LAN A
Network with Wireless
N PC Card
(LAN DHCP Server Disabled)
(IP Address: 192.168.10.2)









 To Next Page