TEW-823DRU
30
© Copyright 2014 TRENDnet. All Rights Reserved.
Congure IPv6 Sengs
Advanced > Setup > IPv6Sengs
IPv6 (Internet Protocol Version 6) is a new protocol that signicantly increases the number
of available Internet public IP addresses due to the 128-bit IP address structure versus IPv4
32-bit address structure. In addion, there are several integrated enhancements compared
to the most commonly used and well known IPv4 (Internet Protocol Version 4) such as:
• Integrated IPsec: Beer Security.
• Integrated Quality of Service (QoS): Lower latency for real-me applicaons.
• Higher Eciency of Roung: Less transmission overhead and smaller roung tables.
• Easier conguraon of addressing.
ÍNote: In order to use IPv6 Internet connecon sengs, it is required that your ISP
provide you with the IPv6 service. Please contact your ISP for available and more
informaon on the IPv6 service.
1 Log into your router management page (refer to “Log in to Management Page” on page 8).
2 Click on Advanced > Setup > IPv6 Sengs.
3 Review the IPv6 Internet Connecon sengs and enter informaon sengs specied
by your ISP.
ÍNote: Please contact your ISP for IPv6 service availability.
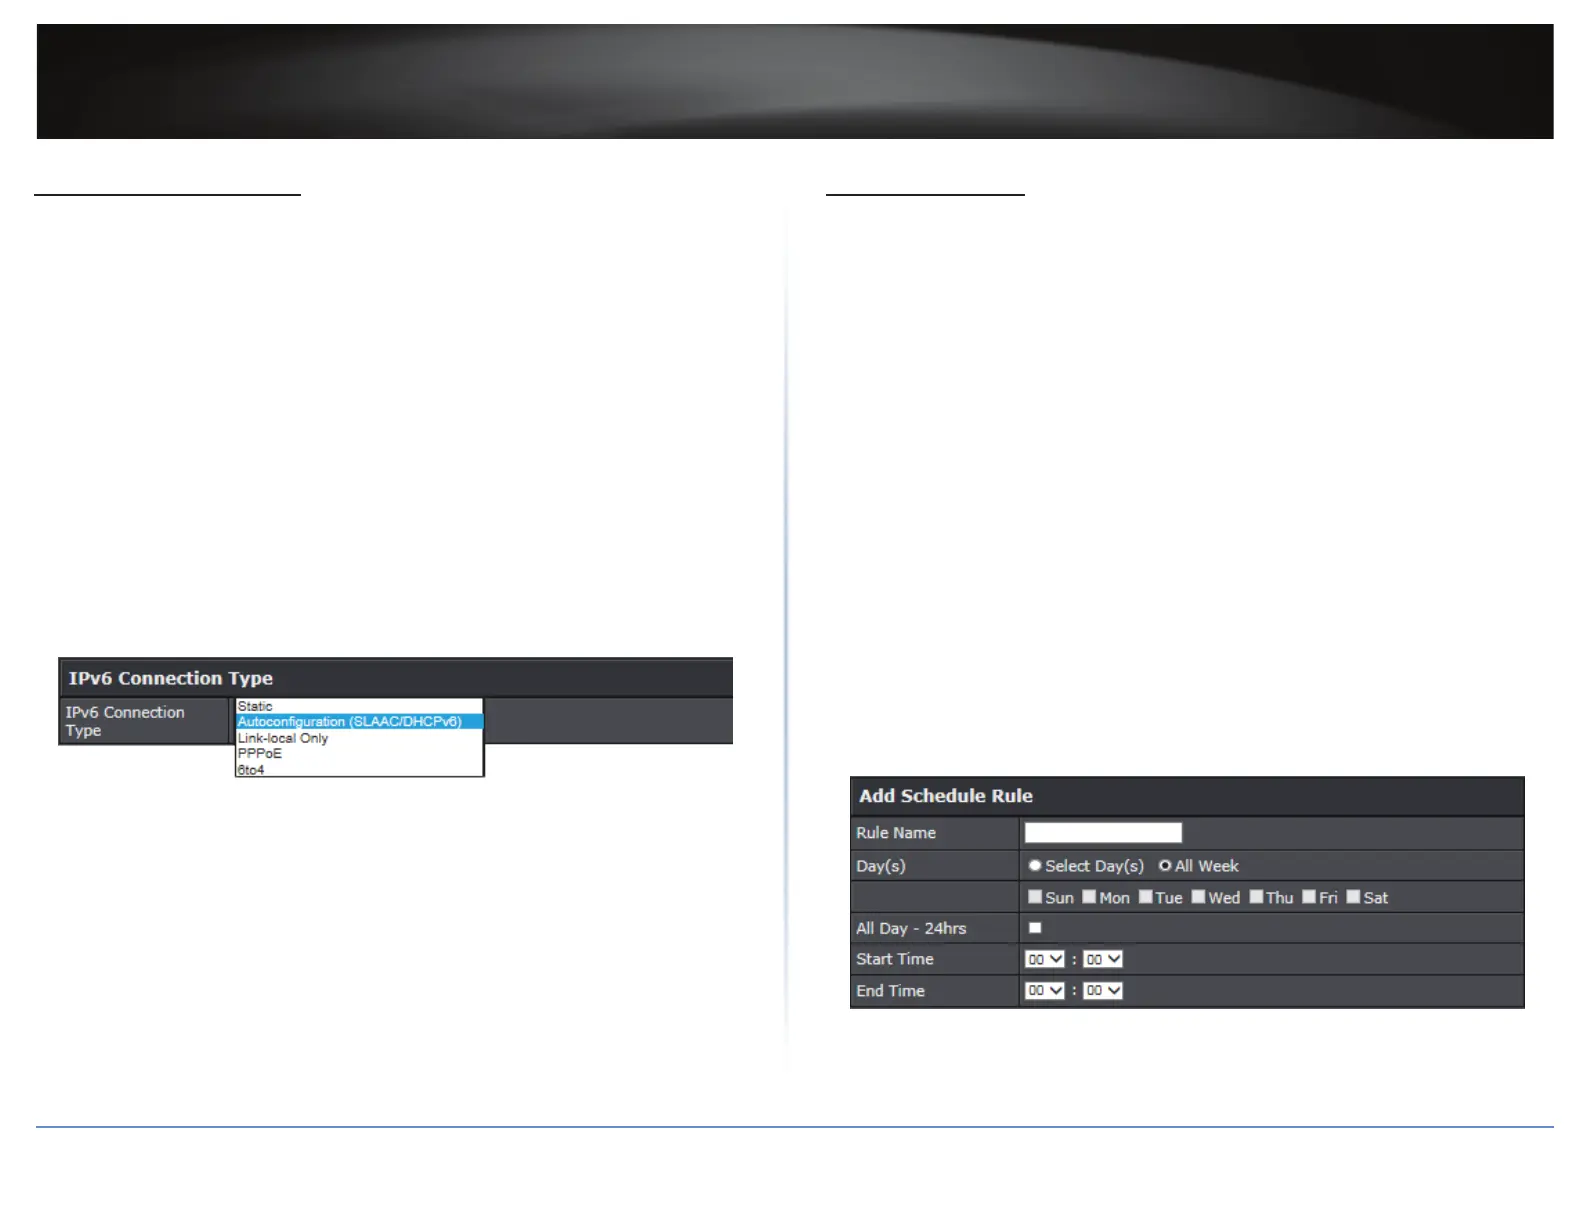
Select the IPv6 connecon type provided by your ISP.
4 Click Apply to save the changes.
ÍNote: To discard the changes, click Cancel.
Create Schedules
Advanced > Setup > Schedule
For addional security control, your router allows you to create schedules to specify a me
period when a feature on your router should be acvated and deacvated. Before you use
the scheduling feature on your router, ensure that your router system me is congured
correctly.
ÍNote: You can apply a predened schedule to the following features:
ͳ Wireless (2.4GHz and 5GHz)
ͳ Guest Network
ͳ Parental Control (MAC/IP Filters)
ͳ Access Control (IP Protocol Filters)
ͳ Virtual Server
ͳ Special Applicaons
ͳ Gaming
1 Log into your router management page (refer to “Log in to Management Page” on page 8).
2 Click on Advanced > Setup > Schedule.
3 In Add Schedule Rule secon, modify the following values:
Rule Name: Enter a name for the schedule you would like to apply.
Day(s): Check Select Day(s) to select the specic days or select All Week to set the
schedule for all days.
ÍNote: Check the checkbox next to the day(s) when you want to run the schedule.
All Day – 24 Hours: Check the opon to set the schedule to 24 hours.
Start/End Time: Select the start and end me you would like the schedule to follow.
4 Click Apply to save the changes.
ÍNote: To discard the changes, click Clear.













 To Next Page