TEW-823DRU
18
© Copyright 2014 TRENDnet. All Rights Reserved.
Port: Enter the port your RADIUS server is congured to use for RADIUS authencaon.
ÍNote: It is recommended to use port 1812 which is the default RADIUS port.
Shared Secret: Enter the shared secret used to authorize your router with your
RADIUS server.
Connect Wireless Devices using WPS
WPS (Wi-Fi Protected Setup) is a feature that makes it easy to connect devices to your
wireless network. If your wireless devices support WPS, you can use this feature to easily
add wireless devices to your network.
ÍNote: You will not be able to use WPS if you set the SSID Broadcast seng to Disabled
or if you are using WEP security.
There are two methods the WPS feature can easily connect your wireless devices to your
network:
• Push Buon Conguraon (PBC) method:
ͳ Hardware Push Buon method–with an external buon located physically on
your router and on your client device (recommended).
ͳ WPS Soware/Virtual Push Buon - located on router management page.
• PIN (Personal Idencaon Number) Method - located on router management page.
ÍNote: Please refer to your wireless device documentaon for details on the operaon
of WPS.
Hardware Push Buon (PBC) Method (recommended)
It is recommended that a wireless key (passphrase or password) is created before
connecng clients using the PBC method. By default your router is precongured with a
wireless encrypon key. If no wireless key is dened when connecng via PBC, the router
will automacally create an encrypon key that is 64 characters long. This 64 character
key will then have to be used if one has to connect computers to the router using the
tradional connecon method.
To add a wireless device to your network, simply push the WPS buon on the wireless
device you are connecng (consult client device User’s Guide for length of me), then push
and hold the WPS buon located on your router for 3 seconds and release it. The WPS
LED will blink to indicate WPS has been acvated on your router. Please refer to “Product
Overview” on page 4.
For connecng addional WPS supported devices, repeat this process for each addional
device.
PBC (Soware/Virtual Push Buon)
Advanced > Wireless (2.4GHz or 5GHz) > WPS
In addion to the hardware push buon located physically on your router, the router
management page also has push buon which is a soware or virtual push buon you can
click to acvate WPS on your router.
1 Log into your router management page (refer to “Log in to Management Page” on page 8).
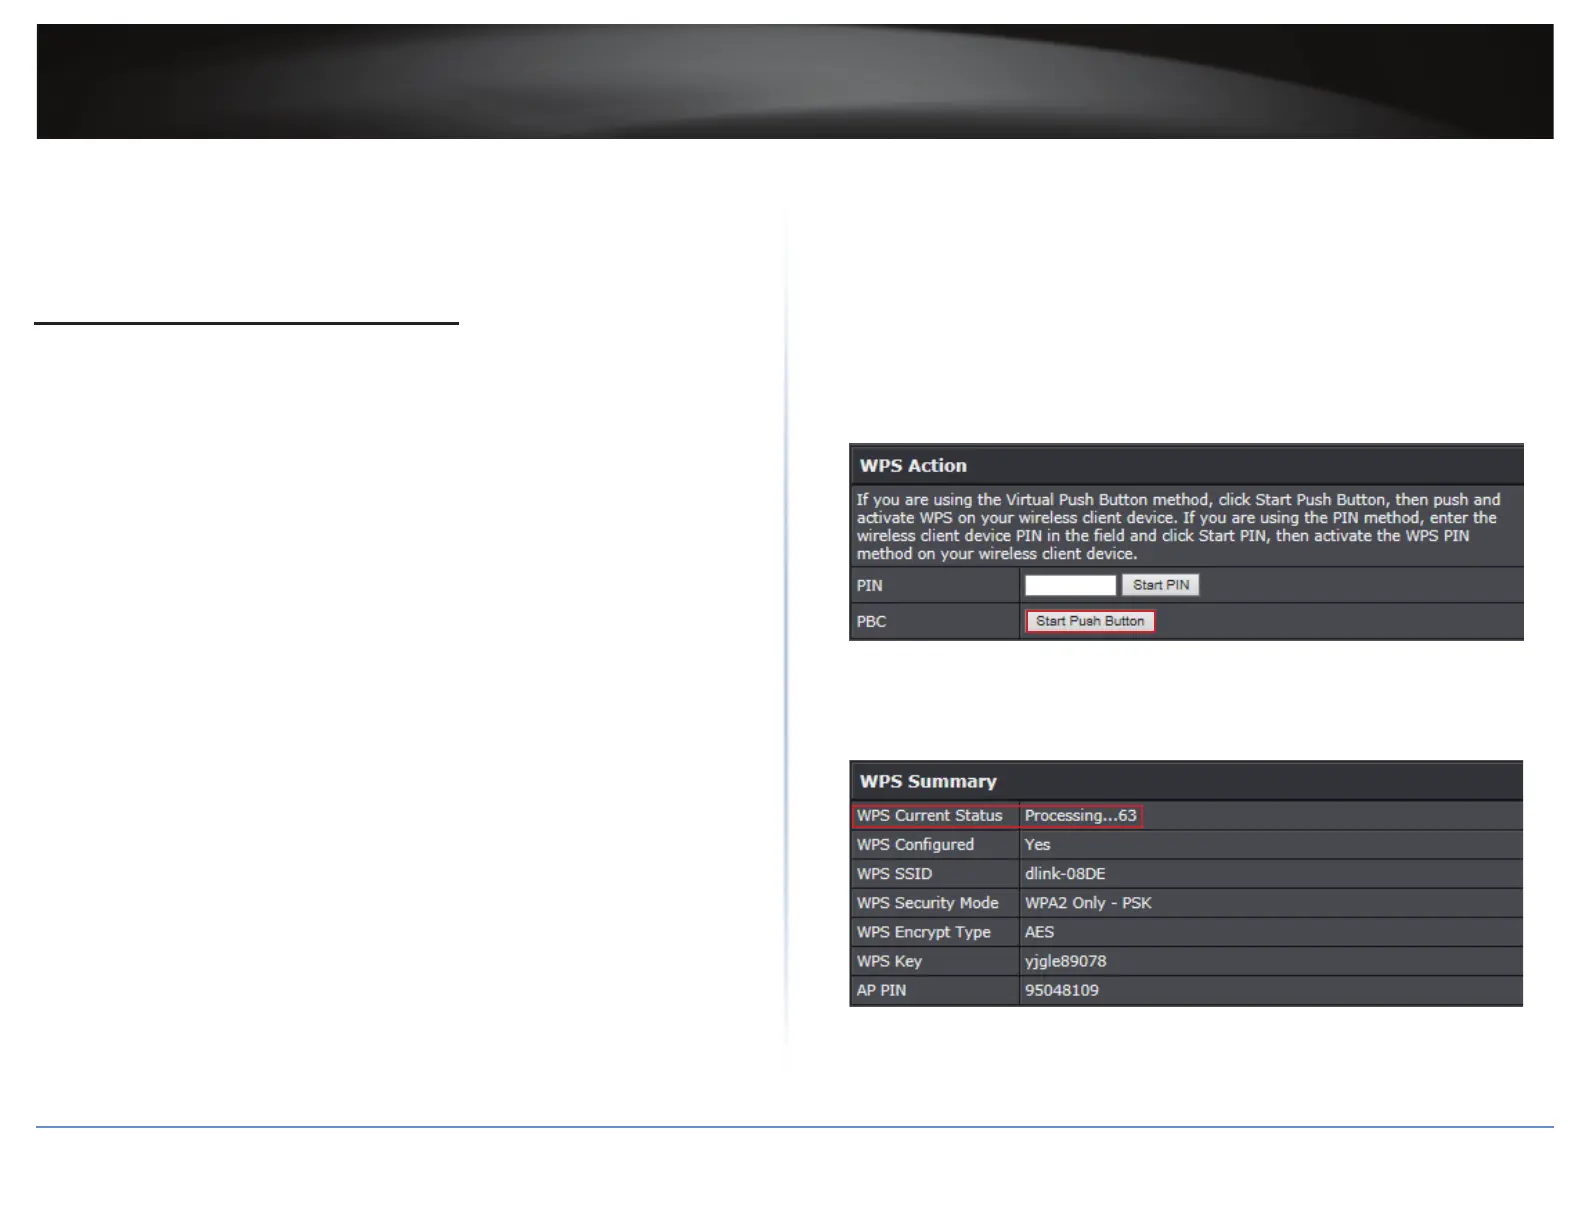
2 Click on Advanced > Wireless (2.4GHz or 5GHz) > WPS > WPS Acon.
3 To add a wireless device to your network, next to PBC, click the Start Push Buon buon.
Then push the WPS buon on the wireless device (consult wireless device’s User’s Guide
for length of me) you are connecng.
4 Wait for your router to nish the WPS process.
ÍNote: You should see a message on your WPS client device indicang the WPS was
successful.


 To Next Page