© Copyright 2020 TRENDnet. All Rights Reserved.
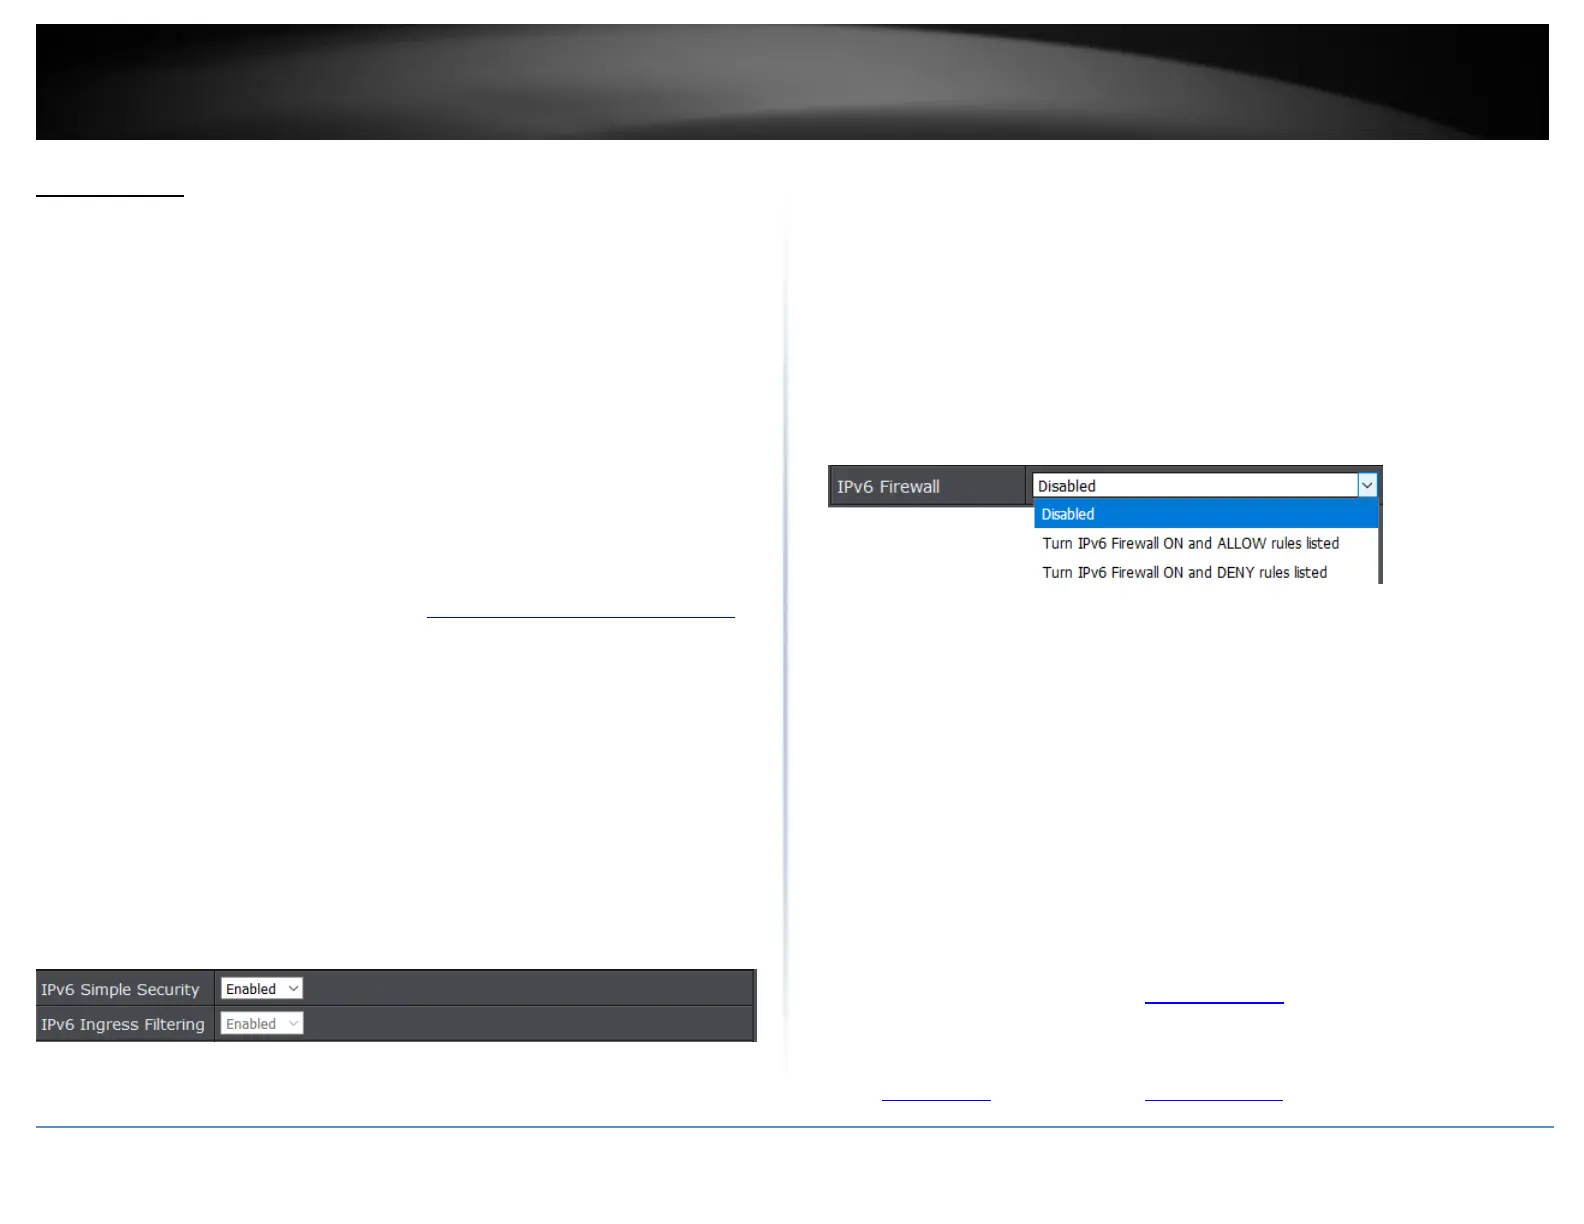
IPv6 Firewall
Advanced > Firewall > IPv6 Firewall
If you are using IPv6 Internet connectivity with your Internet Service Provider (ISP), you
may want to enable IPv6 security on your router to prevent internal access using IPv6
protocol to your internal LAN network.
When IPv6 Internet connectivity is established, the IPv6 simple security enables a basic
IPv6 firewall which allows all outgoing requests from the originating internal LAN to go
out to the Internet, denies all incoming requests from the originating outside
WAN/Internet and allow only ongoing communications/sessions established that
originated from the internal LAN, similar to the IPv4 NAT function (RFC6092). Enabling
IPv6 simple security also denies all ICMPv6 ping requests incoming from Internet into
your internal IPv6 LAN network (RFC4890). To enable basic IPv6 security, you can enable
the IPv6 Simple Security setting, then Save & Reboot. If you would like to create more
specific IPv6 firewall rules, you can create and specify these rules in the Add IPv6
Firewall Rule section.
1. Log into your router management page (see “Access your router management page”
on page 10).
2. Click on Advanced, click on Firewall, and click then click IPv6 Firewall.
firewall settings. To save changes to this section, click Apply when finished. Commit
your changes to the router by clicking on Apply/Discard Changes in the left-hand menu,
and click Apply & Reboot.
IPv6 Simple Security: Click the drop-down list and select Enable to enable IPv6
basic firewall and select Disable to disabled the IPv6 basic firewall. Enabling this
setting also denies incoming ICMPv6 requests.
IPv6 Ingress Filter: If IPv6 Simple Security is not enabled, select Enable to only
deny incoming ICMPv6 requests. All other IPv6 incoming communication will be
allowed unless otherwise specified by a specific IPv6 firewall rule.
To add a specific IPv6 firewall rule, under Add IPv6 Firewall Rule, select the action for
the firewall rules table review the settings below. Click Add to add the rule to the table.
Commit your changes to the router by clicking on Apply/Discard Changes in the left-
hand menu, and click Apply & Reboot.
IPv6 Firewall – Selecting the action will allow specific IPv6 firewall rules to be
created.
a. Turn IPv6 Firewall ON and DENY rules listed – This will set the action
to deny IPv6 traffic for all of the specific IPv6 firewall rules listed in the
IPv6 Firewall Rules table.
b. Turn IPv6 Firewall ON and ALLOW rules listed – This will set the
action to allow IPv6 traffic for all the specific IPv6 firewall rules listed
in the IPv6 Firewall Rules table.
Rule Enable: Check this option to enable the IPv6 firewall rule.
Rule Name: Enter a name for the IPv6 firewall rule.
Source IP Range: Enter the IPv6 address or IPv6 address range and select the
Interface (WAN or LAN) where the traffic will be originating. (ex. If this is an
outbound traffic rule, the IPv6 address should be the local IPv6 address or range
of devices on your LAN and interface should be set to LAN)
Destination IP Range: Enter the IPv6 address or IPv6 address range and select the
Interface (WAN or LAN) where the traffic will be going. (ex. If this is an outbound
traffic rule, IPv6 address should be the destination outside Internet IPv6 address
where the traffic will be going and interface should be set to WAN)
Protocol – Select the protocol you would like to allow or deny for the IPv6
firewall rule. TCP, UDP, or Both. (Note: Both means TCP and UDP protocols)
Port Range – Enter the port range you would like to allow or deny for the IPv6
firewall rule.
Schedule (Optional) – The schedule function allows you to define a schedule
when the port trigger should be turned on. To define a new schedule, click New
Schedule and refer to page 39 “ Create Schedules”. After you have created a new
schedule, click the drop-down list and the new schedule will be available for
selection. Note: Before applying scheduling, please ensure your Time settings are
configured correct and you have defined a schedule. See page 38 to configure
Time Settings and see page 39 “ Create Schedules” to create a schedule.
 Loading...