© Copyright 2020 TRENDnet. All Rights Reserved.
Block all services
1. Log into your router management page (see “Access your router management page”
on page 10).
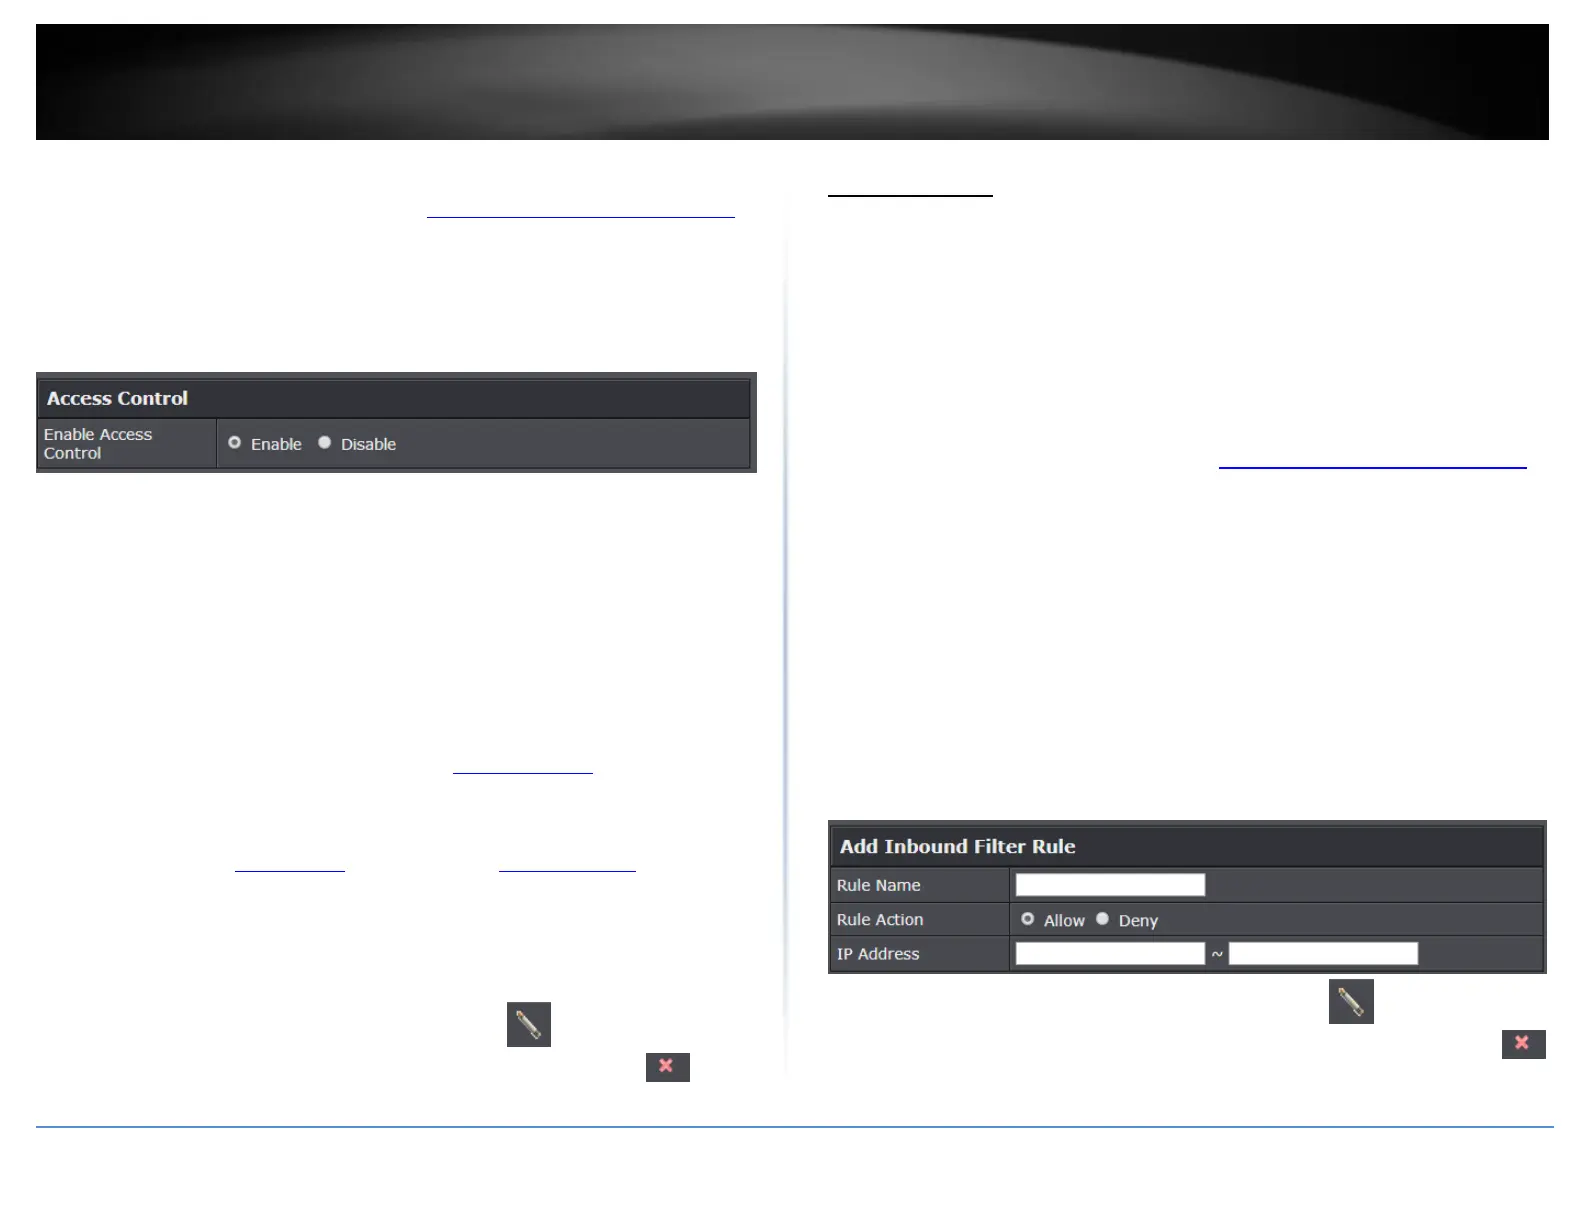
2. Click on Advanced and click on Security, then click on Access Control.
3. Next to Enable Access Control, click the Enable option.
4. Review the Add All Services Block Rule. Click Add to save the rule. Commit your
changes to the router by clicking on Apply/Discard Changes in the left-hand menu, and
click Apply & Reboot.
Rule Enable – Checking this option turns on the Protocol/IP Filter and
unchecking turns it off.
Rule Name – Enter a name for the Protocol/IP Filter.
Schedule (Optional) – The schedule function allows you to define a schedule
when the access control filter should be turned on. To define a new schedule,
click New Schedule and refer to page 42 “ Create Schedules”. After you have
created a new schedule, click the drop-down list and the new schedule will be
available for selection. Note: Before applying scheduling, please ensure your
Time settings are configured correct and you have defined a schedule. See page
41 to configure Time Settings and see page 42 “ Create Schedules” to create a
schedule.
Client IP Address Range – Enter the IP address or IP address range to apply the
protocol/IP filter. (e.g. 192.168.10.20-192.168.10.20 or 192.168.10.20-
192.168.10.30).
Note: The filter will not be applied to IP addresses outside of the range specified.
Note: In the Block Rule List, you can edit a rule by clicking under the Edit column
next to the rule you would like to edit. You can also delete a rule by clicking under
the Delete column next to the rule you would like to delete.
Inbound Filter
Advanced > Security > Inbound Filter
Inbound Filters allows you to allow or deny a specific range of IP addresses. You can
create a predefined range of IP addresses to apply to a specific feature.
Note: You can apply a predefined inbound filter to the following features:
Virtual Server
Gaming
Remote Management
1. Log into your router management page (see “Access your router management page”
on page 10).
2. Click on Access, and click on Inbound Filter.
3. Review the inbound filter settings. Click Add to save the Inbound Filter. Commit your
changes to the router by clicking on Apply/Discard Changes in the left-hand menu, and
click Apply & Reboot.
Rule Name – Enter a name for the IP address range.
Rule Action – Select Allow to allow the specified IP address range or Deny to
deny the specified IP address range.
IP Address - Enter the IP address range (e.g. 192.168.1.20-192.168.1.30).
Note: In the Inbound Filter List, you can edit a rule by clicking under the Edit
column next to the rule you would like to edit. You can also delete a rule by clicking
under the Delete column next to the rule you would like to delete.