© Copyright 2020 TRENDnet. All Rights Reserved.
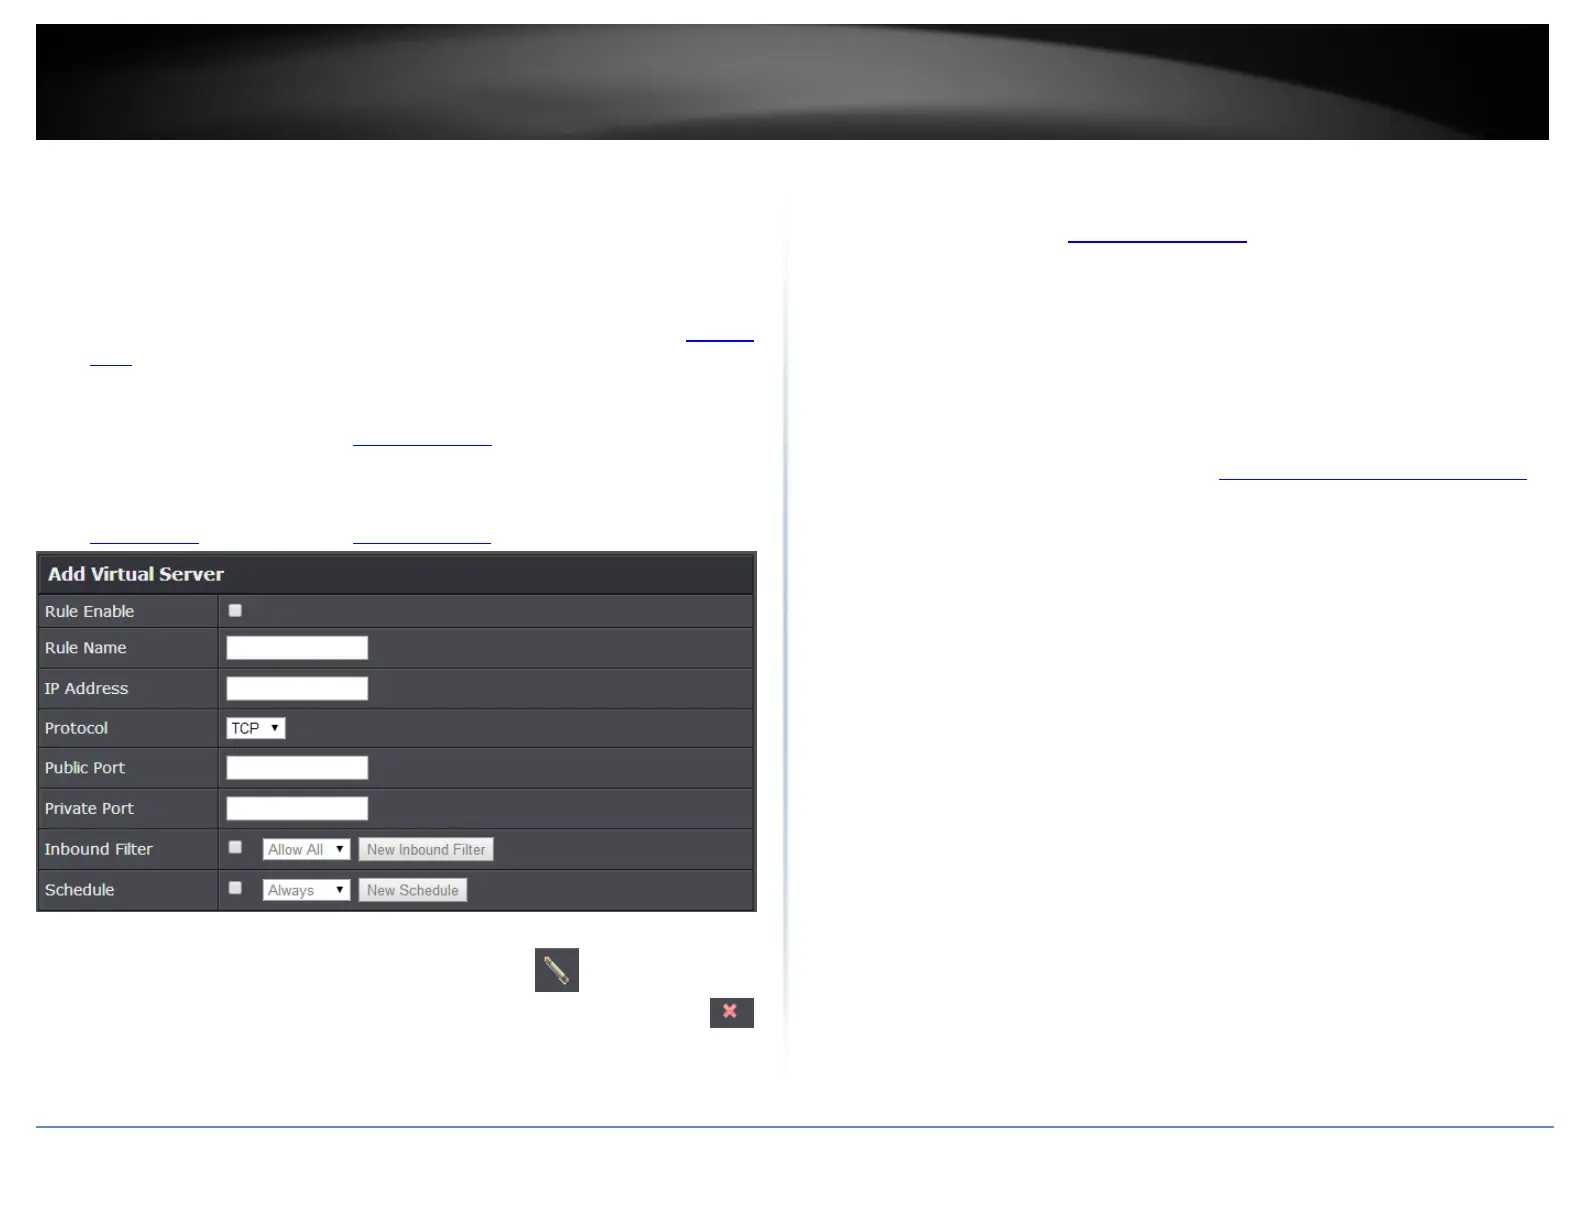
Note: The Public Port can be assigned a different port number than the Private
Port (also known as port redirection), however it is recommended to use the same
port number for both settings. Please refer to the device documentation to
determine which ports and protocols are required. It is recommended to assign a
static IP address to the device or use DHCP reservation to ensure the IP address of
the device does not change.
Inbound Filter: Select the defined IP address range to allow access. (see “Inbound
Filter” section on page 44).
Schedule (Optional) – The schedule function allows you to define a schedule
when the virtual server should be turned on. To define a new schedule, click New
Schedule and refer to page 42 “ Create Schedules”. After you have created a new
schedule, click the drop-down list and the new schedule will be available for
selection. Note: Before applying scheduling, please ensure your Time settings are
configured correct and you have defined a schedule. See page 41 to configure
Time Settings and see page 42 “ Create Schedules” to create a schedule.
Note: In the Virtual Server List, you can edit a rule by clicking under the Edit
column next to the rule you would like to edit. You can also delete a rule by clicking
under the Delete column next to the rule you would like to delete.
Example: To forward TCP port 80 to your IP camera
1. Setup DynDNS service (see Identify Your Network section page 40).
2. Access TRENDnet IP Camera management page and forward Port 80 (see product
documentation)
3. Make sure to configure your network/IP camera to use a static IP address.
Note: You may need to reference your camera documentation on configuring a static IP
address.
4. Log into your router management page (see “Access your router management page”
on page 10).
5. Click on Advanced and click on Firewall, then click on Virtual Server
6. Check the Rule Enable option to enable the Virtual Server.
7. Next to IP Address, enter the IP address assigned to the camera. (e.g. 192.168.10.101)
8. Next to Protocol, make sure TCP is selected in the drop-down list.
10. The Private Port and Public Port, enter port number 80 is configured for both
settings.
11. To save the changes, click Add. Commit your changes to the router by clicking on
Apply/Discard Changes in the left-hand menu, and click Apply & Reboot.
 Loading...