TROUBLESHOOTING
33
Fault Code Troubleshooting
From Test Mode, you can run oven diagnostics and check fault counts. To access Test Mode or turn on
Diagnostic mode, see page 14. To locate oven components for testing, adjustment, or replacement, see
the Appendix.
Troubleshooting:
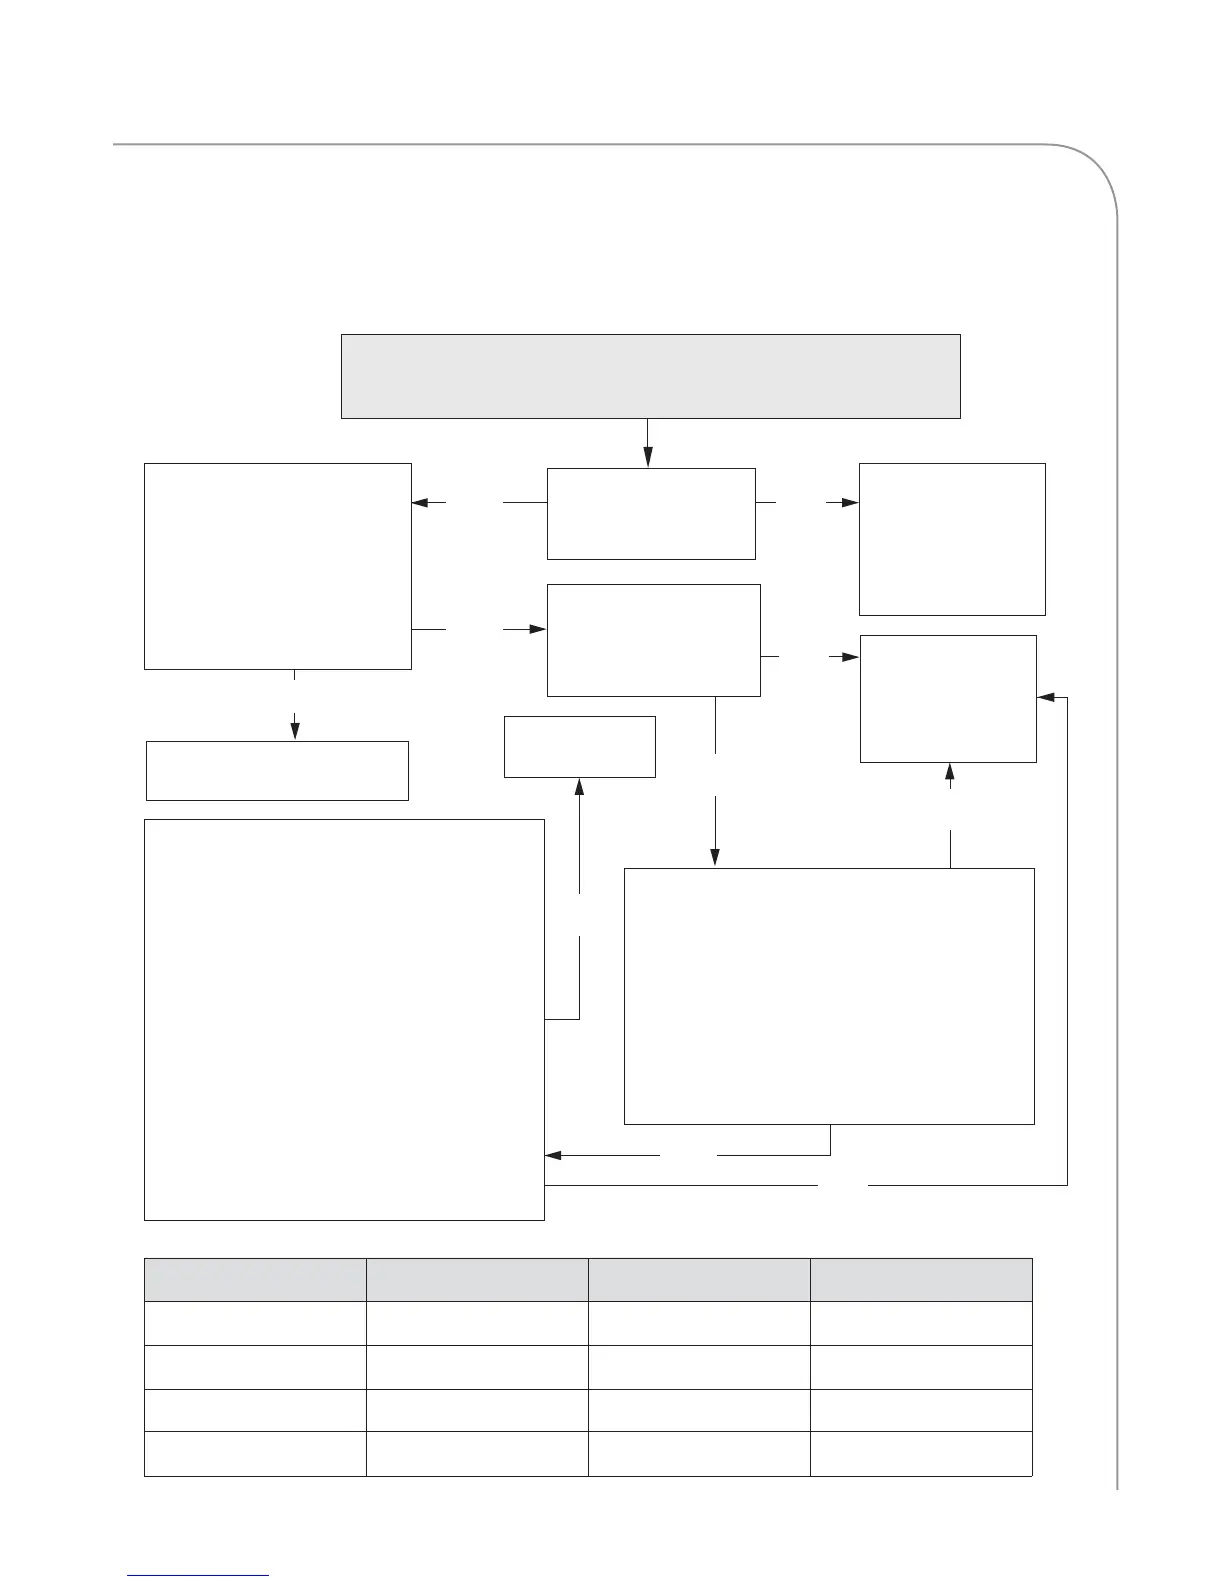
F1: BLOWER (Blower Running Status Bad)
YES
YES
NO
Figure 36: Motor Windings Resistance Table
Replace blower motor(s).
Remove obstruc-
tion or if necessary,
replace blower
motor(s).
YES
Do resistance measurements
between windings and
chassis agree with values on
motor windings resistance
table (below)? (Be sure to
check both the top and
bottom blower motors.)
Is each blower motor
spinning freely?
NO
Are Status Indicators
“B” and “T” backlit in
? (page 14)
NO
Replace the
BMSC.
To From Description Expected Resistance
Black Red Winding (A-B) 5.9-7.3 Ohms
Black White Winding (A-C) 5.9-7.3 Ohms
Red White Winding (B-C) 5.9-7.3 Ohms
Black, Red, or White Green Windings to Chassis Open
NO
YES
1. Disconnect control wiring (top blower =
J2, bottom = J1 connector).
2. Ground pin 5 of the J1 and J2 connectors
(Status OK wire) to chassis to remove the
back-light from status indicators “B” and
“T”(see page 45).
Were the back-lights removed from the
status indicators while pin 5 was grounded?
Check the wire
harness and if nec-
essary, replace the
control board.
NO
YES
Test for voltage on the J1 and J2 connector.
1. Ground pin 5 of the J1 connector.
2. While pin 5 is grounded, check the
terminals on the control wiring plug
for 0-10 VDC across pins 1 and 2 of
the J1 connector (see page 45) while
incrementing the blower speed in
.
3. Repeat steps 1 and 2 for the J2
connector.
Is DC voltage present throughout all speed
settings in on both the J1 and J2
connectors

 Loading...