17 of 35 REF: CCU3/C-4100.DOC REV: M September 26, 2005
5. Configuring the CCU3/C-4100
Once the installation is done, you need to run CCUNET program to set up the
address. Note that CCUNET program should not be run simultaneously with XLG
C/S. Please refer to XLG CS Software Installation manual for installing the
CCUNET program ( V4.45 or later ).
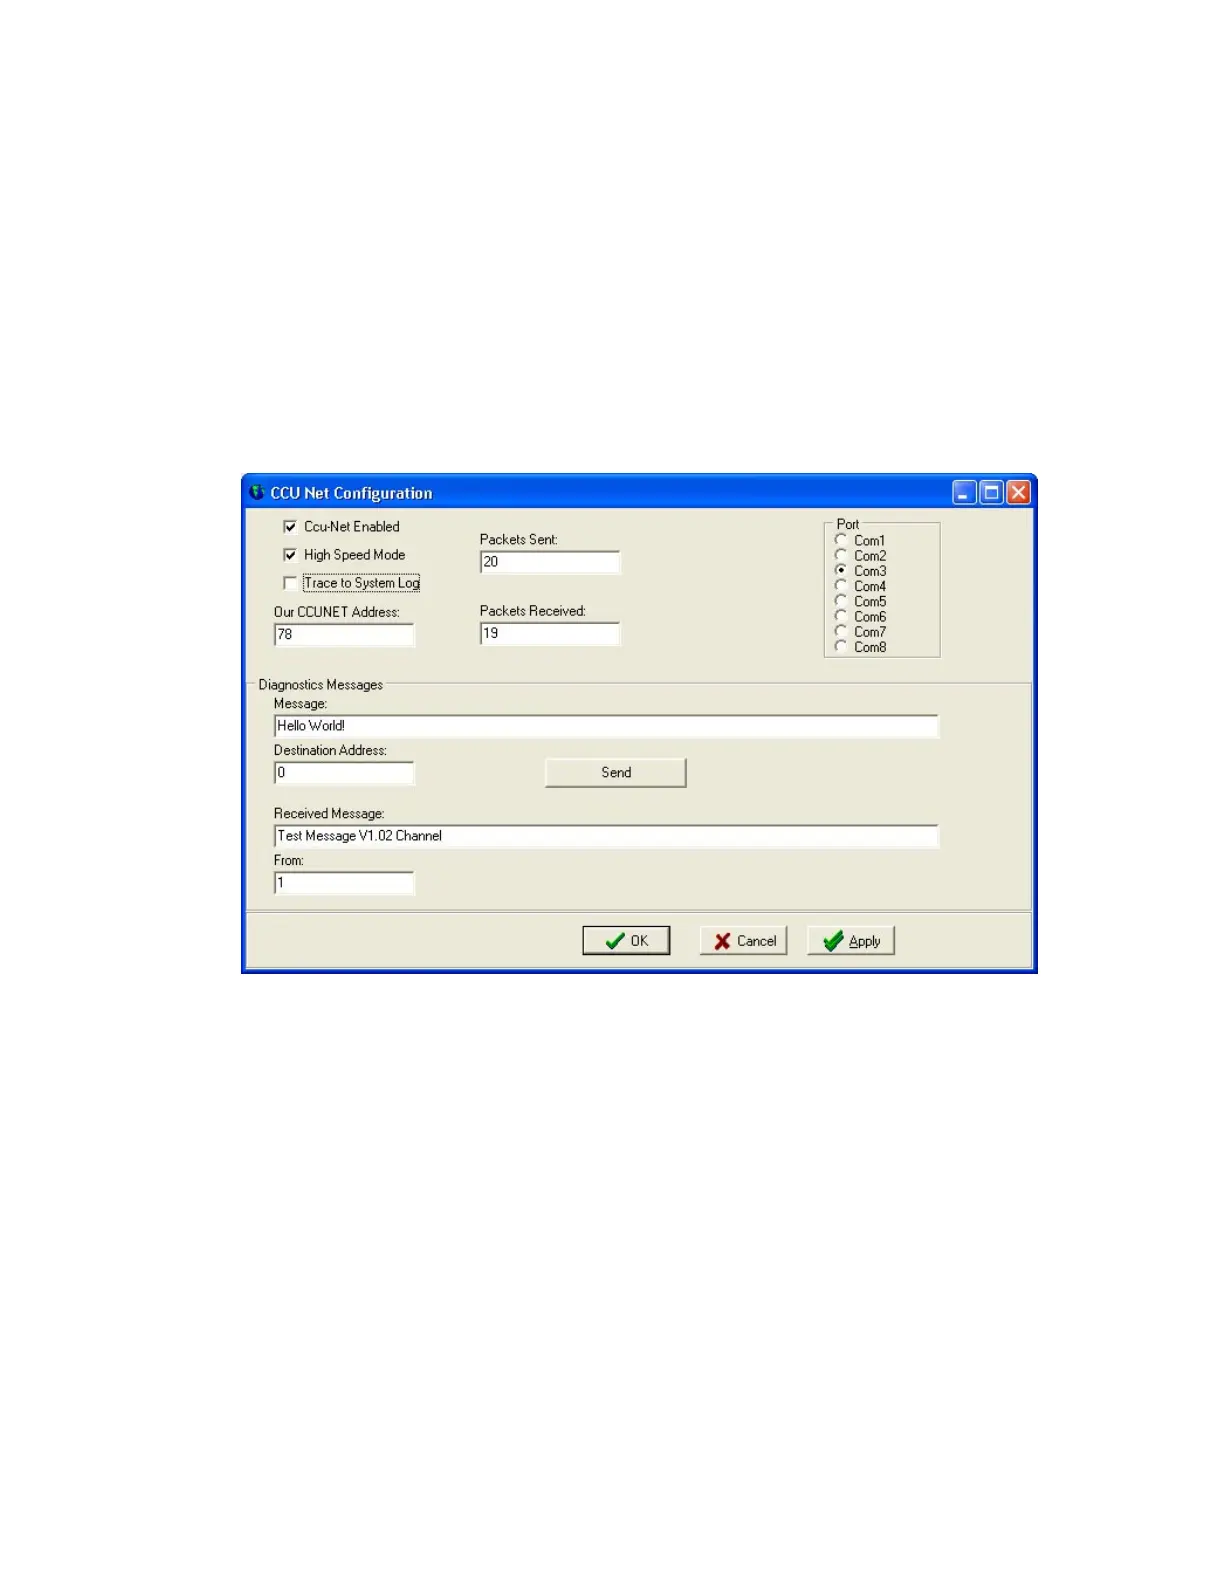
First, you need to set up the comport. Go to Setup, select Coms. Ccu-Net Enabled
and High Speed Mode should be ticked. Choose the correct comport from the Port
section on the right.
Our CCUNET Address is for the CCUNET program itself. It should be set to an
address that is NOT the same as any of the CCUs in the CCUNET.
Press Apply to store the changes.
Figure 14. Setup page
Packets Sent and Packets Received indicate there are valid messages going out
and coming in, which means the communication between the CCUNET and CCUs
are operating correctly.
You can send messages to one or more CCUs by pressing Send button. If the
destination address is 0, it broadcasts the test message to all the CCUs on the net.
You can type a certain CCU address in the destination address in order to check
the communication to that CCU. If the communication is ok, you should see
received messages.
The Received Message area shows the latest received packet only and the
address from which that message is received.
 Loading...