Climate Control Zoning System II installation and operation manual | Chapter 3 – Installing the base unit l 9
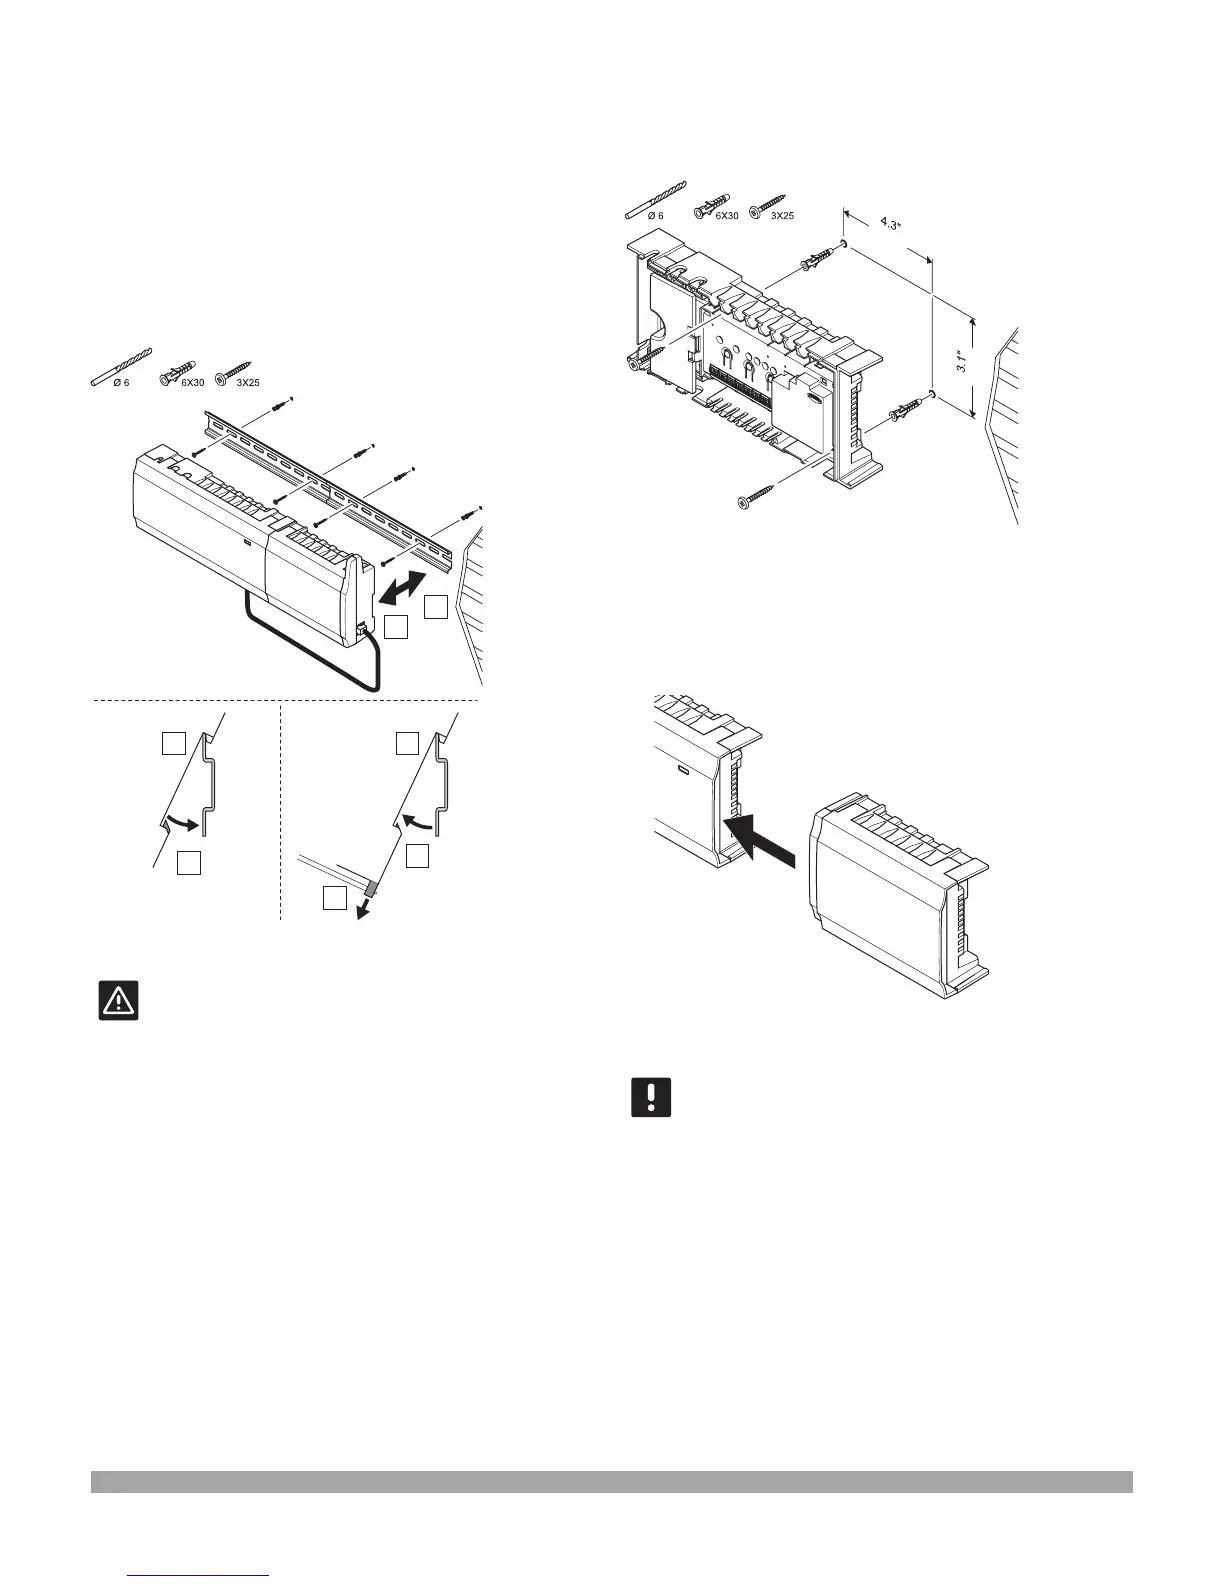
Attaching the base unit to a wall
The base unit is delivered in a kit that includes screws, wall
plugs and a mounting bracket.
Mounting brackets
Attach the mounting bracket to the wall using the screws and
wall plugs, then attach the base unit to the mounting bracket.
The gure below shows how to attach (A) and detach (B)
the base unit using a mounting bracket.
B
B
A
1
1
2
A
Caution: Make sure the controller cannot slide
off the bracket if mounting it in any other position
than horizontal.
Screws and wall plugs
The gure below shows base unit mounting hole positions
and how to attach it to the wall using screws and wall plugs.
110 mm
80 mm
Connecting the expansion module (optional)
The illustration below shows how to connect the expansion
module to the base unit.
Important! Only one expansion module is supported
per base unit.
Figure 3-7: Attaching the base unit to a wall
Figure 3-8: Attaching base unit with screws and wall plugs
Figure 3-9: Connecting optional expansion module

 Loading...