uponor.com l 15
Chapter 5:
Hardware Installation
Installation Procedure
Uponor recommends the following steps to provide the
best possible installation results:
• Prepare for Installation (see page 15)
• Install Controller(s) (see page 16)
• Install Communication Module or Antenna
(see pages 17-18)
• Install the Relay Module (see page 18)
• Install Thermostats (see page 19)
After installing the hardware, Chapter 6: Wiring will
describe how to wire the system components, connect
the wireless devices, and finalize setup using the Smatrix
Pulse App.
Prepare for Installation
• Verify the contents of the package with the packing list.
• Check whether an external temperature sensor (e.g., floor
sensor) is to be installed with a thermostat.
• Review the wiring diagram in the manual or inside the
Controller cover.
• Ensure the Controller can be installed near the manifold.
Note that each manifold should have its own controller
(unless the manifold is a single zone).
• Ensure all Smatrix Pulse components are protected from
exposure to water.
Required Tools
Refer to the following list of tools required to install the
Smatrix Pulse hardware:
• Wire cutters
• Small Phillips screwdriver
• Flathead screwdriver
• T-10 bit (wiring compartment on the controller)
• Level
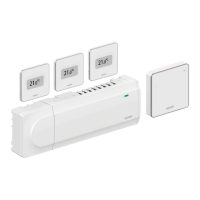
Installation Example
Figure 5-1: Installation example