uponor.com l 27
Chapter 7:
Connecting Wireless Devices
After mounting the hardware and wiring the devices,
the next step in the installation is connecting the various
devices wirelessly.
With the Smatrix Pulse system, the true wireless features
make the hardware more flexible and easier to install. This
section will take the user through the various options to
“link” the devices together given the following options:
• Linking a thermostat to a Controller
• Linking a thermostat to a Relay Module
• Linking a Controller to a Relay Module
• Linking a sub-Controller to a Primary Controller
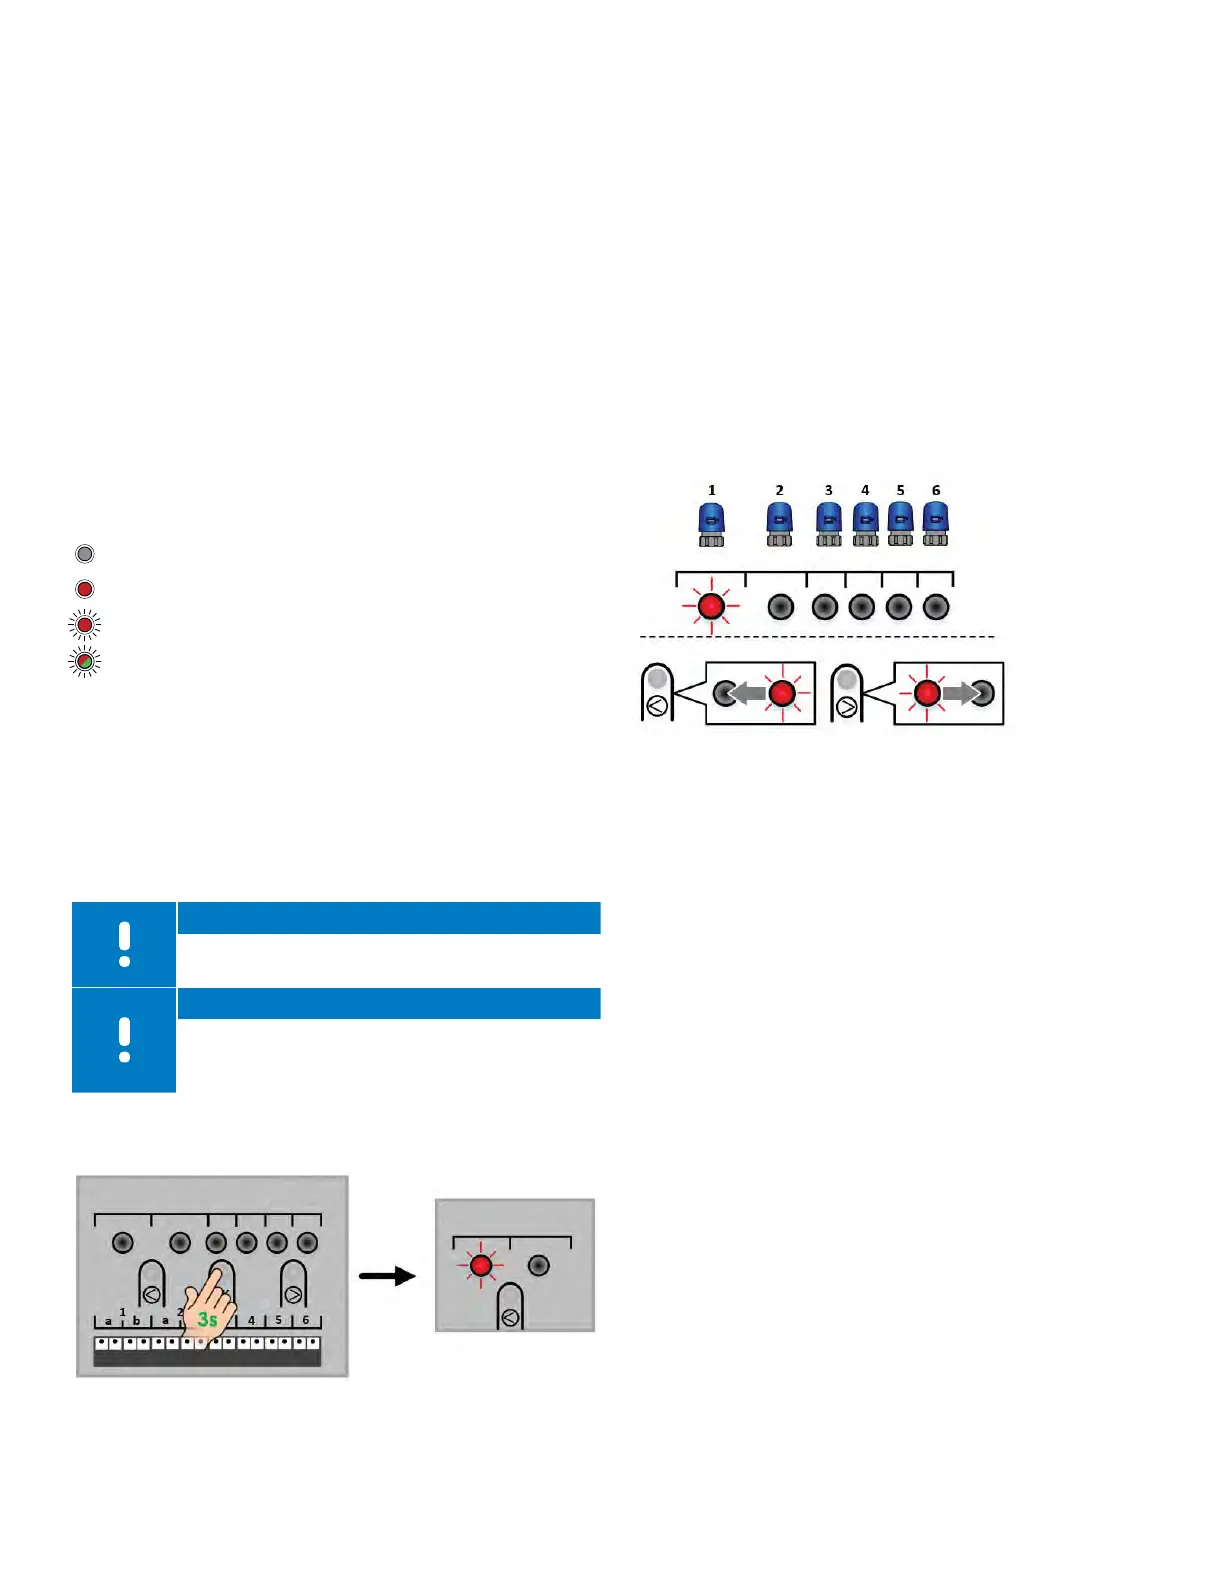
LED Guide
LED is unlit and dark (no color)
LED is on solid
LED is on flashing
LED is alternating colors
Linking a Thermostat to a Controller
It is necessary to link a thermostat to a Controller so the
thermostat can pass information to the Controller about
room temperatures, set temperatures, etc. The Controller
will process the information and make decisions based on
the system configuration and mode to operate the various
heating and cooling components.
Note
A thermostat can only be linked to a single
Controller.
Note
Thermostats must be linked to a Controller for
them to appear on the Smatrix Pulse App.
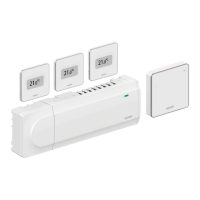
Use the following steps to link a thermostat to a Controller.
• Activate the registration mode by pressing the OK button
on the Controller for three (3) seconds. The Power LED
changes from solid green to solid red.
• The Controller is in registration mode when the LED for
Channel 1 flashes red. If a thermostat has already been
linked, the first channel available will flash red.
A previously linked channel will appear solid green.
• If the LED (or channel) flashing is not correct for the
actuator the thermostat will control, used the < and >
buttons to move the flashing red LED to the preferred
channel.
• Press the OK button to enter or assign that thermostat.
The link will be confirmed with LED turning solid green,
and the next available channel LED will begin to flash red.
• If more than one channel will be assigned to a
thermostat, select the next channels to be registered to
the thermostat and press OK. Once all selected channel
LEDs are solid green, go to the thermostat.
• Put the thermostat into “pairing” or registration mode:
• Digital Thermostat: Press and hold the ▲ and ▼ buttons
on the side of the thermostat until a symbol for an
antenna appears in the display. A check will briefly
appear when the registration is complete and then
revert to current room temperature.
• Mini Sensor: Press the button and hold on the back of
the thermostat for five (5) seconds. The LED on the front
of the stat will begin to flash. The LED will turn off when
the registration is complete.
• Once the registration between the thermostat and the
Controller is complete, the LED (or LEDs) set up previously
will turn solid green, and the next available (or open)
channel will flash red.
• Repeat these steps for additional thermostats.
Figure 7-1: Linking a thermostat to a Controller
Figure 7-2: Assigning a thermostat