3. Service and Repair
3-4
Battery Charging
The battery is charged by the alternator whenever the engine is running and should not require any other
charging. If the machine has not been in service or if for some other reason the battery has been discharged,
perform the following:
Check the battery fluid level. If the electrolyte level is lower than 10 mm (3/8 in.) above the plates, add clean,
distilled water only.
Battery Specific Gravity
After charging, if necessary, the specific gravity of all cells should be checked with a hydrometer. The
temperature corrected specific gravity should be 1.260. If the battery contains any cells with corrected readings
below 1.230, the battery should be replaced.
Do not check the specific gravity in a cell to which water has just been added. If there is not enough electrolyte
in a fully charged cell to obtain a sample for the hydrometer, add water and continue charging for 1 to 2 hours
to adequately mix the water and electrolyte.
3.6 LUBRICATION
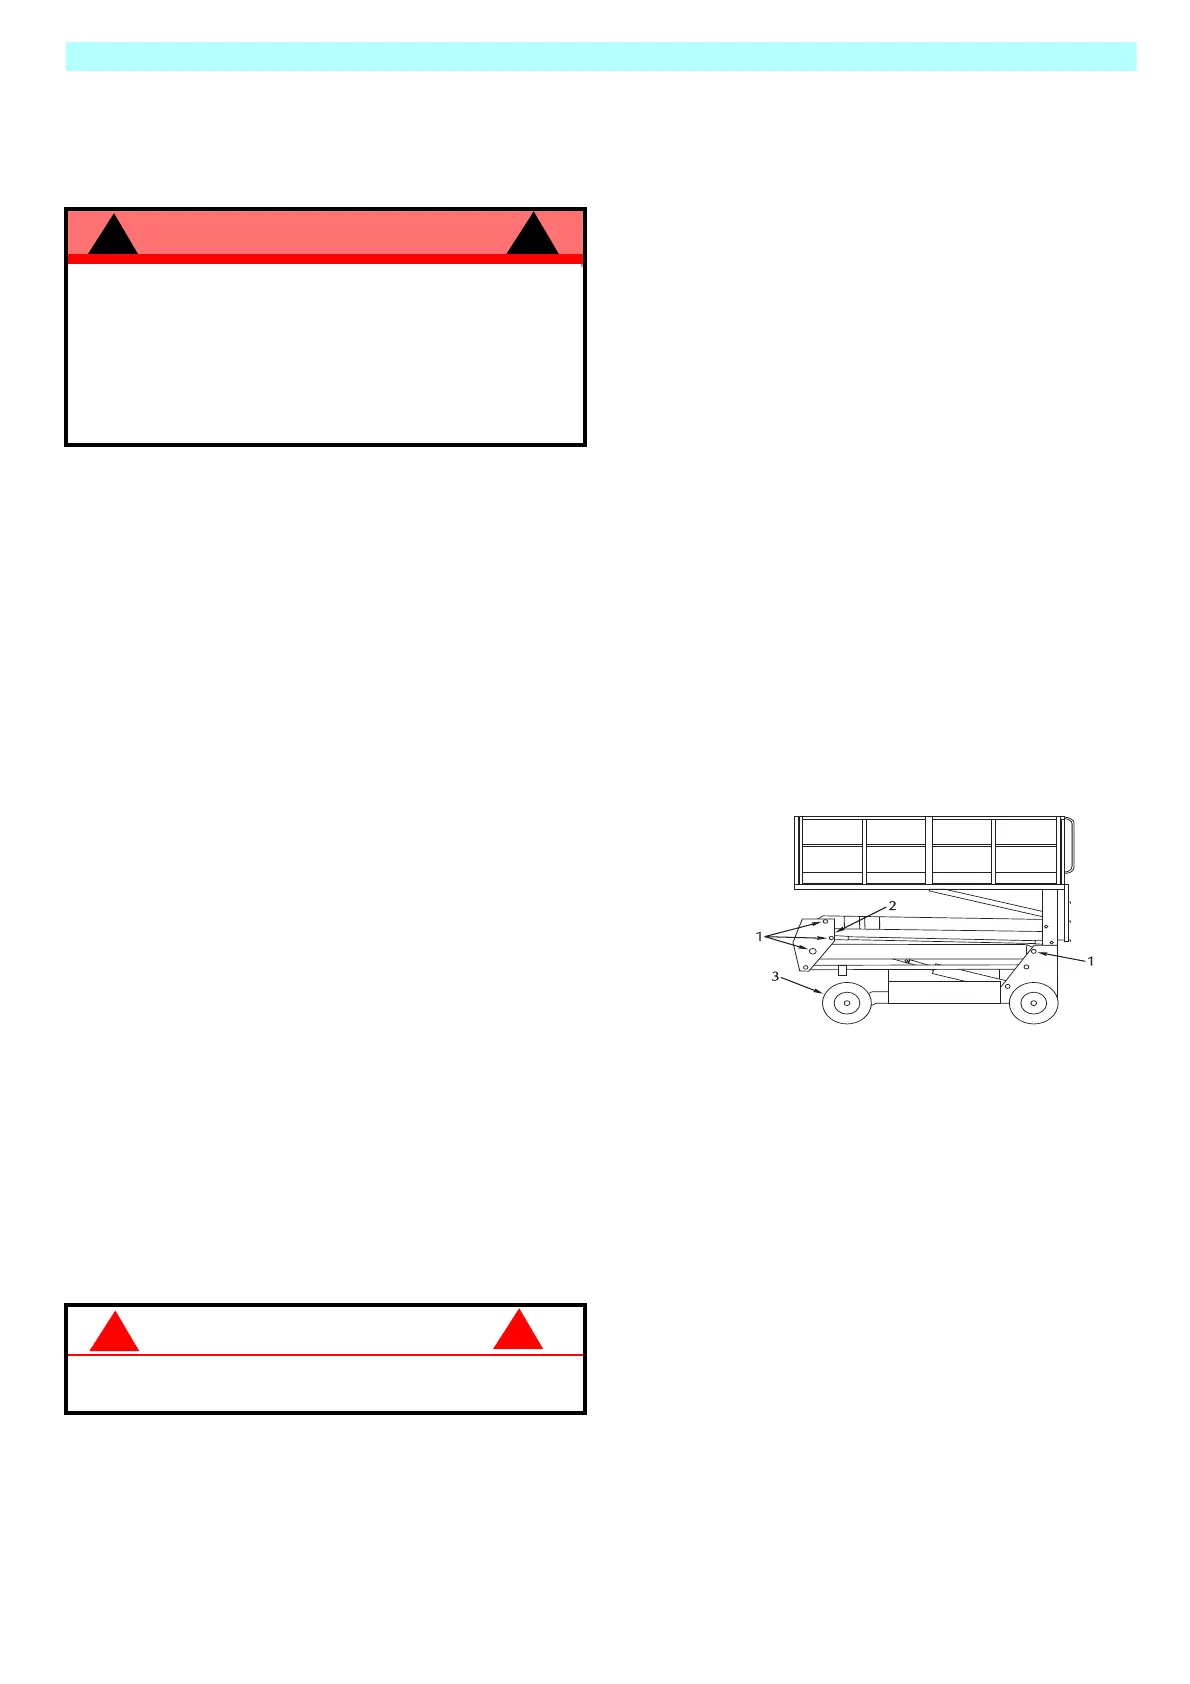
Figure 3-2: Lubrication Points
Grease Fittings
Wipe each grease fitting before and after greasing. Using multipurpose grease in a grease gun, pump the
grease into the fitting until grease just begins to appear at the edges of the pivot, wipe off any excess grease.
Linkage Gears
1. Raise platform fully.
2. Using another work platform or ladder, get up high enough to comfortably reach gears.
3. Use a long handled brush to apply multipurpose grease to the face of the gears
4. Lower the platform after greasing..
Steering Linkage
Apply one or two drops of motor oil to each pivot and king pin bearing.
!
WARNING
!
Charge the battery only in a well ventilated area.
Do not charge the battery when the work platform
is in an area containing sparks or flames.
Always follow the charger manufacturer
instructions.
Never disconnect the cables from the batteries
when the charger is operating.
!
CAUTION
!
Do not use hands to apply grease or allow any
body part to enter the elevating assembly.
1. Grease Fittings
2. Linkage Gears
3. Steering Linkage
Refer to Table 3-1 for lubrication
intervals and Figure 3-2 for location of
items that require lubrication service.
Refer to the appropriate sections for
lubrication information on the
hydraulic tank and filter.
 Loading...