9-10
Setup, Registration, and User Management > System Menu
Paper Settings
Item Description
Custom Paper Size Set up frequently-used custom paper size.
To register a custom paper size, press [On] and enter the desired size. The custom size option
is displayed on the screen to select paper set in the multi purpose tray.
Value
Custom: Off, On
Size Entry
Inch models – X: 5.83 to 17" (in 0.01" increments), Y: 3.86 to 11.69" (in 0.01" increments)
Metric models – X: 148 to 432 mm (in 1 mm increments), Y: 98 to 297 mm (in 1 mm
increments)
Media Type Setting Select weight for each media type.
For Custom 1-8, settings for duplex printing and media type name can be changed.
For details, refer to Media Type Setting on page 9-11.
Default Paper Source Select the default paper source from Cassette 1-3 and multi purpose tray.
Value: Cassette 1 to 3, Multi Purpose Tray
Paper Selection Set the default paper selection.
Value
Auto: Automatically select the cassette containing paper in the same size as originals.
Default Paper Source: Select paper source set by Default Paper Source.
Media for Auto (Color) Select a default media type for auto paper selection when [Auto] is selected of Paper Selection.
If Plain is selected, the paper source with plain paper loaded in the specific size is selected.
Select [All Media Types] for the paper source with any kind of paper loaded in the specific size.
Value: All Media Types, Plain, Transparency, Rough, Vellum, Labels, Recycled, Preprinted,
Bond, Cardstock, Color, Prepunched, Letterhead, Envelope, Thick, Coated, High Quality,
Custom 1 to 8
Media for Auto (B&W)
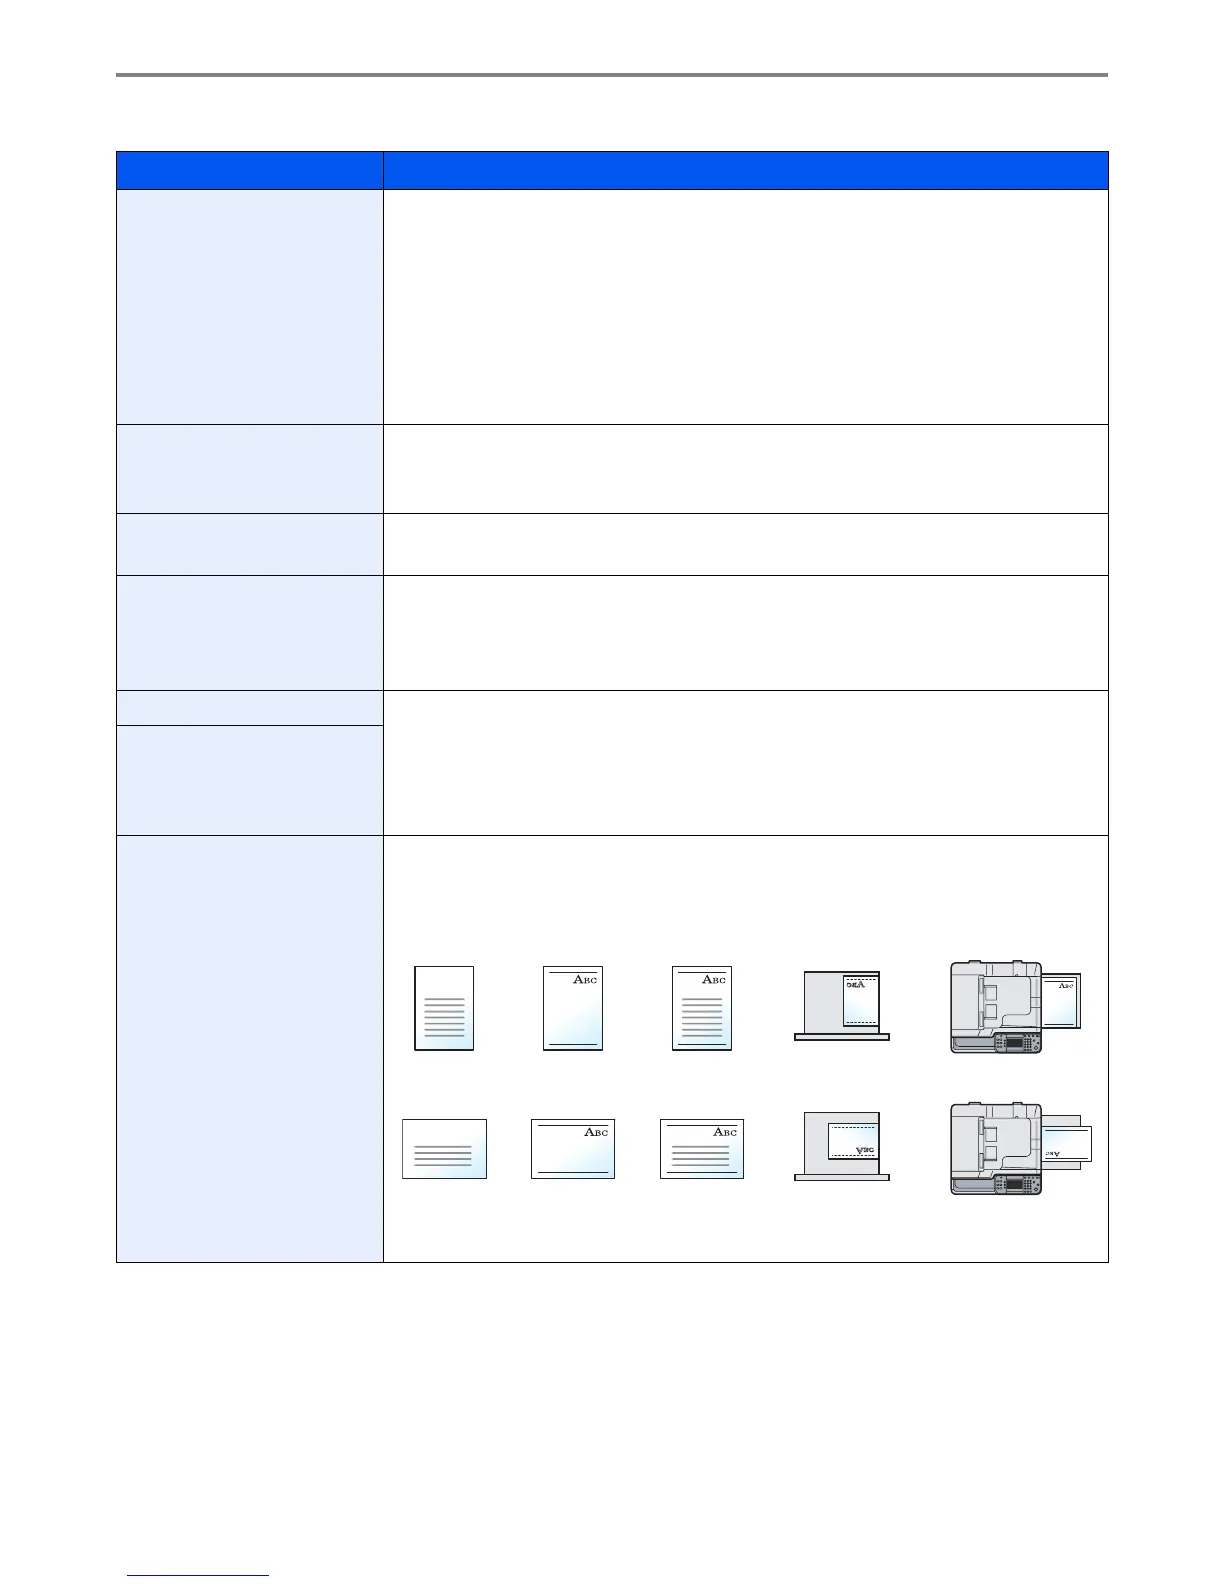
Special Paper Action When printing on Prepunched, Preprint, and Letterhead, punch-holes might not be aligned or
the print direction might be upside-down depending on how originals are set and the
combination of copying functions. In such a case, select [Adjust Print Direction] to adjust the
print direction. When paper orientation is not important, select [Speed Priority].
Example: copying on Letterhead
Value: Adjust Print Direction, Speed Priority
Multi Purpose TrayCassetteFinishedPaperOriginal
Multi Purpose TrayCassetteFinishedPaperOriginal
 Loading...