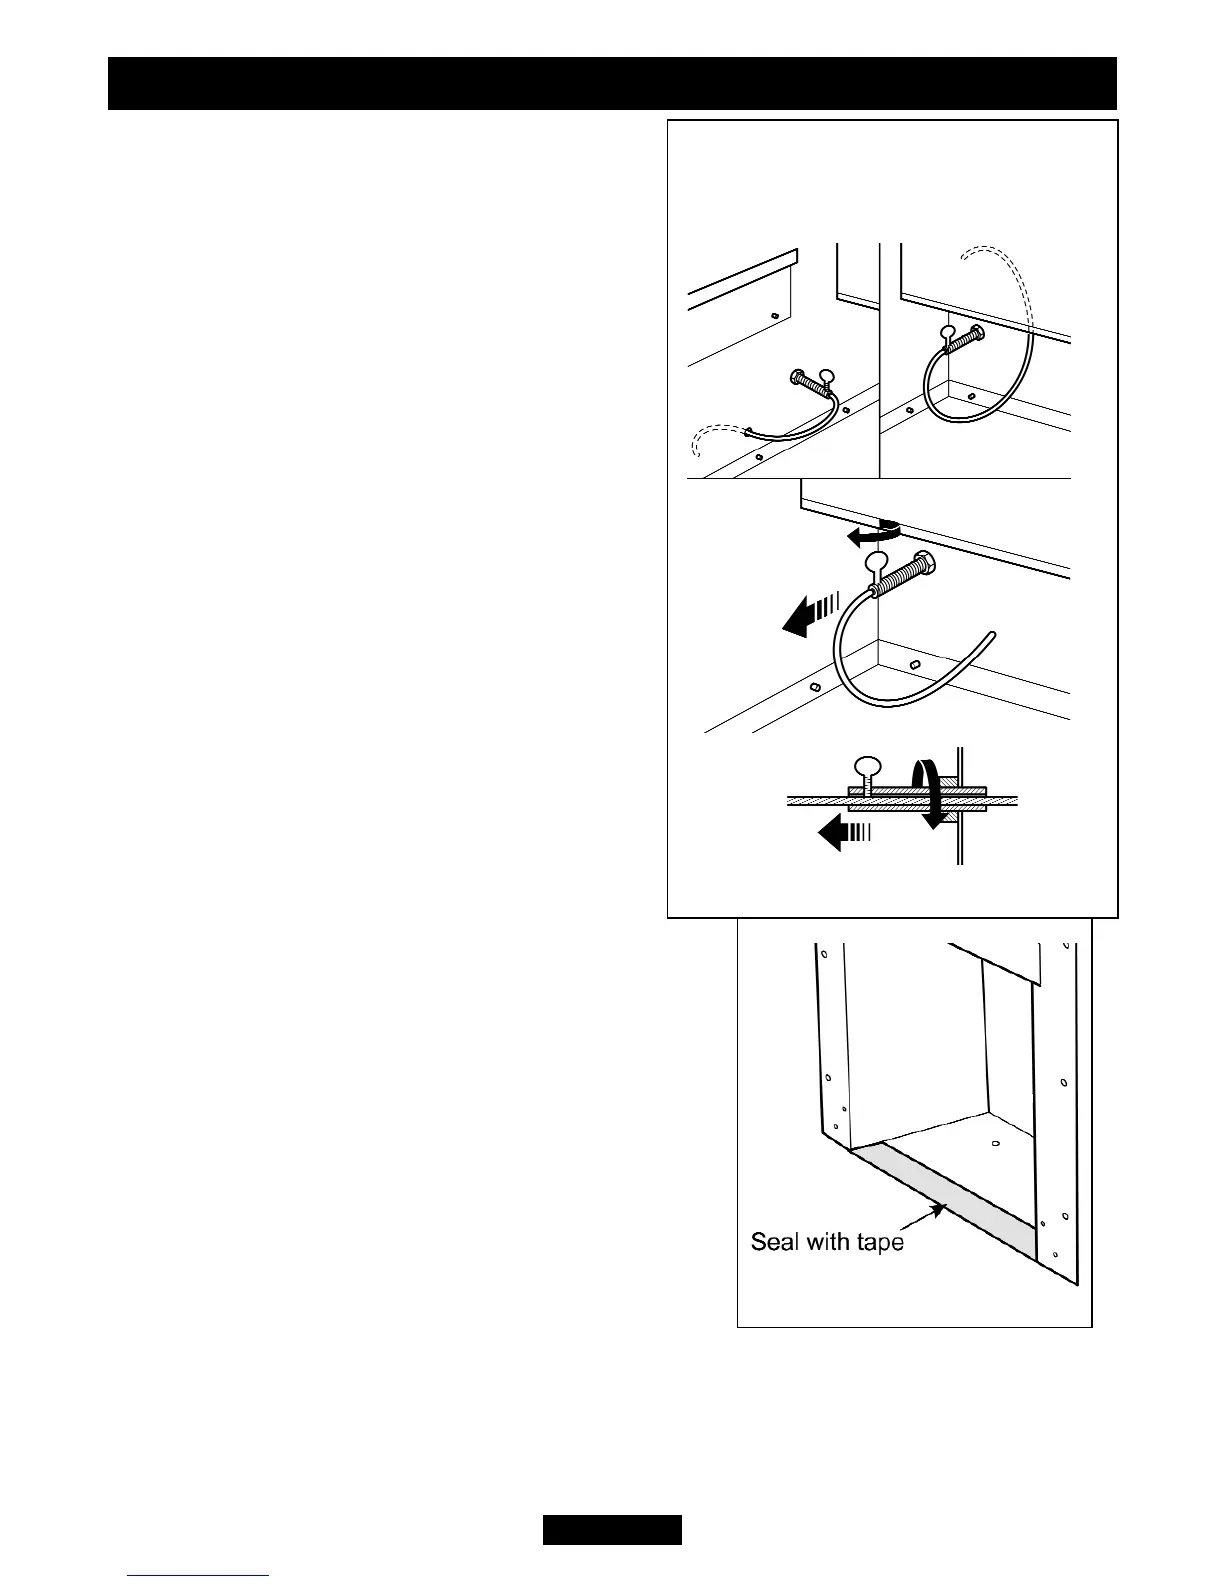
adjuster will pass into the hole. Tighten the
screws in the retainers so that they clamp the
cables in position. Apply tension to the cables
by turning the hexagonal adjusters by hand
(See figure 25).
12. Inspect the installation of the convection
box against the fireplace surround. If the
convection box is aligned squarely and the
sealing is satisfactory, fully tighten the cable
retainers.
13. If the convection box is not correctly
aligned, release the tension on the cables by
slackening the screws and turning the
hexagonal adjusters fully anticlockwise. The
convection box should then automatically
realign itself. Pull each cable taut again and
push the cable retainers back against the back
panel. Again, tighten the screws in the
retainers and apply tension to the cables by
turning the hexagonal adjusters clockwise as
far as possible.
14. Feed the free length of the cables into the
gap between the inner and outer back panels
so that they are available to allow easy
removal and refitting of the appliance during
subsequent service calls. Do not cut off the
free lengths of cable. On precast flue installations
feed the cables into the small holes at the base of
the side panels (See figure 25)
9.3 Sealing floor front - All installations.
Using the floor sealing tape supplied, seal the bottom
of the convection box to the fireplace and hearth
floor (See figure 26).
Make sure that the whole length of the front edge
of the convection box is fully sealed.
Page 30
© Baxi Heating U.K. Limited 2009.
INSTALLER GUIDE
Figure 26. Floor Sealing
Figure 25. Lower cable retention
Side entry
Rear entry