RS-232 Communications Restricting System Programming Access
24
Restricting System Programming Access
To protect against unauthorized access to system operation, two security features can be enabled. These switches are
located on the Power Supply Board next to the power wiring terminals (see Figure 16 below). Consoles are shipped from
the factory with all switches in the open position.
SERIAL SECURITY
Enabling Switch position 1 allows the operator to enter a 6-digit security code before the system will respond to a serial
command. The default serial security code is 000000. The security code itself can be changed with a serial command.
However, the serial security code switch must be reset to the Open position to inhibit the security code requirement.
SETUP SECURITY
A switch in the console can be set to prevent access to the setup and diagnostic menus after initial programming. Closing
or turning on Switch position 4 inhibits use of the setup and diagnostic menus.
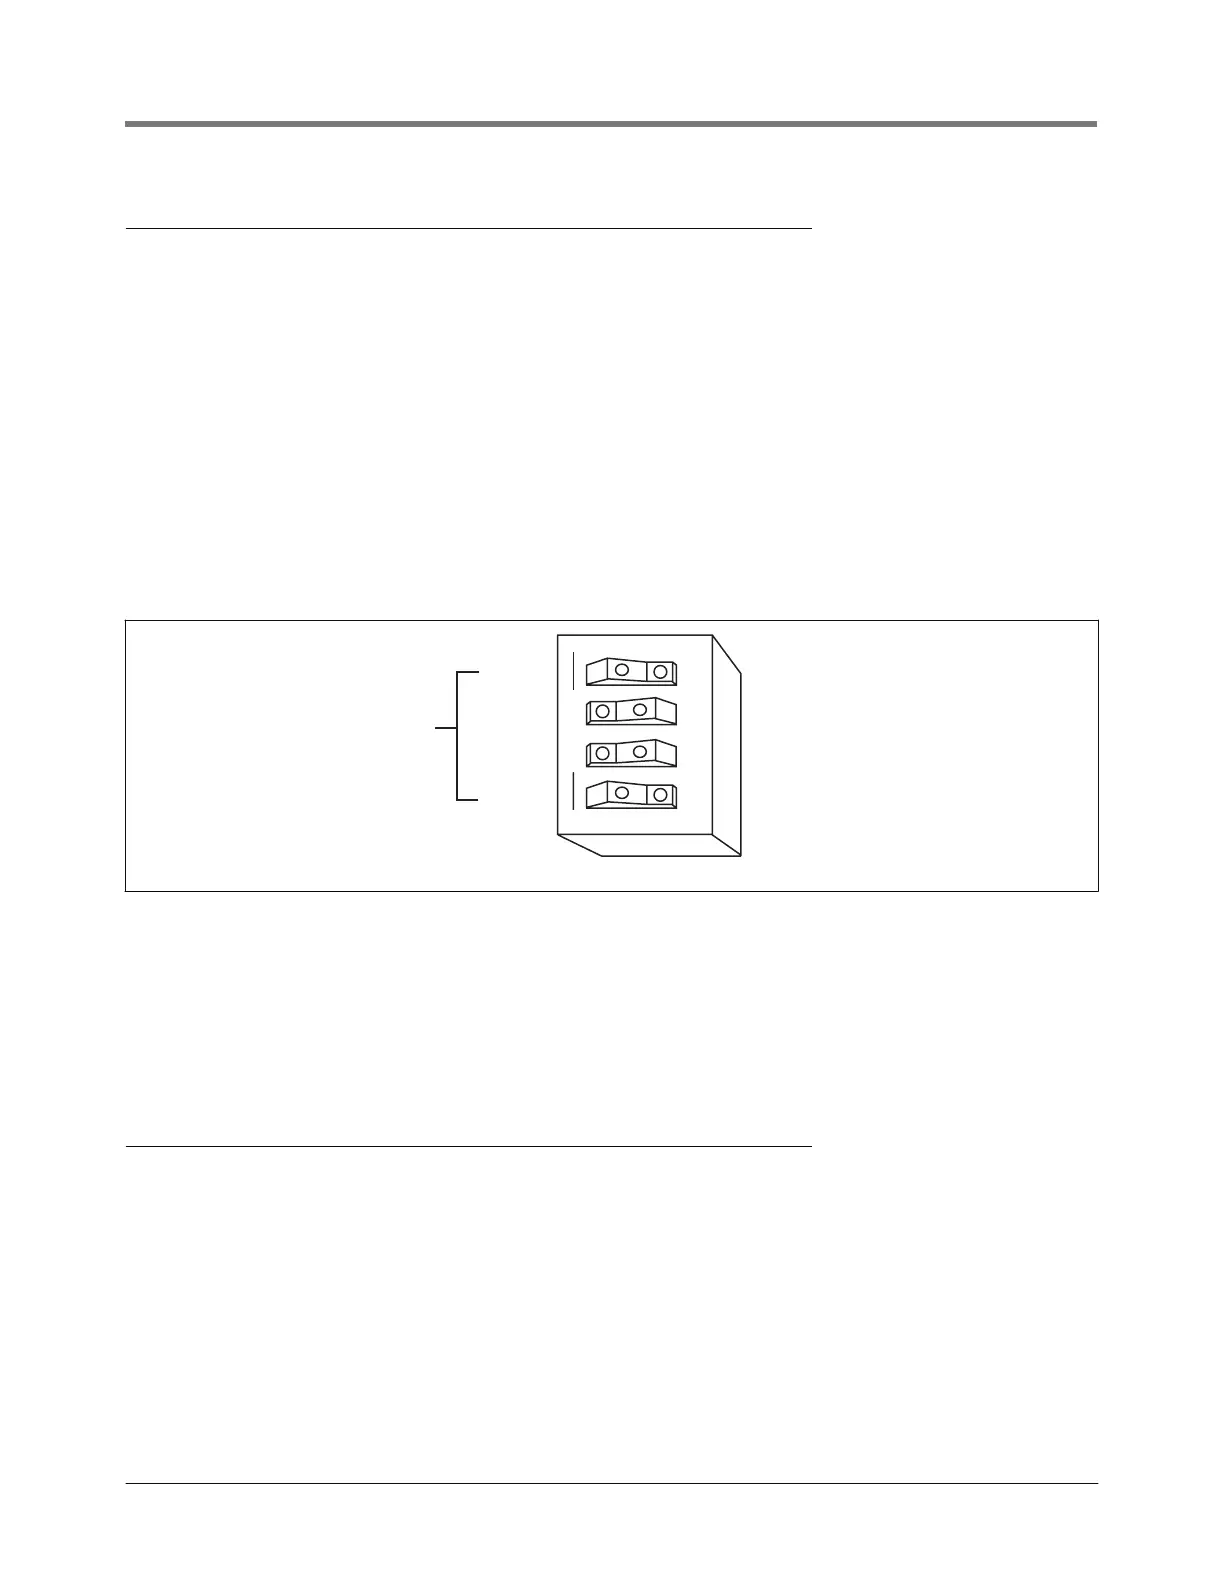
Figure 16. Console Dip Switch Settings
DIP SWITCH SETTINGS
In Figure 16 above, rocker switches 1 and 4 are shown in the closed (enabled) position. Switch 1 is Communications;
Switch 4 is Setup and Diagnostics. To inhibit a function, press the left side of the switch down to the Open position.
Switch 2 and Switch 3 are not used and can be in any position.
RS-232 Serial Communication Setup
• Interface mode type: printer, modem, serial; default serial
• Baud rate options: 300, 600, 1200, 2400, 4800, 9600; default 9600
• Parity options: None, Odd, or Even; default None
• Data length options: 8 or 7; default 8
• Number of stop bits options: 1 or 2; default 1
• Handshaking options: None, XON/XOFF, or Hardware; default XON/XOFF
• Printer page eject options: Yes or No; default No
• Answer On options: 0 to 9; default 1
consoles\tlshld\di
switch.e
s
Security
Setup
Security switches
(shown enabled)
SETUP
COMM
(Switches 2 & 3
are not used)
1 2 3 4
OPEN