Leveling the cabinet
Once all the components of the cabinet have been installed, level the cabinet. The following section is a step-by-step
illustration of the process of leveling the cabinet:
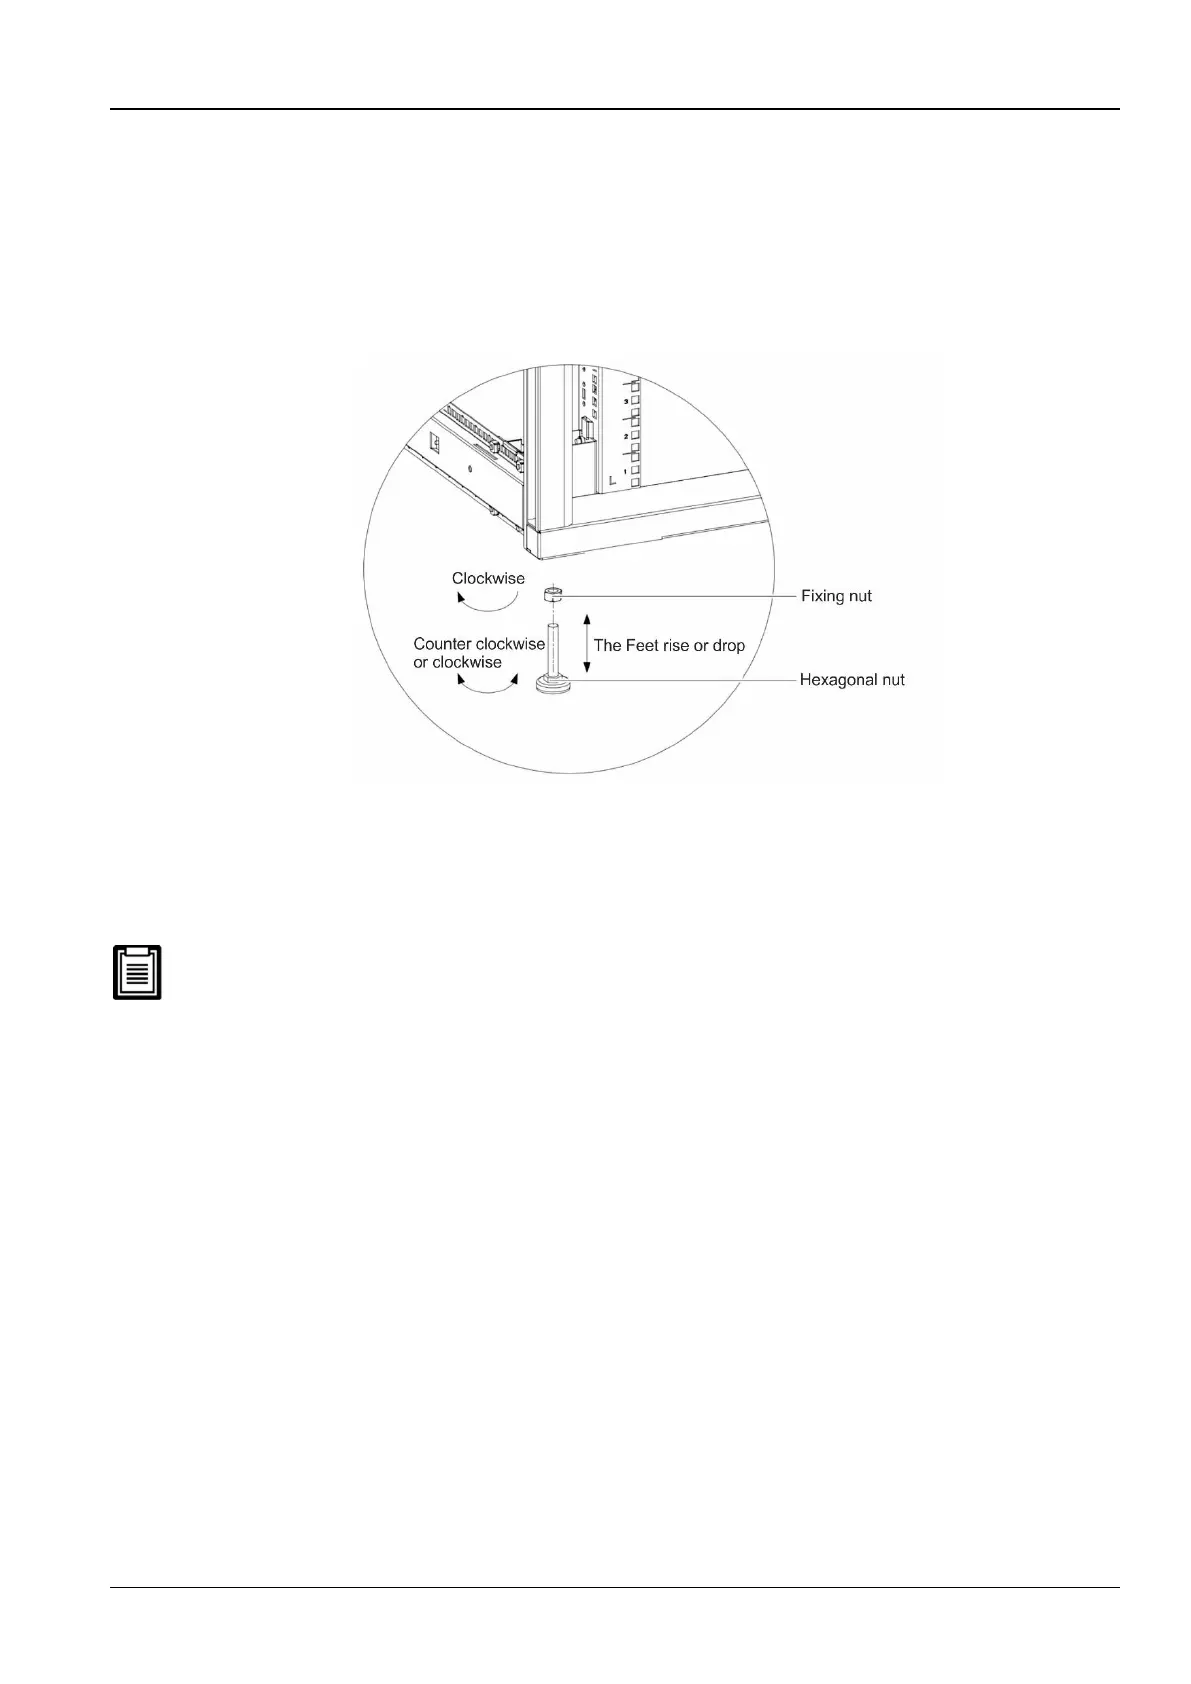
1. Place the cabinet in the desired location (preferably an open ground). Use a movable wrench to loosen the
fixing nuts on the four-foot bolts in a clockwise sequence.
2. Rotate the hexagon bolts on the bottom of the feet clockwise or counter-clockwise till the feet rises or drops to
an appropriate position. Use a level to ensure that the cabinet is in a uniform level state.
Refer to the Figure 2-13 to understand the process better:
Figure 2-13 Leveling the cabinet
Screw down the fixing nuts on the feet bolts counter-clockwise and the leveling gets completed. If the machine room
has a mounting bracket, and its width does not exceed 30mm, remove the feet and fix the cabinet onto the mounting
bracket.
Removing the Feet and Fixing cabinet
Before explaining the task of removing the feet and eventually fixing the cabinet, it is vital that 2 persons will be
required for this operation to avoid personal injury and cabinet damage.
Following are the instructions to be followed for removing the feet and fixing the cabinet:
Removing the feet
Use a moveable wrench to loosen the fixing nuts on the four fleet bolts in a clockwise sequence.
Rotate the hexagon bolts on the bottom of the feet clockwise till the feet drops from the cabinet frames.
Fixing the cabinet
The cabinet provides two holes (diameter: 13.5 mm) respectively on its top, bottom, front, and rear as depicted in
Figure 2-14.



 To Next Page