VESDA
®
LaserPLUS Product Guide
17
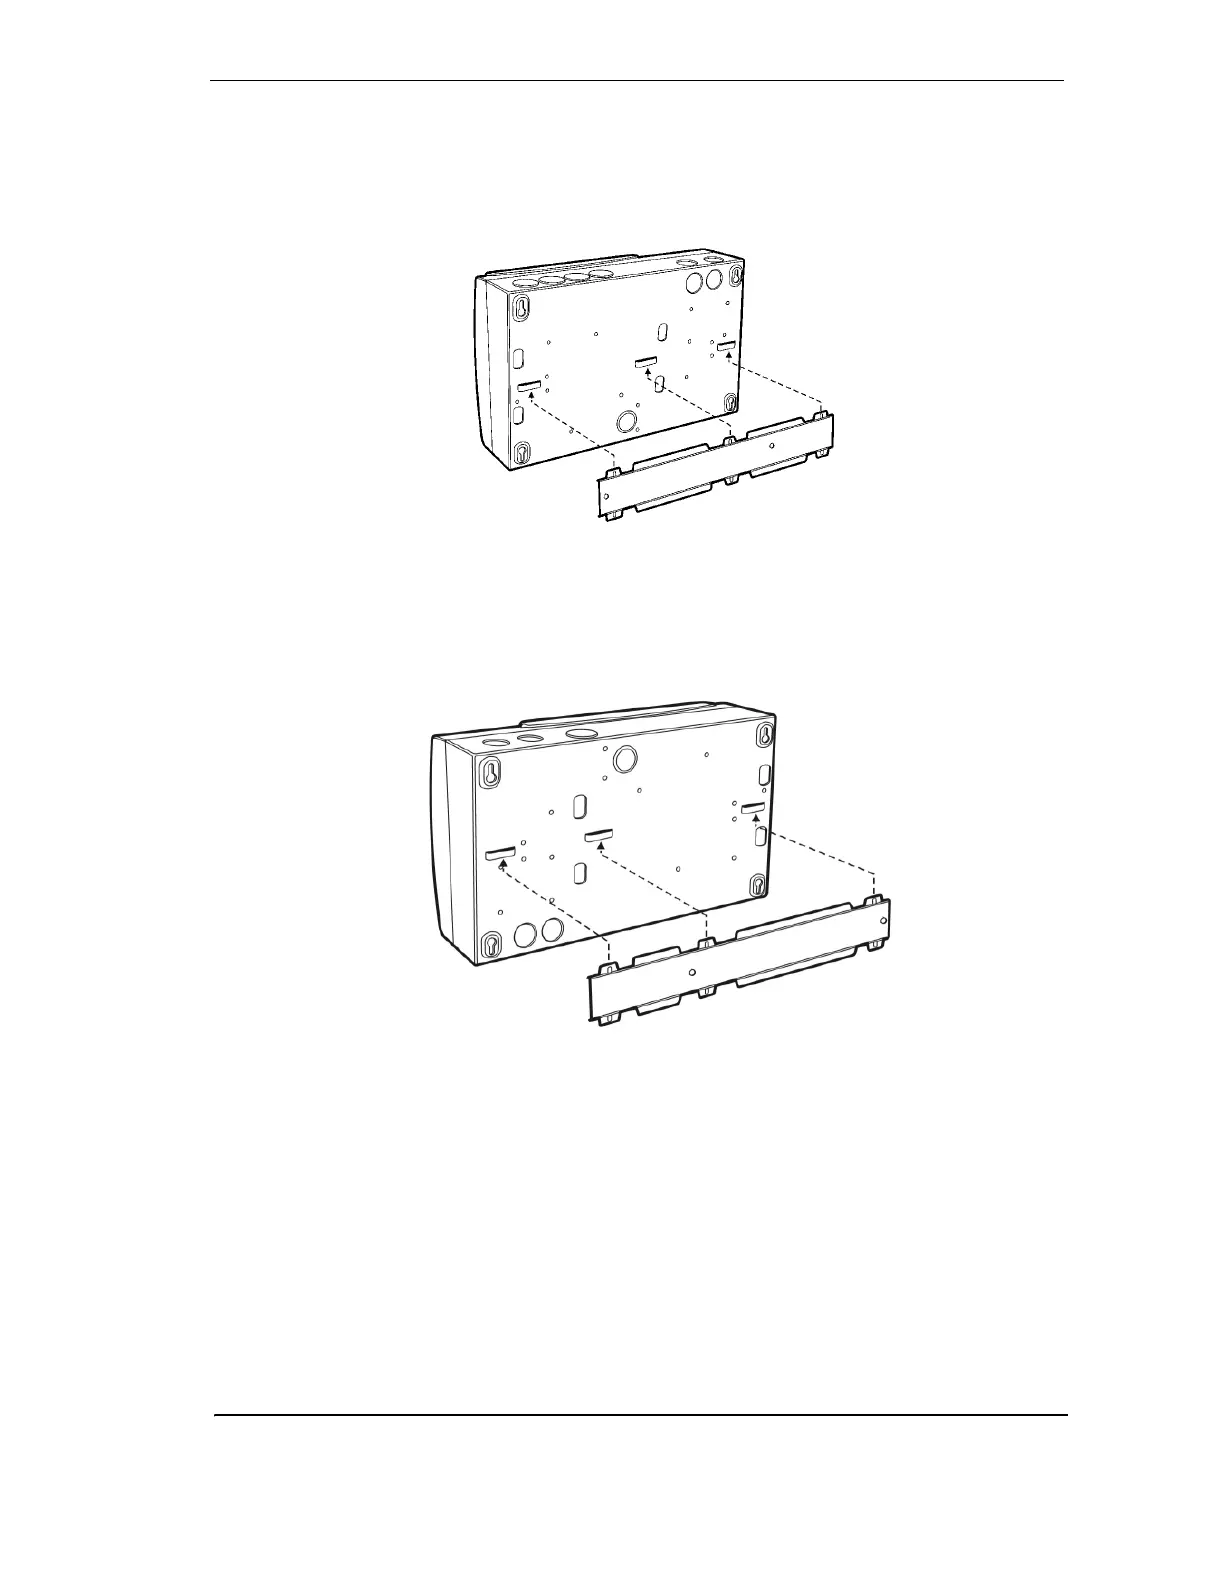
Mounting the LaserPLUS in Normal Orientation
Place the three bridges located at the rear of the detector onto the lances of the mounting
bracket. Push downwards until it locks onto the lances and engages the fitting dimples. To
prevent unwanted removal of the detector, secure the detector to the mounting surface by
placing two screws through the keyhole slots situated near the termination card.
Figure 11 - Mounting the LaserPLUS detector onto the mounting bracket
Mounting the LaserPLUS in the Inverted Orientation
If the detector is fitted with a LCD Programmer and/or a Display Module, re-orient these to the
upright position. Mount the detector in inverted orientation onto the mounting bracket.
Figure 12 - Mounting the LaserPLUS detector in inverted orientation onto the
mounting bracket
Mounting the LaserPLUS without a mounting bracket
In the event the detector has to be mounted directly onto the mounting surface, remove the
chassis from the mounting box. See Replacing the chassis/Air Inlet Pipe Manifold on page 28 for
details.
Use the four keyhole slots to secure the mounting box to a flat surface, ensuring that it is
horizontally straight. Re-install the chassis into the mounting box. Carefully re-connect the looms
and complete the cabling prior to closing the front cover. See Internal Wiring for LaserPLUS on
page 30