3
Safety and compliance information
MEDICAL EQUIPMENT WITH RESPECT TO ELECTRIC SHOCK,
FIRE AND MECHANI
CAL HAZARDS ONLY IN ACCORDANCE
WITH UL60601-1, IEC60601-1 AND CAN/CSA C22.2 No. 601.1
5RA9
D
IAGNOSTICPRO™ Advantage, DOSIMETRYPRO™ Advantage and CADPRO™ Advantage
carry the CE mark, issued by BSI
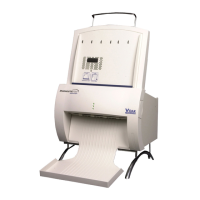
This product’s function and intended use is as an
X-ray Film Digitizer.
To maintain Medical Equipment Certification, the digitizer must be connected to a host
computer that has been configur
ed in accordance with IEC 60601-1-1.
This product is in the Ordinary Equipment Class. It prov
ides no protection against the
ingress of water.
This product is not suitable for use in th
e presence of flammable anesthetic mixtures with
air or with oxygen or with nitrous oxide.
Class I Medical Device; No Applied Parts. This product provides Class I medical device
protection against electrical shock.
Power cords used with this device in North Amer
ica must be rated by Underwriters
Laboratories for hospital use. Power cords used with this device in Europe must meet the
requirements of IEC 227 Designation 53 or IEC 245 Designation 53.
The use of portable or mobile communications equipment and/or
the presence of strong
electromagnetic and/or x-ray fields may interfere with proper operation of this product.
This product should not be used adjacent to or stacked with other equipment. If adjacent
or stacked use is necessary, verify normal operation in the configuration in which it will
be used. Should such interference occur, the user is required to provide adequate
isolation between the digitizer and the source of the interference. Isolation is typically
achieved by moving the digitizer away from the source of the interference.
This product is intended to be turned on and left
on. Operation is continuous.
Correct and safe operation of the digitizer requires familiarity
with information that is not marked on the product. The
following symbol indicates the operator should consult the
manual for additional informati
on.
Turn off the scanner before mounting or removing the feeder. Mount the feeder to the
scanner by mating the connector found on the bottom of the feeder to the connector found
on the top of the scanner. Secure the feeder to the scanner with the three thumbscrews.
To remove the feeder, reverse the mounting process.
 Loading...