66250754-4G-EN - V2.0 - 28/03/22
- 62 -
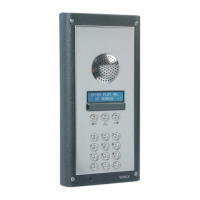
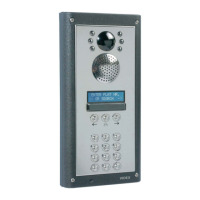
4000 Series GSM Audio Intercom - Technical Manual
4000 Series GSM Audio Intercom with Proximity
Programming the GSM Intercom
online or via either of the two GSM mobile apps - the Videx SMS Wizard (for administrators) and the Videx SMS Wizard PRO (for
installers/engineers).
The following command is used to store the username and password for each of the GSM modules on the GSM module list.
1111PAS”username”,”password”? Store the username & password for the GSM module, also send conrmation to the
sender.
Example: To store the username “videx-tech-1” and the password “gsm-tech-1” for a 4G GSM on the GSM modules list, the
following message can be sent to the GSM intercom:
1111PAS”videx-tech-1”,”gsm-tech-1”?
With the inclusion of the ? the GSM intercom will reply with the following text:
PAS=videx-tech-1
gsm-tech-1
VIDEX 4G
ENABLE ONLINE EVENTS FOR THE GSM MODULE ENE
After the user has registered an online events prole (via the website www.videxevents.co.uk), the GSM module has been congured
for data communication (APN) and added to the list of GSM modules with a username and password setup (PAS) the GSM module
itself requires the events to be enabled (i.e. the events from the GSM module will be sent to the web browser application to be
displayed in the list of events).
By default this feature is disabled (set to 00), but can be enabled (set to 01). The following programming commands can be used to
enable/disable and check the status.
1111ENEnn Enable the online events feature, where nn = 00 (disabled) or 01 (enabled).
1111ENEnn? Enable the online events feature, where nn = 00 (disabled) or 01 (enabled). Also send a conrmation
text back to the sender.
1111ENE? Query the status (enabled or disabled) of the events feature.
Further notes on how to complete the online events setup can be found on page 75 - Managing GSM events remotely.
SETUP PORT FORWARDING FOR CONNECTION TO A SERVER SER
Before setting up a connection to a server the GSM module must rst be setup for data communication using the APN programming
command (see APN setup notes and example on the previous pages), this will allow the GSM to be able to be programmed remotely
‘over the air’ using the GSMSK PC software.
Also in order for the remote ‘over the air’ feature to work port forwarding needs to be setup on the router where the PC connects to
so that the GSM module can forward and receive packets from it, to do this follow the setup and conguration instructions on Videx
application note AN0046_RemotelyProgramming4GIntercomsViaPCSoftware.
To initiate communication the SER programming command can be used (see below), this will eectively let the GSM module know
where the server is.
1111SER”IP”,PORT? Setup port forwarding for connection to a server, where IP is the public IP address where the PC is
located and the PORT is any free port. Also send a conrmation text back to the sender.
IMPORTANT NOTE: IT IS IMPORTANT TO MAKE SURE THAT THE SIM CARD INSTALLED HAS BEEN ENABLED FOR DATA
AND HAS DATA ALLOWANCE AVAILABLE PRIOR TO USING THE APN, ENE, PAS AND SER PROGRAMMING COMMANDS
OTHERWISE THE REMOTE ONLINE EVENTS FEATURE AND THE ‘OVER THE AIR’ FEATURE WILL NOT WORK!
SOURCE OF TIME/DATE UPDATES NTZ
The source of where the GSM module synchronises its internal clock is particularly important when using any of the timeband
features as these features rely on the GSM’s clock to be accurate. As such the 4G GSM module has 3 modes which it can be set to, for
where it can obtain the current time and date updates to synchronise its internal clock with. The three modes are as follows:
• mode 00: no clock setting at all i.e. the GSM receives no automatic time updates.
• mode 01: the time is taken from the telephone network providers clock setting via NITZ (network identity & time zone), but
only if the network supports NITZ (default).
• mode 02: the time is taken from an online clock using the NTP protocol where the GSM module is able to synchronise its
clock with an online NTP server.
By default the 4G GSM module is set to mode 01, whereby it will try to automatically synchronise with the network providers clock
setting via NITZ (network identity & time zone) providing that the network supports NITZ, also refer to important note regarding
NITZ on page 49. The following programming commands can be used to set and conrm the required mode.

 Loading...