66250754-4G-EN - V2.0 - 28/03/22
- 65 -
4000 Series GSM Audio Intercom - Technical Manual
4000 Series GSM Audio Intercom with Proximity
Programming the GSM Intercom
1111BOFnn Enable and set the button oset feature, where nn = 00 (disabled) or oset value between 81 - 87
(refer to the oset value table)
1111BOFnn? As above and also send a conrmation text back to the sender.
1111BOF? Query the oset value stored in the GSM module.
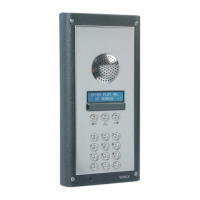
Example 1: A 27 button GSM audio system would consist of an Art.4810-2/4G and 5x Art.4045 button modules. Without the
oset enabled the Art.4810-2/4G onboard buttons would be button 1 (bottom) and 2 (top) respectively.
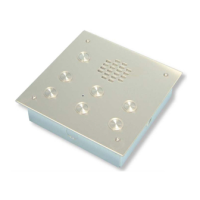
The Art.4045 button modules
, , , and with their conguration jumper R set as follows: R = 6 - 10,
R = 11 - 15, R = 16 - 20, R = 21 - 25 and R = 26 - 30 respectively, with the button numbering as shown
in Fig.83.
To set the panel buttons to read 1 - 15 from the bottom up on the right side panel and then 16 - 27 from the bottom
up on the left side panel, the oset value used from the previous table would be 85 and with the cong. jumper R (for
the button modules
, , , and ) still set to the same positions described above, the following text can
be sent to the GSM intercom:
1111BOF85?
Including a ? at the end of the command the GSM intercom will reply with the following text:
BOF = 85
VIDEX 4G
6
7
1
2
8
9
10
11
12
13
14
15
16
17
18
19
20
21
22
23
24
25
26
27
28
29
30
A
B C
D
E
Button cong. jumper R position for
the button 4045 modules:
A
6 - 10 11 - 15
B
16 - 20
C
D
21 - 25 26 - 30
E
Button oset = 00
1
2
26
27
3
4
5
6
7
8
9
10
11
12
13
14
15
16
17
18
19
20
21
22
23
24
25
A
B C
D
E
Button cong. jumper R position for
the button 4045 modules:
Button oset = 85
A
6 - 10 11 - 15
B
16 - 20
C
D
21 - 25 26 - 30
E
Fig. 83 Fig. 84
In the example with the oset value now set to 85 the Art.4810-2/4G onboard buttons would become buttons 26
(bottom) and 27 (top). The Art.4045 buttons, with the conguration jumper R still set to the same positions as before
on all of the button modules, the buttons would read as 1 - 15 on the right side panel and 16 - 27 on the left side
panel, as shown in Fig.84.

 Loading...