66250754-4G-EN - V2.0 - 28/03/22
- 69 -
4000 Series GSM Audio Intercom - Technical Manual
4000 Series GSM Audio Intercom with Proximity
System Operation
RELEASING THE DOOR/GATE USING THE ONBOARD PROXIMITY READER
For the onboard reader to operate correctly it must rst be enabled, the correct number of bytes setup and fobs/cards stored using
the EPR, PBY and FOB commands (refer to the relevant programming notes on previous pages).
In standby the status LED’s on the front of the GSM will be switched OFF.
ACCESS GRANTED ONBOARD READER
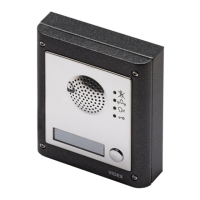
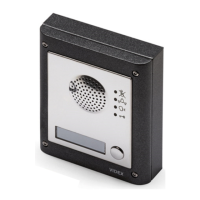
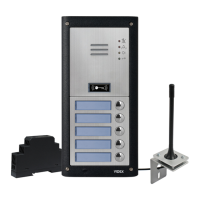
1. To operate the GSM relay present a programmed fob/card to the nameplate window for button 1 (in the case of the Art.4810-
0/4G GSM module the proximity window is located at the bottom of the GSM module, also refer to Fig.1 on page 6).
2. Once the fob/card is presented the busy LED will ash once and the door open LED will switch ON for the duration of the
programmed relay time RLT, and the panel will beep.
3. If the internal speechboard is switched ON then the GSM will announce “the gate is open” or “the door is open”.
ACCESS DENIED ONBOARD READER
1. If a fob/card is presented to the reader that is not stored in the GSM the busy LED on the front will switch ON and will emit a
long beep, the other LED’s will stay OFF.
2. If the internal speechboard is switched ON then the GSM will announce “invalid code”.
IMPORTANT NOTE: The onboard reader can be enabled and fobs/cards can also be programmed and setup using the GSMSK
PC software, more information on how to do this can be found in the GSMSK manual: GSMSK_66251720-EN_V2-1 (or later).
ACTIVATING THE ART. 4850R EXPANSION READER’S ONBOARD RELAY
The Art.4850R expansion reader must be connected via RS485 to the 4G GSM intercom (refer to wiring diagrams on page 29), setup
with a unit ID, the correct number of bytes setup and fobs/cards stored using the EPR, PBY and FOB commands (refer to the relevant
setup notes and programming notes on previous pages).
In standby the status indication LED on the front of the Art.4850R reader will be switched ON (amber).
ACCESS GRANTED ART.4850R
1. To operate the relay on the reader present a programmed fob/card to the proximity reading area.
2. Once the fob/card is presented the status LED will change from amber to green and the onboard relay will activate for the
duration of the programmed relay time. The reader will also emit a double beep, while the busy LED on the GSM intercom
ashes ON and OFF.
ACCESS DENIED ART.4850R
1. If a fob/card is presented to the reader that is not stored in the GSM intercom the status LED on the front of the reader will
change from amber to red and will emit 1 short beep followed by a short double beep, while the busy LED on the GSM
intercom ashes ON and OFF.
IMPORTANT NOTE: The Art.4850R’s onboard relay can also be activated via a push to exit it button (congured as a push-to-
make switch) when connected across the - and PTE terminals on the back of the proximity module.
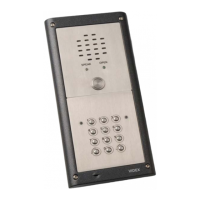
ACTIVATING THE ART. 4903 CODELOCK’S RELAYS
STANDALONE OPERATION I.E. NOT CONNECTED VIA RS485
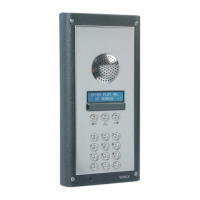
The Art.4903 codelock can operate as a standalone keypad with up to 2 access codes only (1 code per relay), where the codes are
programmed directly via the keypad (refer to programming and setup notes on pages 16 - 19, also refer to the wiring diagram
Fig.21 on page 22).
CORRECT CODE ENTERED ACCESS GRANTED STANDALONE MODE
1. Enter the correct access code for the respective relay, via the keypad, followed by the ENTER
button. The appropriate relay
(i.e. RLY1 or RLY2 depending on setup) will activate for the programmed relay time.
2. The green data LED will ash once and the codelock will emit a series of 1 second interval beeps for the duration of the
programmed relay time.
INCORRECT CODE ENTERED ACCESS DENIED STANDALONE MODE
1. If an incorrect access code has been entered then no relay will activate.
2. The codelock will emit a low tone and the green data LED will ash 4 times followed by a brief pause.
3. The red status LED will then ash once and the codelock will emit a single beep.
IMPORTANT NOTE: The keypad’s relays RLY1 and RLY2 can also be activated via a push to exit button (when congured as a
push-to-make switch) when connected across - and SW1 for RLY1, - and SW2 for RLY2 respectively. It should also be noted that
when the relay time has been set for latching (00) the push to exit button will operate as a “toggle” switch to latch the relay
open and latch the relay closed.
 Loading...
