7
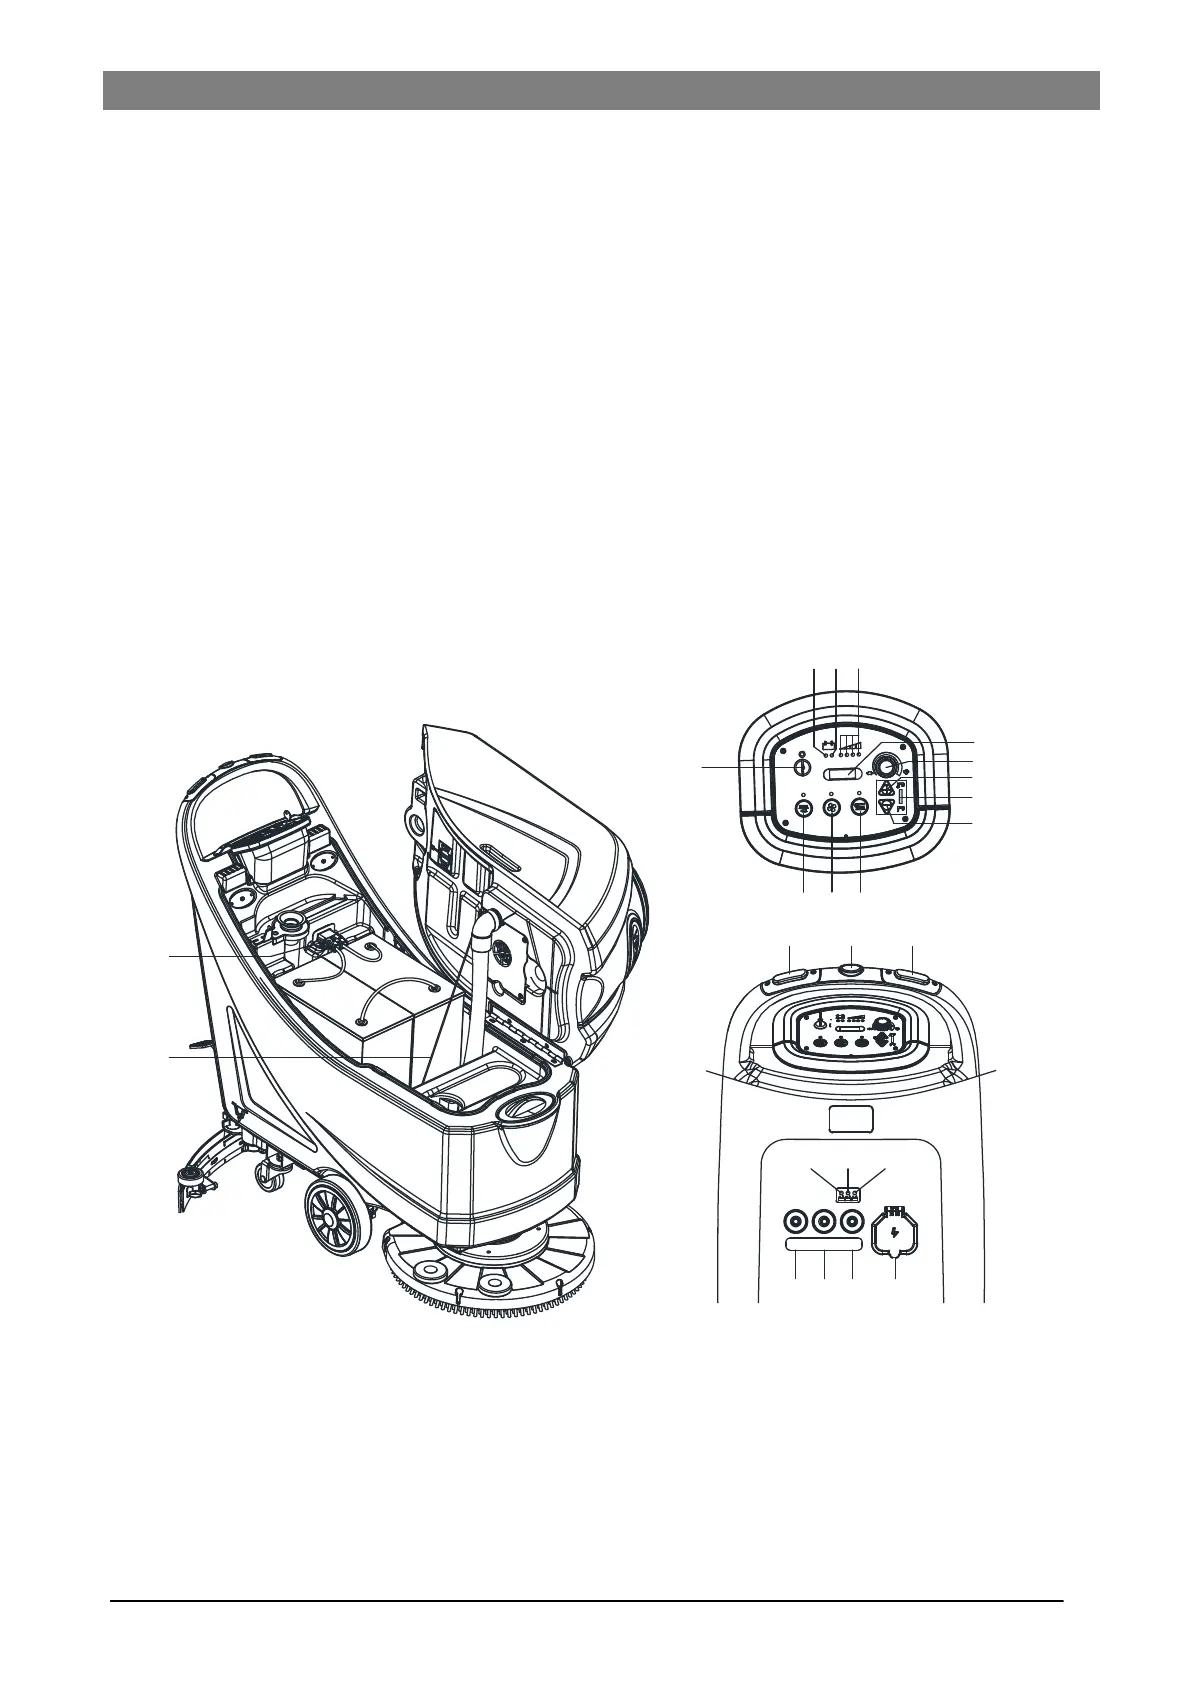
CONTROL PANEL (as shown in Figure 2)
33. Machine backward switch (B)
34. Safe switch
35. Ignition key (0 - I)
36. Discharged battery warning light (red)
37. Semi-discharged battery warning light (yellow)
38. Charged battery warning light (green)
39. Hour meter
40. Speed adjuster (B)
41. Flow increase switch
42. Solution flow indicator
43. Flow decrease switch
44. Brush/pad-holder release switch (only for disc machine)
Extra pressure active (only for orbital machine)
45. Vacuum system switch
46. Brush/pad-holder and vacuum system switch (only for
disc machine)
Pad deck moving up/down and Brush/pad-holder and va-
cuum system switch (only for orbital machine)
47. Charging red LED
48. Charging yellow LED
49. Charging green LED
50. Security cover of charging jack
51. Overload protector of brush
52. Overload protector of traction (B)
53. Overload protector of vacuum
54. Battery connector (red).
55. Tank safety cable
(*): Optional
(A): Only for machine without traction
(B): Only for machine with traction
DISPLAY WINDOW OF CHARGER INDICATON LIGHT (as shown in Figure 2)
1. At the beginning of charging, the red LED (47) of charger normally on. It is the first stage of charging.
2. After charging some time, the red LED (47) turns off, the yellow LED (48) turns on, this is the second stage of
charging.
3. After charging finish, the yellow LED (48) off, the green LED (49) turns on to indicate that the battery is fully
charged.
40
42
35
46 45 44
36
39
41
43
38
37
54
55
34 3433
47
48 49
53
52 51 50
BRUSHTRACTION
VACUUM