EasyManua.ls Logo

Viper AS5160 - User Manual

Viper AS5160
84 pages
Print Icon
To Next Page IconTo Next Page
Loading...
B
USER MANUAL
AS5160 & AS5160T / AS516TO
AS5160 & AS5160T
AS516TO
Nilfisk Inc.
9435 Winnetka Avenue North
Minneapolis, MN 55445
www.usviper.com
VS12002
Rev 01
17APR 2018
Model: 50000401 / 50000406 / 50000539

Table of Contents

Other manuals for Viper AS5160

Questions and Answers

  • M
    Melinda WagnerJul 27, 2025
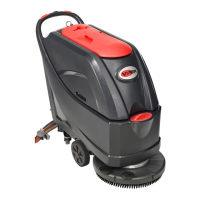
    What to do if the recovery water vacuuming is insufficient in my Viper Scrubber?
    • B
      bvelasquezJul 27, 2025
      If the recovery water vacuuming of your Viper Scrubber is insufficient, several factors could be at play. First, check if the recovery water tank is full and empty it if necessary. Next, ensure the hose is properly connected to the squeegee. Inspect the vacuum grid for clogs or a stuck float and clean as needed. Examine the squeegee for dirt or worn/damaged blades, cleaning or replacing them as necessary. Finally, verify that the tank cover is correctly closed, the gasket is intact (replace if damaged), and the bend tube is free of clogs.
  • D
    dawsondanielleJul 31, 2025
    Why does the squeegee on my Viper AS5160 Scrubber leave marks on the floor?
    • R
      Ryan EvansJul 31, 2025
      If the squeegee on your Viper Scrubber leaves marks on the floor, start by checking for and removing any debris under the squeegee blades. If the blades are worn, chipped, or torn, replace them. Also, ensure that the squeegee has been properly adjusted using the adjustment knob.
  • S
    Shannon PerezAug 5, 2025
    How to fix Viper Scrubber when the motors don't work and no warning light is on?
    • C
      Corey GoodwinAug 5, 2025
      If the motors of your Viper Scrubber do not work and no warning light turns on, it could be due to a disconnected battery connector. Ensure the battery connector is securely connected. Alternatively, the batteries might be completely discharged, in which case you should charge them.
  • R
    ryanreynoldsAug 9, 2025
    Why are the 3 battery charge indicators flashing simultaneously on my Viper AS5160?
    • C
      Cheryl JimenezAug 9, 2025
      If the 3 battery charge indicators on your Viper Scrubber are flashing simultaneously, it may be due to brush motor overload. Try using less aggressive brushes. Alternatively, there might be foreign materials, such as tangled threads, preventing the brush from rotating. Clean the brush hub to resolve this.
  • A
    Arthur NelsonAug 12, 2025
    What to do if the brushes don't work and the red warning light is on for Viper AS5160?
    • A
      Alan GreenAug 13, 2025
      If the brushes on your Viper Scrubber do not work and the red warning light is on, the batteries may be discharged. Charge the batteries to resolve this issue.
  • D
    Dana JohnsonAug 17, 2025
    What to do if the solution flow to the brushes is insufficient in Viper AS5160?
    • I
      ismithAug 18, 2025
      If the solution flow to the brushes of your Viper Scrubber is insufficient, the solution/clean water filter might be dirty. Clean the filter to ensure adequate flow.
  • D
    David BradleyAug 22, 2025
    What to do if my Viper AS5160 does not move?
    • M
      Mark WilkinsAug 22, 2025
      Turn the ignition key to “0”, then try to start the machine again without pressing the switches.

Summary

Introduction

Guide Purpose and Contents

Explains the purpose and scope of the quick start guide and refers to the main manual.

How to Keep This Guide

Provides instructions on storing the quick start guide safely away from damage.

Declaration of Conformity

States that the declaration of conformity is supplied with the machine and certifies its compliance.

Accessories and Maintenance

Details that maintenance and repair must be done by qualified personnel using original parts.

Change and Improvement

States the company reserves the right to make product changes without prior notice.

Scope of Application

Defines the suitable uses and environments for the scrubber machine.

Machine Identification Data

Instructs to record machine model and serial number for spare parts identification.

Transport and Unpacking

Guides on checking machine condition upon delivery and safe unpacking procedures.

Safety

Visible Symbols on the Machine

Explains warning symbols and their meanings displayed directly on the machine.

Symbols That Appear on the Instruction for Use Manual

Describes the meaning of various safety symbols used throughout the user manual.

General Safety Instruction

Provides essential safety warnings and precautions for operating the machine.

Machine Description

Machine Structure (as shown in Figure 1)

Lists and illustrates all the main components of the machine's physical structure.

Control Panel (as shown in Figure 2)

Details the function and location of each control on the machine's panel.

Display Window of Charger Indicaton Light (as shown in Figure 2)

Explains the meaning of the LED indicators for battery charging status.

Technical Parameters

Provides detailed technical specifications for the machine models.

Wiring Diagram (Only for Disc Machine Without Traction)

Illustrates the electrical wiring diagram for the disc machine without traction.

Wiring Diagram (Only for Disc Machine With Traction)

Illustrates the electrical wiring diagram for the disc machine with traction.

Wiring Diagram (Only for Orbital Machine)

Illustrates the electrical wiring diagram for the orbital machine.

Operating Guide

Battery Check;Setting on a New Machine

Guides on checking and setting new batteries, including warnings and battery types.

Battery Installation and Battery Typesetting (WET or GEL; AGM)

Details how to install and set battery types for WET, GEL/AGM, and Discover EV AGM batteries.

According to the Type of Batteries (WET or GEL; AGM), Set the Machine as Follows: (only for orbital machine)

Explains how to set the machine for different battery types for orbital machines using boot time display.

Brush;Pad-Holder Installation and Uninstallation (only for disc machine)

Provides step-by-step instructions for installing and removing brushes or pad-holders on disc machines.

Pad Installation and Uninstallation (only for orbital machine)

Details the process for installing and uninstalling pads on orbital machines.

Adjusting the Balance of Squeegee

Guides on adjusting the squeegee for proper ground contact and effective drying.

Solution or Washing Water Tank Filling

Instructions on how to fill the solution and clean water tanks with appropriate liquids.

Machine Start and Stop

Covers the procedures for starting and stopping the machine, including battery status checks.

Adjusting the Level of Orbitaldeck (Only for Orbital Machine)

Explains how to adjust the orbital deck level for optimal cleaning performance.

Machine Operation (Scrubbering and Drying)

Details the process of operating the machine for scrubbing and drying floors.

Battery Discharge During Operation

Describes battery level indicators and cautions regarding operation with low battery.

Tank Emptying

Explains the automatic float shut-off system and how to empty the recovery water tank.

Recovery Water Tank Emptying

Step-by-step guide on how to empty the recovery water tank, with specific cautions.

Solution;Clean Water Tank Emptying

Instructions for emptying the solution tank and rinsing it after use.

After Using the Machine

Outlines post-operation tasks including removing parts and cleaning.

Machine Long Inactivity

Provides instructions for storing the machine when not in use for extended periods.

First Period of Use

Advises on checks and inspections required after the initial 8 hours of machine use.

Maintenance

Scheduled Maintenance Table

Presents a table detailing daily, weekly, semiannual, and yearly maintenance tasks.

Battery Charging

Guides on when and how to charge the machine's batteries, including safety warnings.

Brush;Pad Cleaning

Instructions for cleaning brushes and pad-holders, including safety precautions.

Solution Filter Cleaning

Details the process for cleaning the solution filter to ensure proper water flow.

Squeegee Cleaning

Provides steps for cleaning the squeegee and checking its blades for optimal drying.

Squeegee Blade Check and Replacement

Guides on inspecting squeegee blades for wear, damage, and performing replacements.

Tank and Vacuum Grid with Float Cleaning, and Cover Gasket Check

Instructions for cleaning the recovery tank, vacuum grid, float, and checking the cover gasket.

Machine Working Hour Check

Explains how to check the total working hours of the machine using the hour meter.

Fuse Check;Replacement

Details how to check and replace fuses and circuit breakers for the machine's electrical system.

Accessories;Options

Lists optional accessories available for the machine and where to find more information.

Troubleshooting

Scrapping

Viper AS5160 Specifications

General IconGeneral
Cleaning Width510 mm
Battery Voltage24 V
Sound Pressure Level69 dB(A)
Protection ClassIPX4
Brush Width510 mm
Machine Width600 mm
Solution Tank Capacity61 l
Recovery Tank Capacity61 liters

Related product manuals