EasyManua.ls Logo

Visonic PowerMaster-10 G2 User Manual

Visonic PowerMaster-10 G2
96 pages
To Next Page IconTo Next Page
Page #1 background imageLoading...
Page #1 background image
D-304762 PowerMaster-10/30 G2 Installer's Guide 1
PowerMaster-10/30 G2
Version 17
Installer and Quick User Guide
Table of Contents
1. INTRODUCTION ................................................... 3
1.1 System Features ............................................ 3
2. CHOOSING THE INSTALLATION LOCATION ... 7
3. POWERMASTER-10 G2 INSTALLATION ........... 8
3.1 Opening the PowerMaster-10 G2 Control
Panel and Bracket Mounting .............................. 8
3.2 Connecting to the Telephone Line ............... 9
3.3 System Planning & Programming .............. 10
3.4 GSM Module Installation ............................. 10
3.5 PGM-5 Installation ....................................... 11
3.6 Adding Wired Zones or PGM Device ......... 12
3.7 Connecting Power to the Control Panel .... 14
3.8 Supplying Power to the Unit ....................... 16
3.9 Closing the PowerMaster-10 G2 Control
Panel ................................................................... 16
4. POWERMASTER-30 G2 INSTALLATION ......... 17
4.1 PowerMaster-30 G2 Wiring Diagram .......... 17
4.2 Opening the PowerMaster-30 G2 Control
Panel and Bracket Mounting ............................ 18
4.3 Connecting to the Telephone Line ............. 18
4.4 Connecting Wired Zone and Siren ............. 19
4.5 System Planning & Programming .............. 19
4.6 GSM Module Installation ............................. 20
4.7 DUAL RS-232 Optional Module Mounting . 20
4.8 PGM-5 Installation ....................................... 21
4.9 Optional Expander Module ......................... 22
4.10 Connecting Power to the Control Panel .. 24
4.11 Battery Insertion ........................................ 25
4.12 Supplying Power to the Unit ..................... 26
4.13 Closing the PowerMaster-30 G2 Control
Panel ................................................................... 26
5. PROGRAMMING ................................................ 27
5.1 General Guidance ........................................ 27
5.1.1 Navigation ................................................ 27
5.1.2 Feedback Sounds .................................... 27
5.2 Entering the "Installer Mode" and Selecting
a Menu Option ................................................... 28
5.2.1 Entering the "Installer Mode" if "User
Permit" is enabled ............................................. 28
5.2.2 Selecting options ..................................... 28
5.2.3 Exiting the Installer Mode ........................ 28
5.3 Setting Installer Codes ............................... 29
5.3.1 Identical Installer and Master Installer
Codes ............................................................... 30
5.4 Zones / Devices ........................................... 30
5.4.1 General Guidance & Zones/Devices Menu
Options ............................................................. 30
5.4.2 Adding New Wireless Devices or Wired
Sensors ............................................................. 30
5.4.3 Deleting a Device ..................................... 34
5.4.4 Modifying or Reviewing a Device ............. 34
5.4.5 Replacing a Device .................................. 34
5.4.6 Defining Configuration Defaults for "Device
Settings" ............................................................ 35
5.4.7 Configuring Soak Test Mode ................... 36
5.4.8 Updating Devices after Exiting Installer
Mode ................................................................. 36
5.5 Control Panel ............................................... 36
5.5.1 General Guidance "Control Panel" Flow-
Chart & Menu Options ...................................... 36
5.5.2 Configuring Arming/Disarming and
Exit/Entry Procedures ....................................... 37
5.5.3 Configuring Zones Functionality .............. 39
5.5.4 Configuring Alarms & Troubles ................ 40
5.5.5 Configuring Sirens Functionality .............. 41
5.5.6 Configuring Audible & Visual User Interface
.......................................................................... 42
5.5.7 Configuring Jamming and Supervision
(Missing device) ................................................ 43
5.5.8 Configuring Miscellaneous Features ....... 44
5.6 Communication ........................................... 44
5.6.1 General Guidance "Communication" Flow-
Chart & Menu Options ........................................ 44
5.6.2 Configuring PSTN (landline phone)
Connection ........................................................ 46
5.6.3 Configuring GSM-GPRS (IP) - SMS
Cellular Connection .......................................... 47

Table of Contents

Other manuals for Visonic PowerMaster-10 G2

Question and Answer IconNeed help?

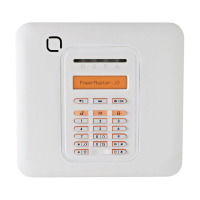
Do you have a question about the Visonic PowerMaster-10 G2 and is the answer not in the manual?

Visonic PowerMaster-10 G2 Specifications

General IconGeneral
ModelPowerMaster-10 G2
CategorySecurity System
Wireless TechnologyPowerG
Remote ControlYes
Event Log1000 events
CommunicationGSM, PSTN, IP
Frequency868 MHz
TypeWireless
Operating Temperature-10°C to +55°C
HumidityUp to 85% non-condensing

Summary

1. INTRODUCTION

1.1 System Features

Lists and describes the PowerMaster features and how to configure them.

2. CHOOSING THE INSTALLATION LOCATION

3. POWERMASTER-10 G2 INSTALLATION

3.1 Opening the PowerMaster-10 G2 Control Panel and Bracket Mounting

Details on opening the control panel and mounting the bracket.

3.2 Connecting to the Telephone Line

Instructions for connecting the telephone line to the control panel.

3.3 System Planning & Programming

Guidance on system planning and initial programming steps.

3.4 GSM Module Installation

Steps for installing the optional GSM module.

3.5 PGM-5 Installation

Instructions for installing the PGM-5 output interface module.

3.6 Adding Wired Zones or PGM Device

Procedure for adding wired zones and PGM devices.

3.7 Connecting Power to the Control Panel

Steps for connecting AC power to the control panel.

3.8 Supplying Power to the Unit

Details on powering up the control panel, including backup battery.

3.9 Closing the PowerMaster-10 G2 Control Panel

Final steps for closing and securing the control panel.

4. POWERMASTER-30 G2 INSTALLATION

4.1 PowerMaster-30 G2 Wiring Diagram

Diagram illustrating the wiring connections for the PowerMaster-30 G2.

4.2 Opening the PowerMaster-30 G2 Control Panel and Bracket Mounting

Steps for opening the panel and mounting the bracket.

4.3 Connecting to the Telephone Line

Instructions for connecting the telephone line.

4.4 Connecting Wired Zone and Siren

Procedure for connecting wired zones and sirens.

4.5 System Planning & Programming

Guidance for system planning and programming.

4.6 GSM Module Installation

Steps for installing the optional GSM module.

4.7 DUAL RS-232 Optional Module Mounting

Instructions for mounting the DUAL RS-232 module.

4.8 PGM-5 Installation

Instructions for installing the PGM-5 module.

4.9 Optional Expander Module

Details on installing the optional Expander module.

4.10 Connecting Power to the Control Panel

Procedure for connecting power to the control panel.

4.11 Battery Insertion

Steps for inserting the backup battery pack.

4.12 Supplying Power to the Unit

Guidance on supplying power to the unit, including backup.

4.13 Closing the PowerMaster-30 G2 Control Panel

Final steps for closing and securing the control panel.

5. PROGRAMMING

5.1 General Guidance

Overview of installer programming and system customization.

5.1.1 Navigation

Explanation of keypad buttons for navigation and configuration.

5.1.2 Feedback Sounds

Description of sounds used for system feedback.

5.2 Entering the "Installer Mode" and Selecting a Menu Option

Procedure to enter installer mode and select menu options.

5.2.1 Entering the "Installer Mode" if "User Permit" is enabled

Method to enter installer mode when user permission is required.

5.2.2 Selecting options

Guidance on selecting options within menus.

5.2.3 Exiting the Installer Mode

Steps to exit the installer mode.

5.3 Setting Installer Codes

Configuration of Master Installer, Installer, and Guard codes.

5.3.1 Identical Installer and Master Installer Codes

Guidance on handling identical installer and master installer codes.

5.4 Zones / Devices

Management of system zones and connected devices.

5.4.1 General Guidance & Zones/Devices Menu Options

Overview of zone and device management options.

5.4.2 Adding New Wireless Devices or Wired Sensors

Procedure for enrolling and configuring new devices.

5.4.3 Deleting a Device

Steps to delete devices from the system.

5.4.4 Modifying or Reviewing a Device

Procedure to review or modify existing device parameters.

5.4.5 Replacing a Device

How to replace a faulty device with a new one.

5.4.6 Defining Configuration Defaults for "Device Settings"

Setting default parameters for new device enrollments.

5.4.7 Configuring Soak Test Mode

Enabling and configuring the Soak Test mode for zones.

5.4.8 Updating Devices after Exiting Installer Mode

Process of updating device configurations after exiting installer mode.

5.5 Control Panel

Configuration options for the control panel's operation.

5.5.1 General Guidance – "Control Panel" Flow-Chart & Menu Options

Overview of control panel configuration menus and options.

5.5.2 Configuring Arming/Disarming and Exit/Entry Procedures

Setting arming, disarming, exit, and entry delay parameters.

5.5.3 Configuring Zones Functionality

Customizing zone behavior like cross-zoning and swinger stop.

5.5.4 Configuring Alarms & Troubles

Configuring alarm and trouble event handling and reporting.

5.5.5 Configuring Sirens Functionality

Settings for the panel's built-in and external sirens.

5.5.6 Configuring Audible & Visual User Interface

Customizing audible beeps and visual display feedback.

5.5.7 Configuring Jamming and Supervision (Missing device)

Settings for detecting and reporting jamming and missing devices.

5.5.8 Configuring Miscellaneous Features

Configuration for various other system features.

5.6 Communication

Configuration of communication channels and reporting methods.

5.6.1 General Guidance – "Communication" Flow-Chart & Menu Options

Overview of communication settings and menu structure.

5.6.2 Configuring PSTN (landline phone) Connection

Settings for the PSTN telephone line connection.

5.6.3 Configuring GSM-GPRS (IP) - SMS Cellular Connection

Configuration for cellular communication via GSM, GPRS, or SMS.

5.6.4 Configuring Events Reporting to Monitoring Stations

Defining how events are reported to monitoring stations.

5.6.5 Configuring Events Reporting to Private Users

Configuration for reporting events to private telephone subscribers.

5.6.6 Configuring Motion Cameras for Visual Alarm Verification

Setting up motion cameras for visual alarm verification.

5.6.7 Configuring Upload / Download Remote Programming Access Permission

Managing remote access and programming permissions.

5.6.8 Broadband

Configuration for the Broadband/IP communicator module.

5.7 PGM Output

Configuration of programmable output (PGM) functions.

5.7.1 General Guidance

Overview of PGM output configuration.

5.7.2 Open Collector States

Technical details on open collector output states.

5.7.3 Configuring a PGM device

Defining factors that determine PGM output.

5.7.4 Entering Daytime Limits

Setting daytime limits for PGM device operation.

5.7.5 PGM Output Configuration

Details on configuring PGM output behavior for various events.

5.8 Custom Names

Options for customizing zone names and speech messages.

5.8.1 Custom Zone Names

Procedure for defining custom names for zones.

5.8.2 Record Speech

Instructions for recording speech messages for the system.

5.8.3 Voice Box Mode

Setting the mode for two-way voice communication.

5.9 Diagnostics

Tools for testing system operation and device status.

5.9.1 General Guidance – "Diagnostics" Flow-Chart & Menu Options

Overview of the diagnostics menu and testing options.

5.9.2 Testing Wireless Devices

Procedure for testing all attached wireless devices.

5.9.3 Testing the GSM module

Steps to test the GSM communication module.

5.9.4 Testing the SIM Number

Procedure to test the SIM card number entry.

5.9.5 Testing the Broadband/PowerLink Module

Diagnostic procedure for the Broadband/PowerLink module.

5.10 User Settings

Access to user-specific settings and configurations.

5.11 Factory Default

Procedure to reset the PowerMaster parameters to factory defaults.

5.12 Serial Number

Information about viewing the system serial number and related data.

5.13 Start UL/DL

Initiating upload/download procedures with the server.

5.14 Partitioning

Features for dividing the alarm system into independent areas.

5.14.1 General Guidance – "Partitioning" Menu

Overview of the partitioning menu.

5.14.2 Enabling / Disabling Partitions

Steps to enable or disable the partitioning feature.

5.15 Operation Mode

Selecting operational modes for the control panel.

5.15.1 General Guidance – "Operation Mode" Menu

Overview of the operation mode selection menu.

5.15.2 Select setting

Procedure for selecting specific operation modes.

5.15.3 BS8243 Setup

Configuration settings for the BS8243 operation mode.

5.15.4 DD243 Setup

Configuration settings for the DD243 operation mode.

5.15.5 CP01 Setup

Configuration settings for the CP01 operation mode.

5.15.6 OTHERS Setup

Configuration settings for other operation modes.

6. PERIODIC TEST

6.1 General Guidance

Overview of periodic testing procedures.

6.2 Conducting a Periodic Test

Detailed steps for performing a periodic test of the system.

7. MAINTENANCE

7.1 Handling System Troubles

Troubleshooting guide for common system faults and their solutions.

7.2 Dismounting the Control Panel

Procedure for safely removing the control panel from its mounting.

7.3 Replacing the Backup Battery

Steps for replacing the system's backup battery.

7.4 Fuse Replacement

Information regarding fuse replacement in the control panel.

7.5 Replacing/Relocating Detectors

Guidelines for replacing or relocating detectors.

7.6 Annual System Check

Recommended annual checks for system maintenance.

8. READING THE EVENT LOG

APPENDIX A. Specifications

A1. Functional

Detailed functional specifications of the control panels.

A2. Wireless

Specifications related to the wireless capabilities.

A3. Electrical

Electrical specifications including power and battery details.

A4. Communication

Specifications for the system's communication features.

A5. Physical Properties

Physical characteristics such as dimensions and weight.

A6. Peripherals and Accessory Devices

List of compatible peripherals and accessory devices.

APPENDIX B. Working with Partitions

B1. User Interface and Operation

Description of the user interface in partition mode.

B2. Common Areas

Explanation of common areas in relation to partitions.

APPENDIX C. Detector Deployment & Transmitter Assignments

C1. Detector Deployment Plan

Template for planning detector placement and assignments.

C2. Keyfob Transmitter List

List for tracking keyfob transmitters and their assignments.

C3. Emergency Transmitter List

List for tracking emergency transmitters and their assignments.

C4. Non-Alarm Transmitter List

List for tracking non-alarm transmitters and their assignments.

APPENDIX D. Event Codes

D1. Contact ID Event Codes

Reference list of Contact ID event codes.

D2. SIA Event Codes

Reference list of SIA event codes.

D3. Understanding the Scancom Reporting Protocol Data Format

Explanation of the Scancom reporting protocol data format.

D4. SIA over IP - Offset for Device User

Details on SIA over IP offsets for device users.

APPENDIX E. Sabbath Mode

E1. General Guidance

Overview of the Sabbath Mode feature.

E2. Connection

Wiring instructions for Sabbath Mode setup.

E3. Arming the System by Sabbath Clock

Configuration for arming the system using a Sabbath clock.

APPENDIX F. PowerLink3 IP Communicator

F1. Getting Started

Introduction to the PowerLink3 IP Communicator.

F2. Specifications

Technical specifications of the PowerLink3 IP Communicator.

F3. Installation

Package contents and system requirements for installation.

F4. Installing the Visonic PowerLink3 IP Communicator

Hardware installation steps for the IP communicator.

APPENDIX G. Glossary

APPENDIX H. Compliance with Standards

WARRANTY

Related product manuals