Chapter 1 PREPARATION
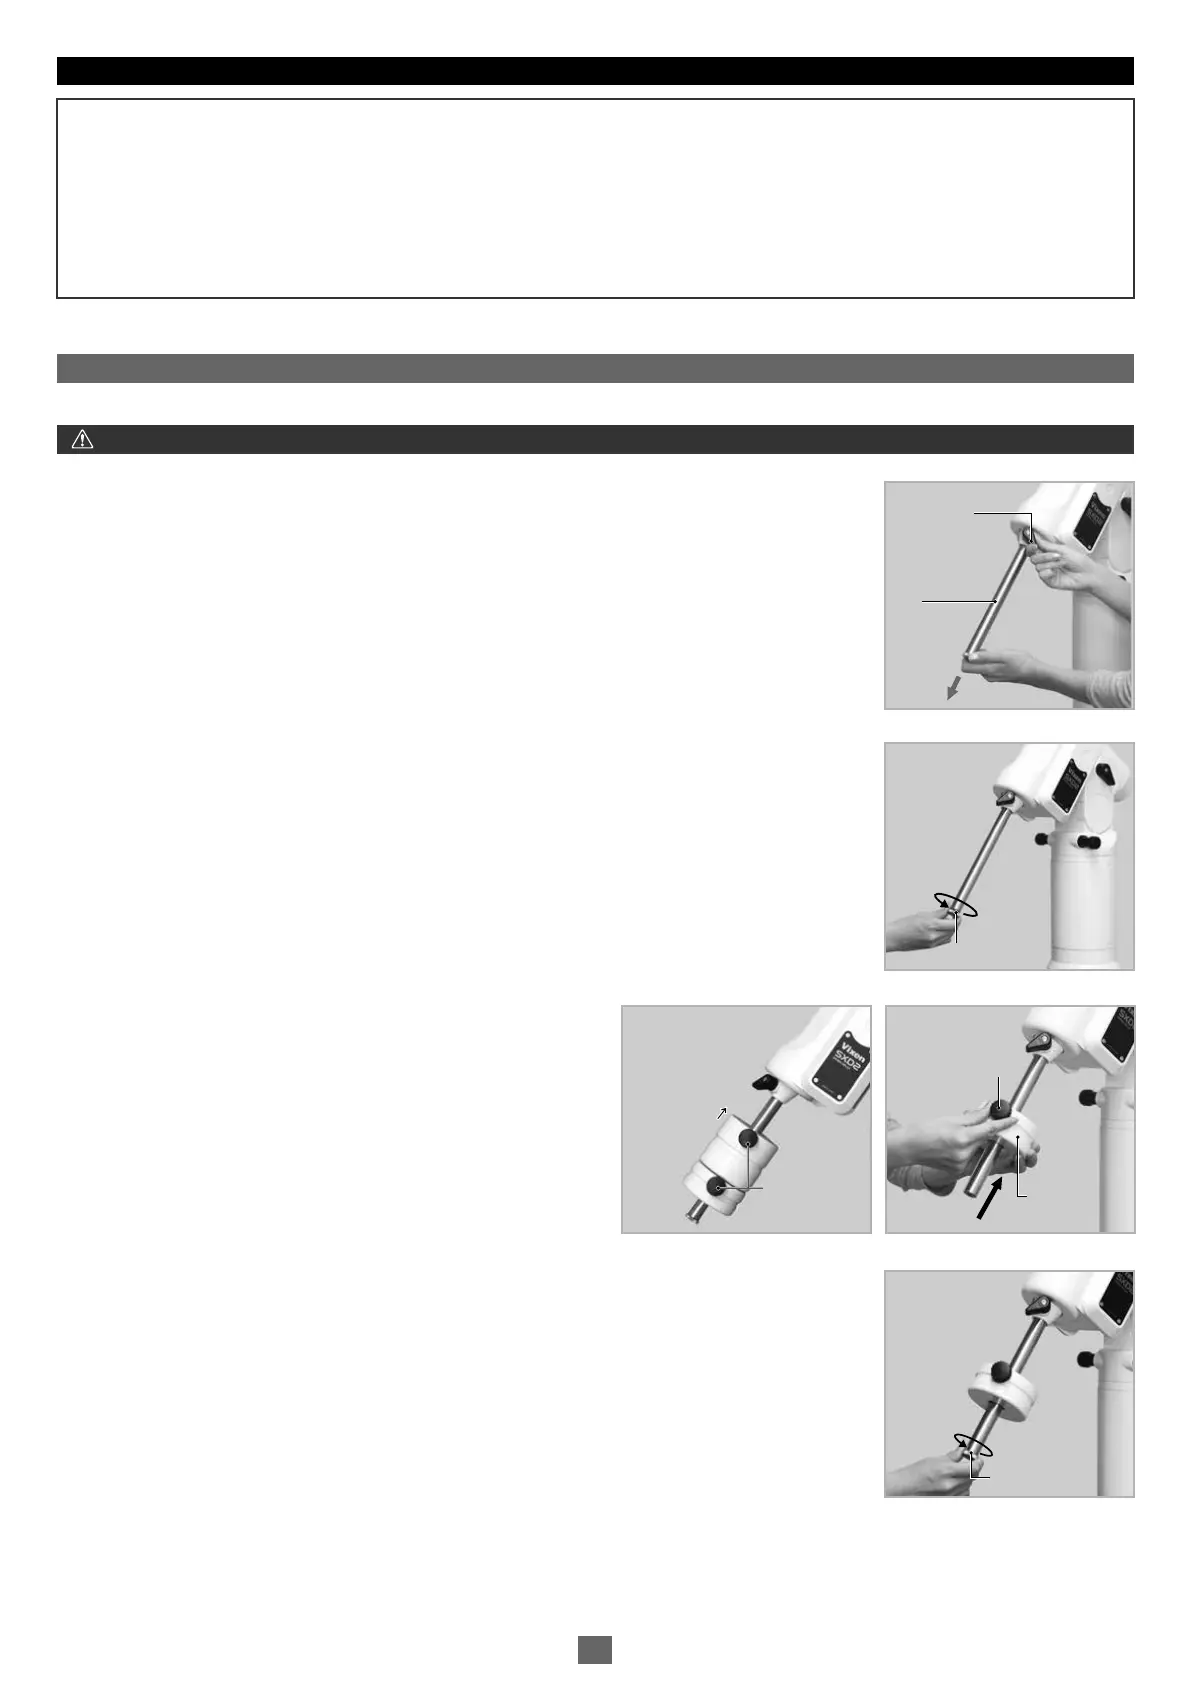
CAUTION: Be sure to handle the counterweight carefully as it is a very heavy item.
The counterweight bar is in the declination body. You may balance the SXD2 mount with only the counterweight bar to start.
1
3
4
2
Tips on Assembling the Mount
Generally equatorial mounts are heavier on the declination axis side. Because of this feature, placing the SXD2 mount so that its
declination axis comes directly over one of the tripod legs can make it most stable when you use the SXD2 mount for a north (or south)
latitude of 50 degrees and lower. However, the balance of the SXD2 mount may vary if it is used in latitude higher than 50 degrees.
This may result in shifting the center of balance to the opposite side of the declination axis depending on the location of the loading
equipment. Change the position of the tripod legs so that the SXD2 mount becomes more stable in such a case.
Loosen the counterweight bar lock lever to draw out the counterweight bar.
Tighten the counterweight bar lock lever with the counterweight bar extended fully.
Remove the safety screw on the end of the counterweight bar. Loosen the lock screw on the side of a
counterweight and install the counterweight by sliding it onto the counterweight bar.
Attach the counterweight so that the lock screw on the counterweight
is on the far side of the safety screw as shown in the figure.
Tighten the counterweight lock screw and replace the safety screw to screw it down on the end of the
counterweight bar tightly.
Far Side
.Attaching the Counterweight
Ⅲ
Lock Lever
Counterweight
Bar
Lock Lever
Counterweight
Bar
CounterweightCounterweight
Safety ScrewSafety Screw
Safety ScrewSafety Screw
Lock Screw
Far Side
Lock Screw
Lock ScrewLock Screw
13