RD 12/RD 12A Disassembly & Assembly
wc_tx000671gb.fm 91
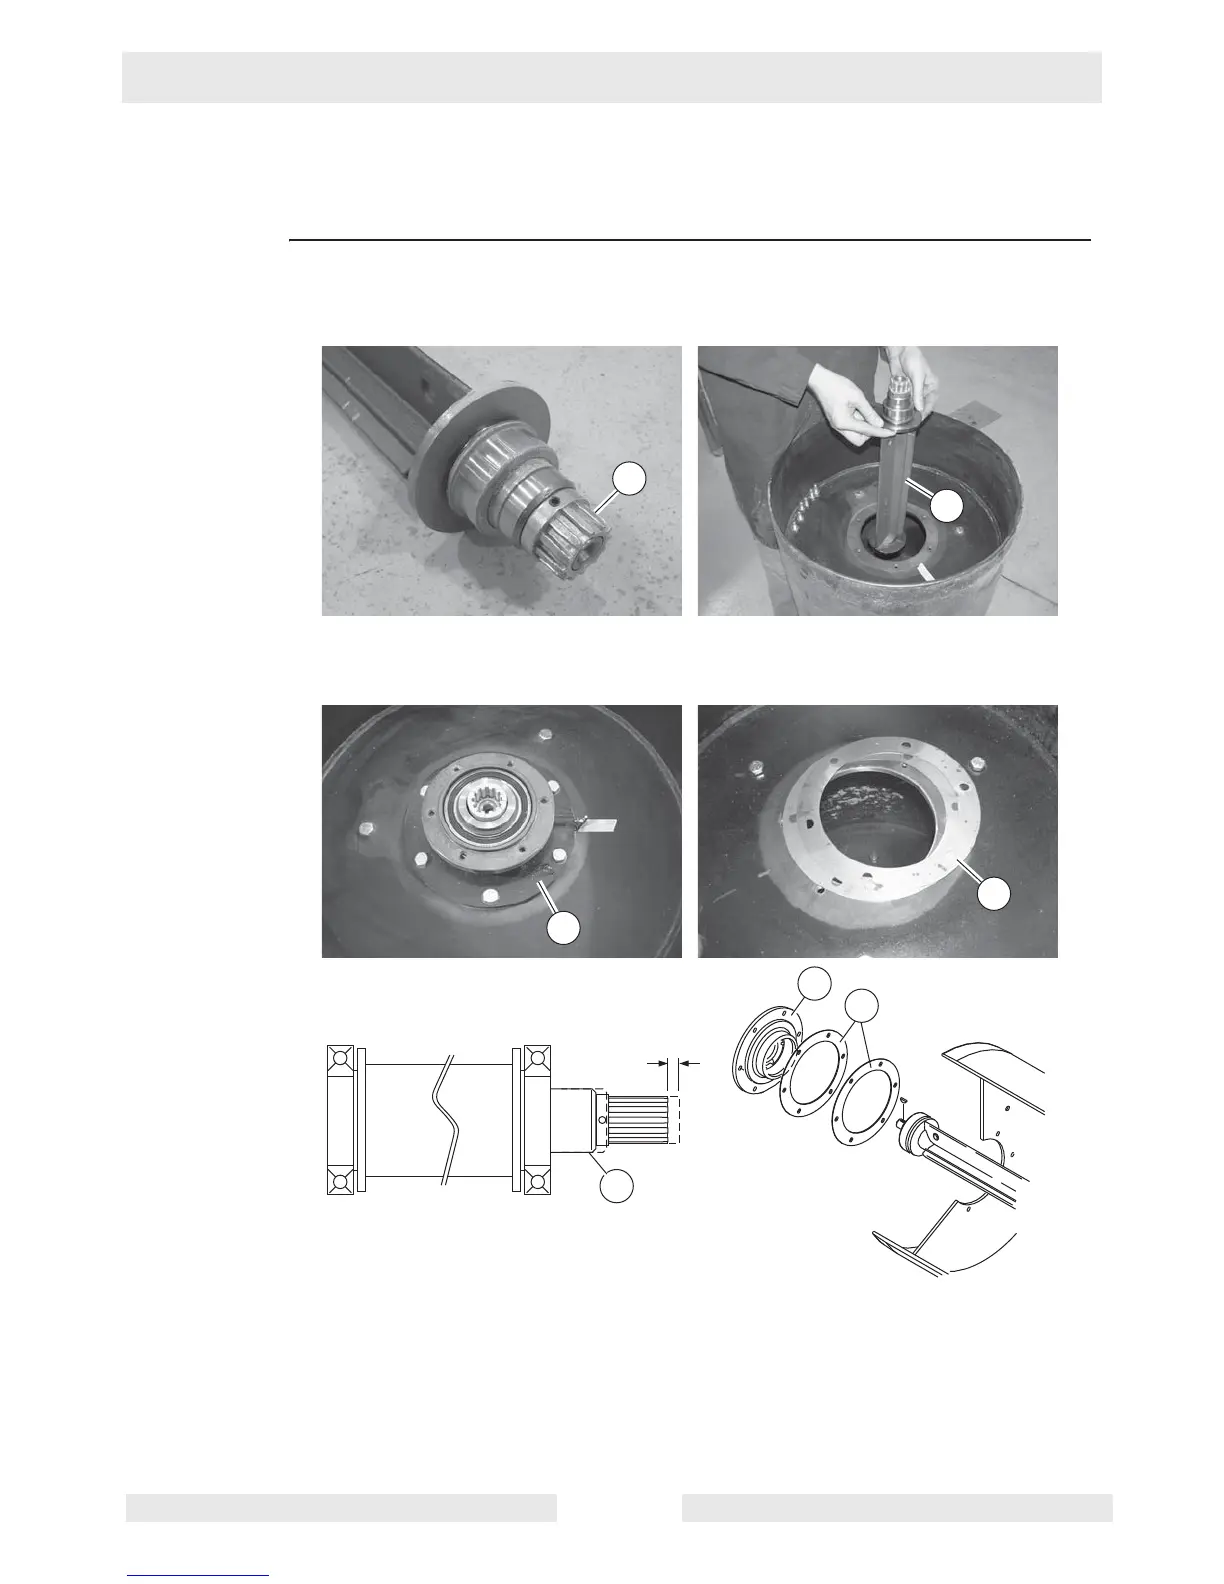
9.18 Installing the Exciter
Prerequisites Front drum removed
Drive-motor-side exciter bearing installed
Procedure Follow the procedure below to install the exciter.
1. Install the key and the gear (a) of the exciter motor coupling onto the exciter. Secure the
gear to the exciter with the set screw.
2. Slide the exciter (b) through the drum and into the drive-motor-side bearing race.
3. Temporarily install the exciter-side drum hub (c) onto the drum using three screws.
4. Check the exciter for end-play. To do so, grab the exciter (b) with a needle-nosed pliers
and pull and push it back and forth inside the drum. There needs to be 5±1 mm
(3/16±1/16 in.) of end-play for correct performance. If the correct amount of end-play is
not found, remove the drum hub and install shims (d) as needed to obtain the correct
amount of end-play. Then, using Loctite 243 on the six screws, secure the drum hub to
the drum. Torque the screws to 49 Nm (36 ft.lbs.).
This procedure continues on the next page.
wc_gr004165
b
a
wc_gr004166
c
b
d
5 mm
(3/16 in.)
d
c