Page 26 of 102 Page 27 of 102Doc: DRX Installation
Version: 7.1 January 2021
Doc: DRX Installation
Version: 7.1 January 2021
wassp.com wassp.com
DRX INSTALLATION MANUAL DRX INSTALLATION MANUAL
4 OPERATING THE DRX
» To turn ON the DRX, short press the power key.
» To turn OFF the DRX, press and hold the power key for more than 4 seconds. All
LEDs will turn o, indicating that power has been turned o.
4.1. POWER
The DRX can be powered on/o using the power button or the remote power switch.
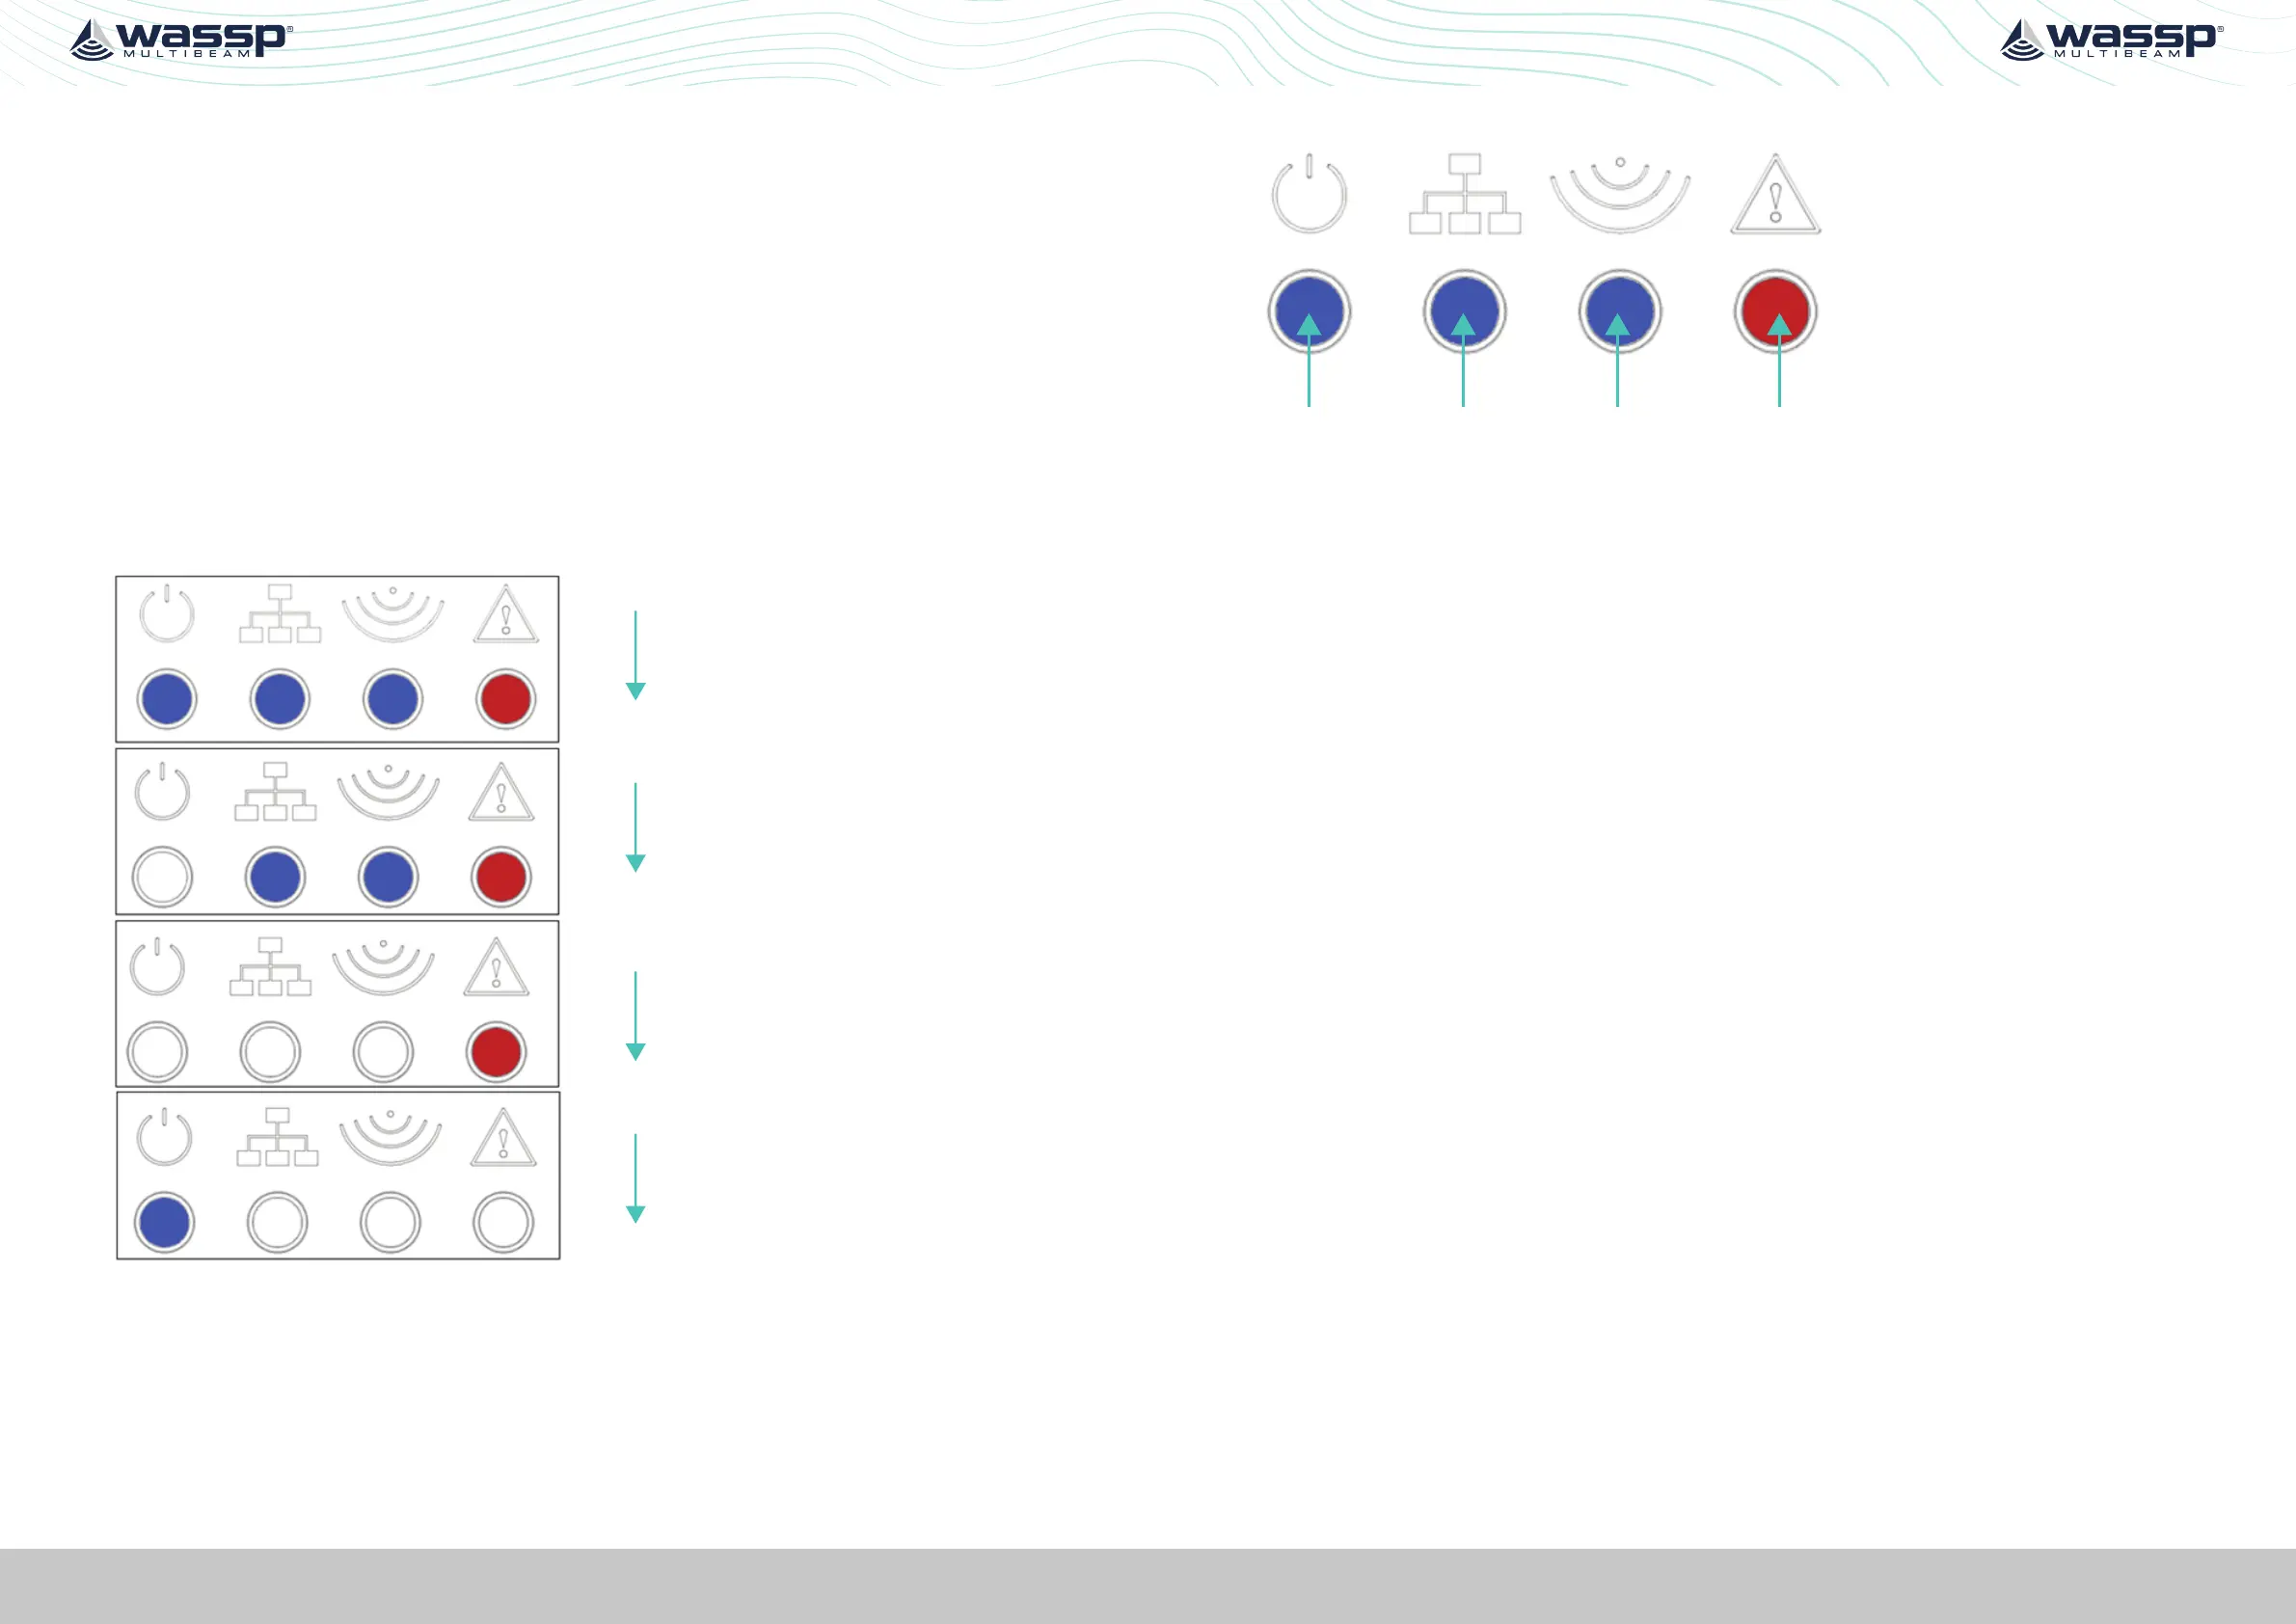
4.2. LED STATUS
The DRX features 4 LEDS next to the power button which give a quick indication of the
status of the DRX system.
4.2.1. Startup sequence.
The boot sequence is as below:
Power Network Ping Error
Power on
Booting
Starting
Process
Normal
Operation
Figure 11. Startup Sequence
4.2.2. Normal Operation LED Indications
Power Network Ping Error
Figure 12. Normal Operation LED Indications
Power LED:
O = Power OFF
On Solid = DRXApp is running
Network LED:
O: No Link (cable not connected)
Solid: Link/Link Established
Blinking: Tx or RX trac
Ping LED:
O: Not pinging
Blinking: Pinging with frequency relative to ping rate (not actual ping rate).
Error LED:
O: Normal operation
On: (While booting) system is booting
On: (After booting) Indicates an error state. All LED states should be noted and reported
to WASSP Support. See “Appendix I - Product Registration, Support and Resources” on
page 101.
 Loading...