Page 28 of 102 Page 29 of 102Doc: DRX Installation
Version: 7.1 January 2021
Doc: DRX Installation
Version: 7.1 January 2021
wassp.com wassp.com
DRX INSTALLATION MANUAL DRX INSTALLATION MANUAL
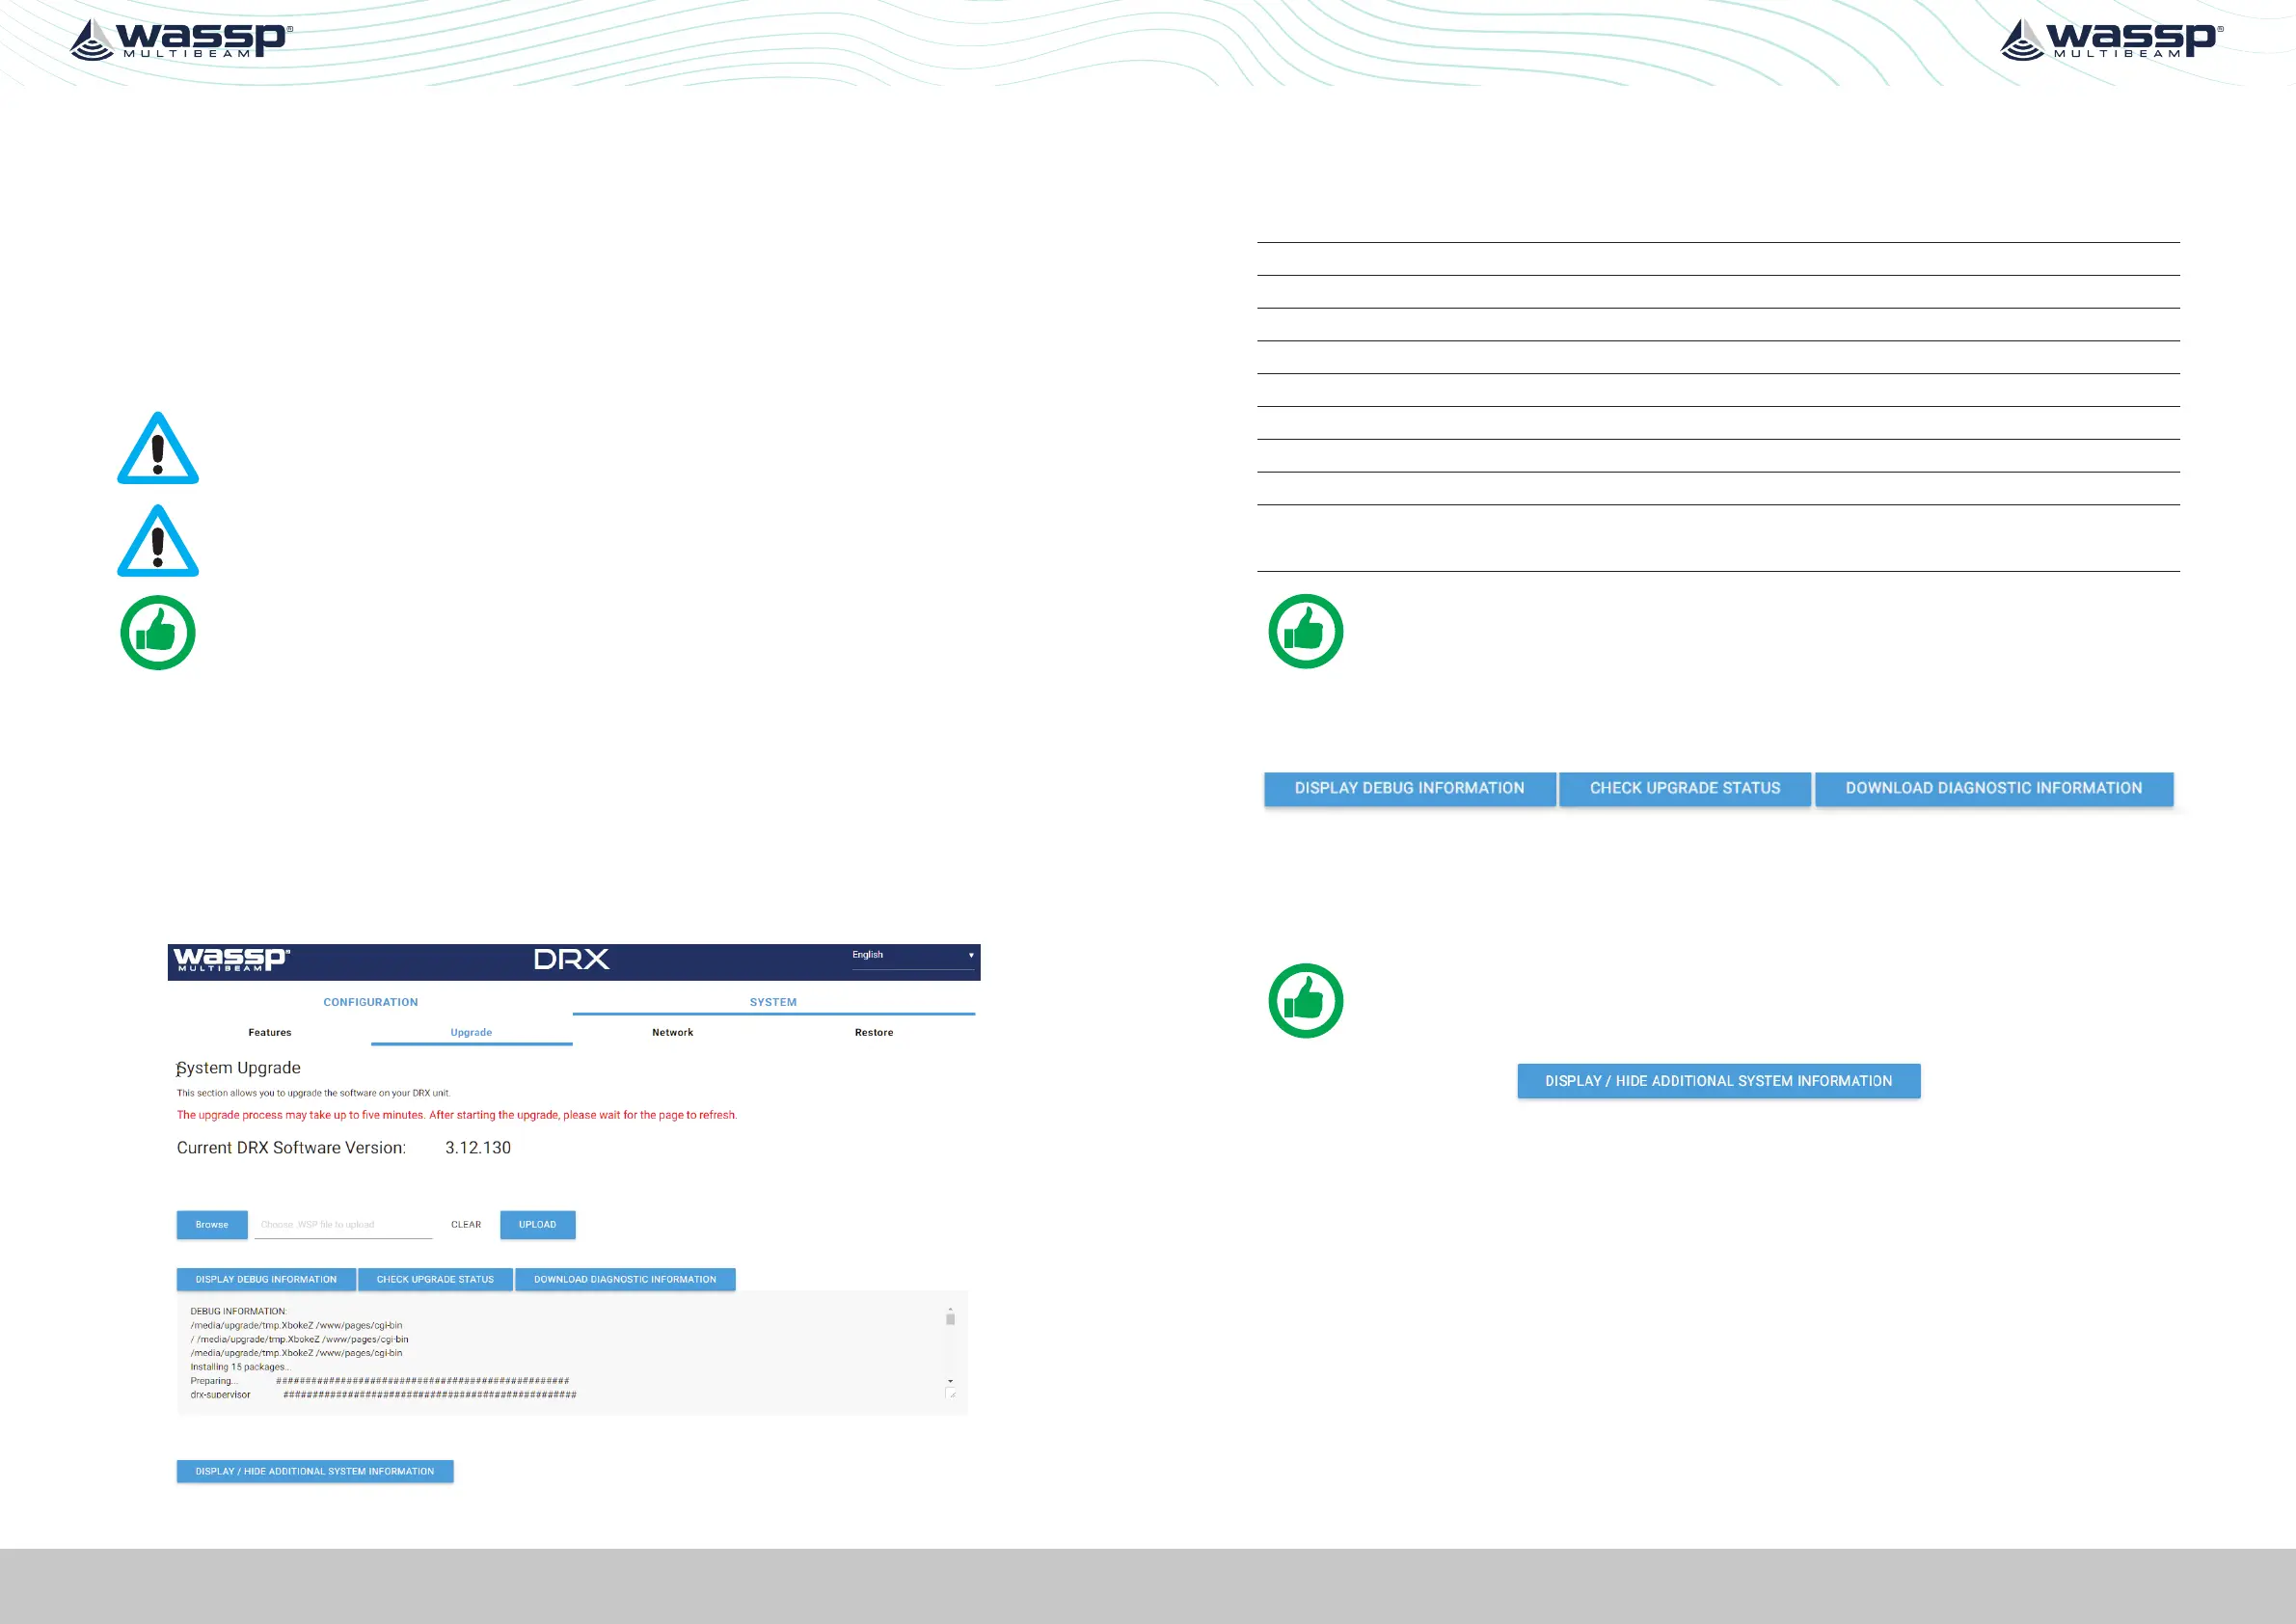
4.3. SYSTEM UPDATE & DIAGNOSTICS
The System section of the DRX SETUP WEBPAGES is used for checking DRX versions,
upgrading the DRX and restoring the DRX settings.
Launching the DRX SETUP WEBPAGES is described in “3.6. Display and Control Devices”
on page 23.
To check DRX version, open the DRX SETUP WEBPAGES and open the SYSTEM tab and
open the UPGRADE tab. Versions should be recorded by copying and pasting or through
screen capture.
CAUTION: Do not power down your DRX during the update procedure, this
may result in complete system failure.
CAUTION: System upgrade cannot be performed whilst DRX is pinging as this
may result in failure.
NOTE: Note down version numbers before and after upgrading.
To perform a system upgrade:
1. Open the DRX SETUP WEBPAGES, open the SYSTEM tab and select the UPGRADE tab.
2. Select the BROWSE button to navigate to the folder containing the software update
package and select the UPLOAD button.
3. During the update procedure the DRX system will reboot. Once completed, check the
new software version in the System tab.
Figure 13. System Upgrade
Upgrade Error Codes
Upgrade may fail for various reasons. An error code and/or text will be displayed in the
message box.
1 Transferred Data is not a file.
2 Transferred File is not of valid type.
3 Transferred File contains bad data.
4 Unable to initiate upgrade, stage 1.
5 Failed to install.
6 Unable to initiate upgrade, stage 2.
7 Unable to restart after upgrade.
8 No File transferred.
9 Undefined.
10 Failure. See error log files for detail.
Contact WASSP Support if this error occurs.
TIP: F5 (refresh button) should be pressed if there is any doubt in data
consistency between the Webpage and the DRX.
4.3.1. Diagnostics Information
Under SYSTEM tab, UPGRADE option there are diagnostics and information options.
» DISPLAY DEBUG INFORMATION will display the DRX logs in the display window.
» CHECK UPGRADE STATUS can be used to confirm with an upgrade has been
completed successfully.
» DOWNLOAD DIAGNOSTICS INFORMATION will download the DRX logs.
NOTE: If there is anything unusual requiring WASSP Support the DRX logs
should be supplied for analysis
» DISPLAY/HIDE SYSTEM INFORMATION shows detailed system information with
version and product details.
4.4. SYSTEM RESTORE
System Restore sets all settings to factory default values.
1. Select the SYSTEM tab and select the RESTORE tab.
2. Click the RESTORE DEFAULTS button to restore the unit to default configuration
settings. The unit will reboot and you will then need to re-enter all the sensor setup
and oset values. See “5 Sensor Configuration” on page 34.
 Loading...