Page 42 of 102 Page 43 of 102Doc: DRX Installation
Version: 7.1 January 2021
Doc: DRX Installation
Version: 7.1 January 2021
wassp.com wassp.com
DRX INSTALLATION MANUAL DRX INSTALLATION MANUAL
1. Select the check boxes of the attitude correction that should be inverted, under
INVERT.
2. Press COMMIT button to save any changes.
3. The indicator beside the check box shows the status of the DRX. If the indicator is
green the correction is inverted in the DRX. If the indicator is red the correction is
not inverted in the DRX.
TRANSDUCER DRAFT value will correct the
depth by taking into account the transducer
draft. See “Figure 17. Ship Measurements
Diagram” on page 35, measurement A.
KEEL DEPTH VALUE will correct the depth
by taking in to account the keel depth. See
“Table 3. NMEA Sentences Output” on page
93.
BATHYMETRY BEAM WIDTH; The overall
swath width for mapping can be adjusted
using port and starboard angle from nadir.
Maximum swath width is 60
0
either side of
nadir for a 120
0
swath width.
NOTE: ‘Induced Heave’ may depend on whether a motion sensor is
configured to account for induced heave.
NOTE: Transducer draft might be adjusted for change in ballast due to fuel,
payload etc.
NOTE: You must COMMIT or these settings will be lost.
NOTE: Transducer Invert can be used to correct for a transducer being
installed back to front.
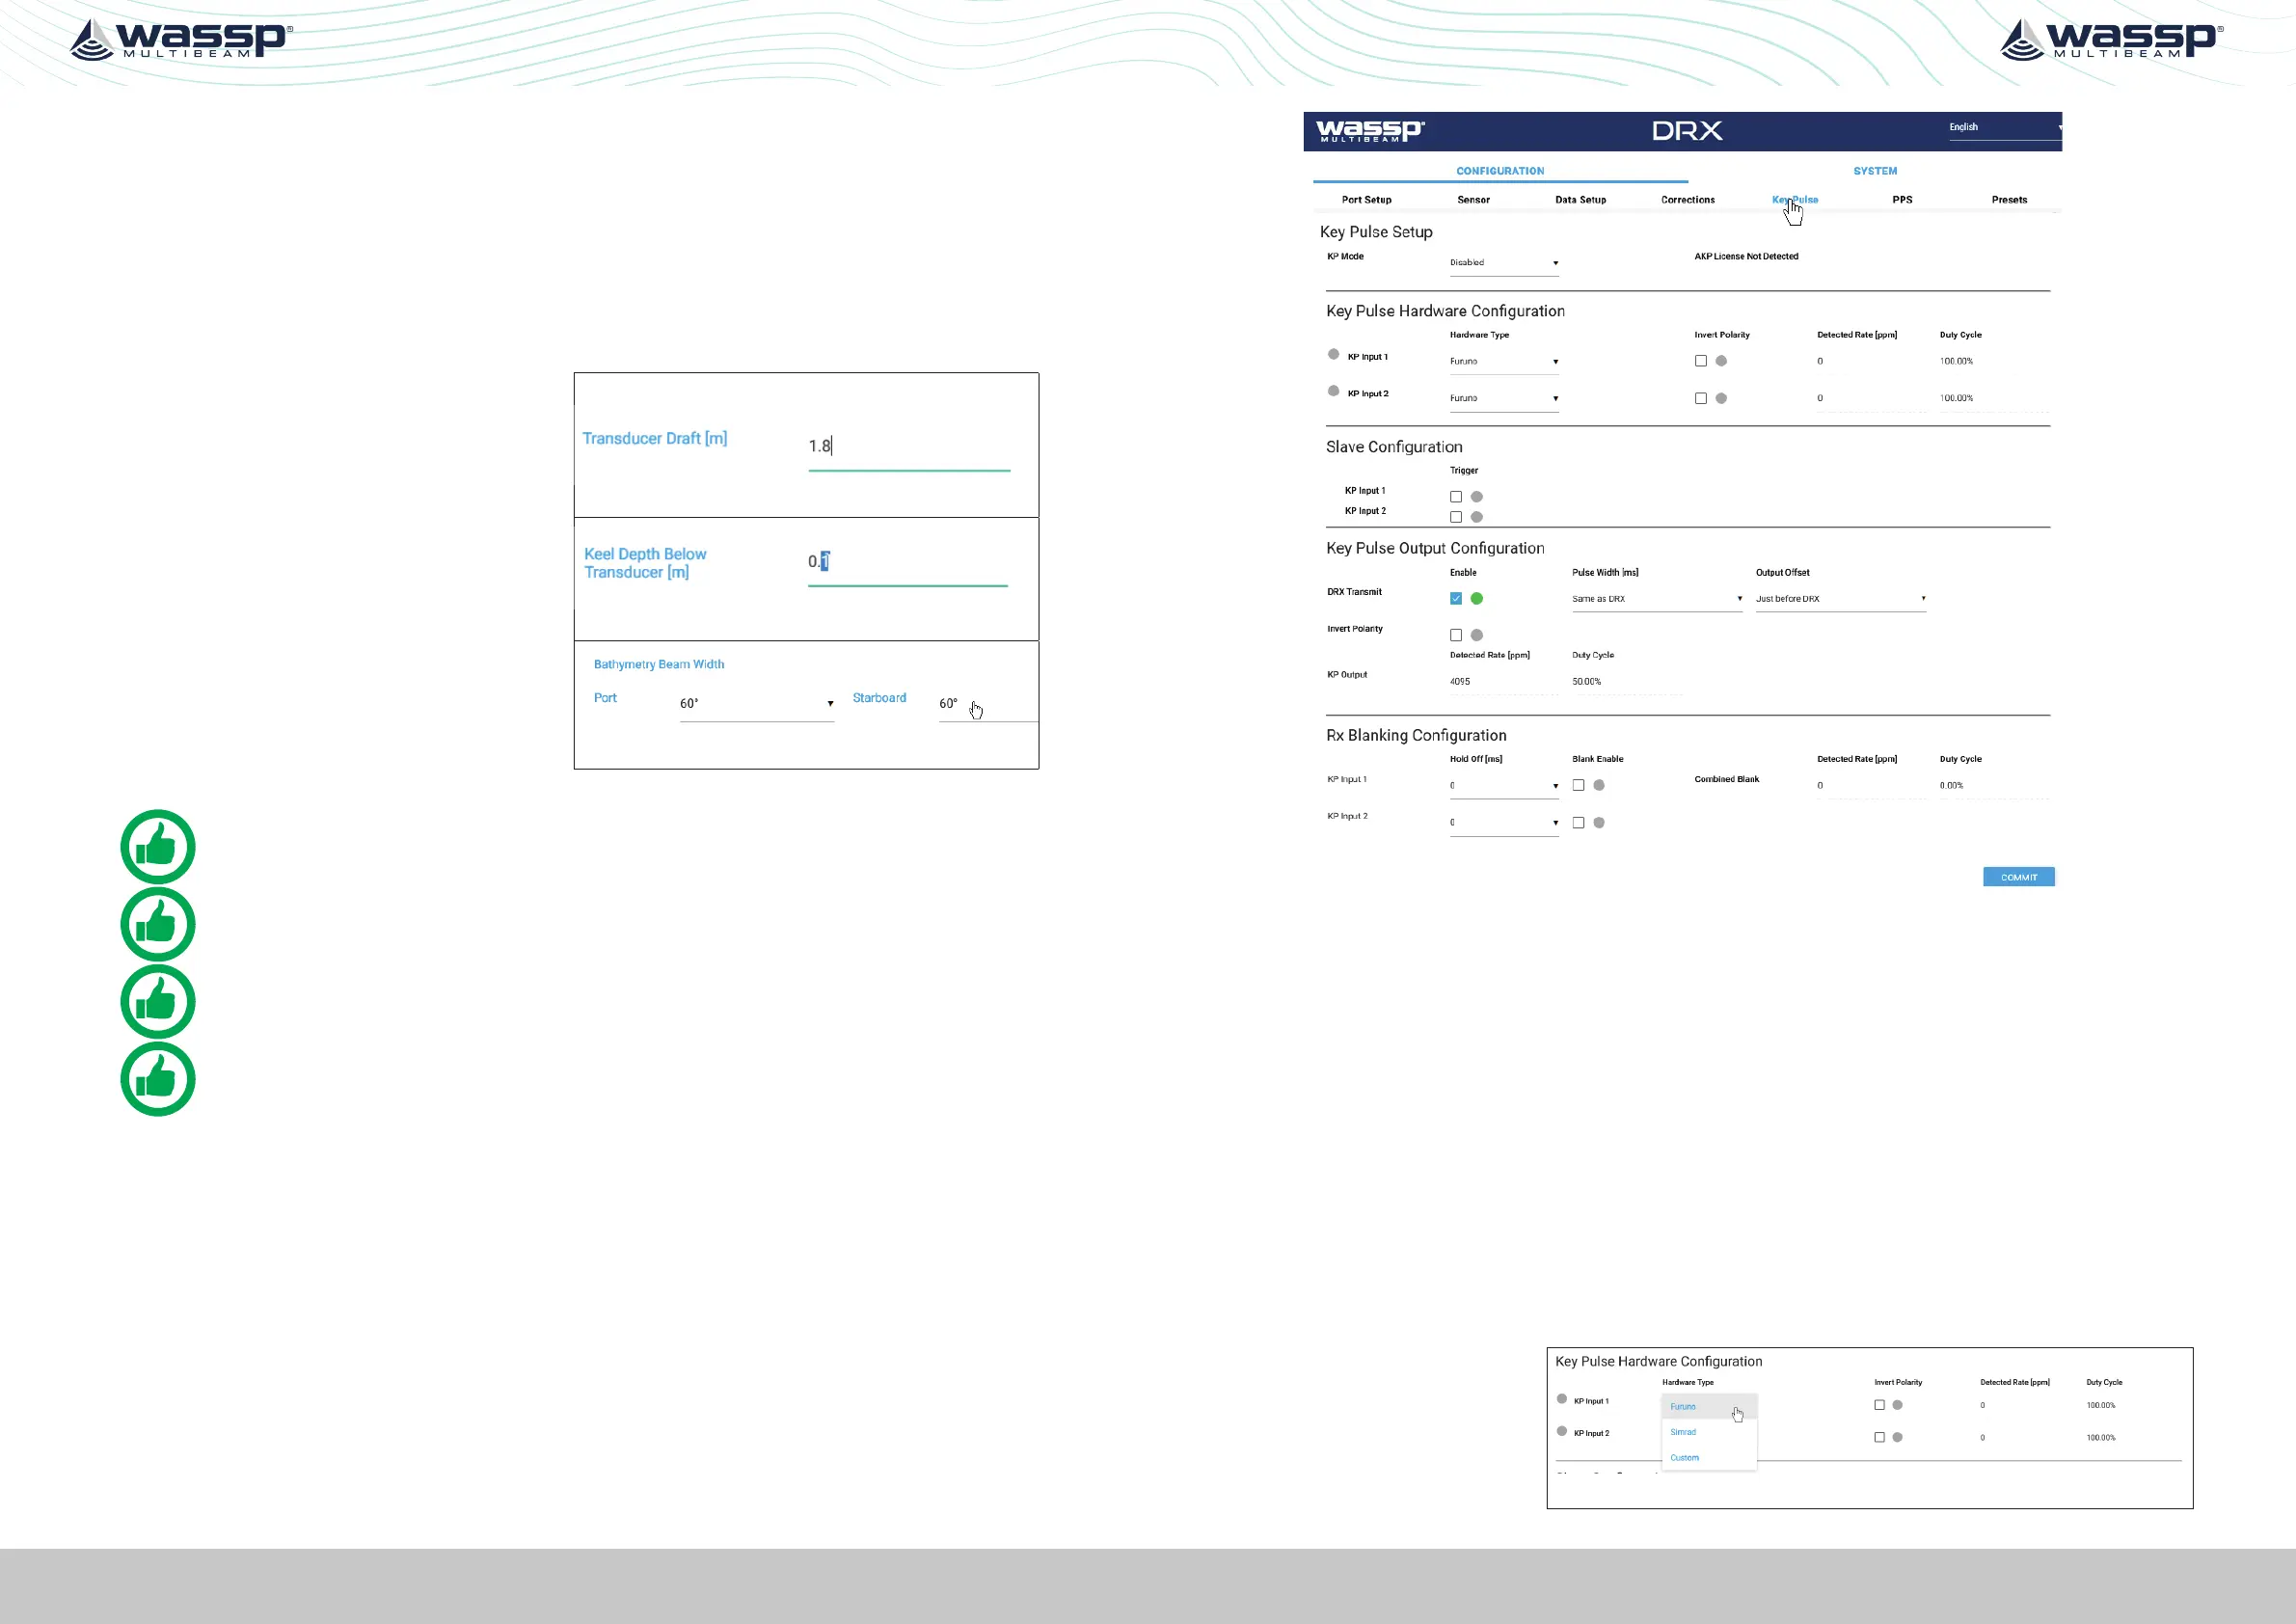
5.2.6. Key Pulse Tab
The KEY PULSE tab is use for syncing the DRX transmit to other acoustic equipment that
the DRX is physically wired to.
Key pulse configuration will be specific to the vessel and operating environment and is
used to optimise operation for all of the equipment by minimising acoustic interference.
Key pulse is configured under the KEY PULSE tab.
Figure 23. DRX Setup, Key Pulse Tab
Key Pulse can be configured to either be Disabled, Master, Slave or Auto Modes under
KEY PULSE SETUP.
» DISABLED; DRX Tx is not aected by key pulse.
» MASTER; DRX will act as a key pulse Tx master.
» SLAVE; DRX will act as key pulse slave for Tx.
» AUTO; Allows DRX to automatically switch from slave to master with blanking as
required.
5.2.6.1. Configuring Key Pulse Slave
In SLAVE mode the DRX will transmit on the key pulse signal from external equipment.
DRX has 2 key pulse inputs available for Slave mode.
To configure Slave mode:
1. Make sure that KEY PULSE SETUP MODE is either SLAVE or AUTO
2. Under KEY PULSE
HARDWARE
CONFIGURATION
select the
Hardware type.
 Loading...