Page 30 of 102 Page 31 of 102Doc: DRX Installation
Version: 7.1 January 2021
Doc: DRX Installation
Version: 7.1 January 2021
wassp.com wassp.com
DRX INSTALLATION MANUAL DRX INSTALLATION MANUAL
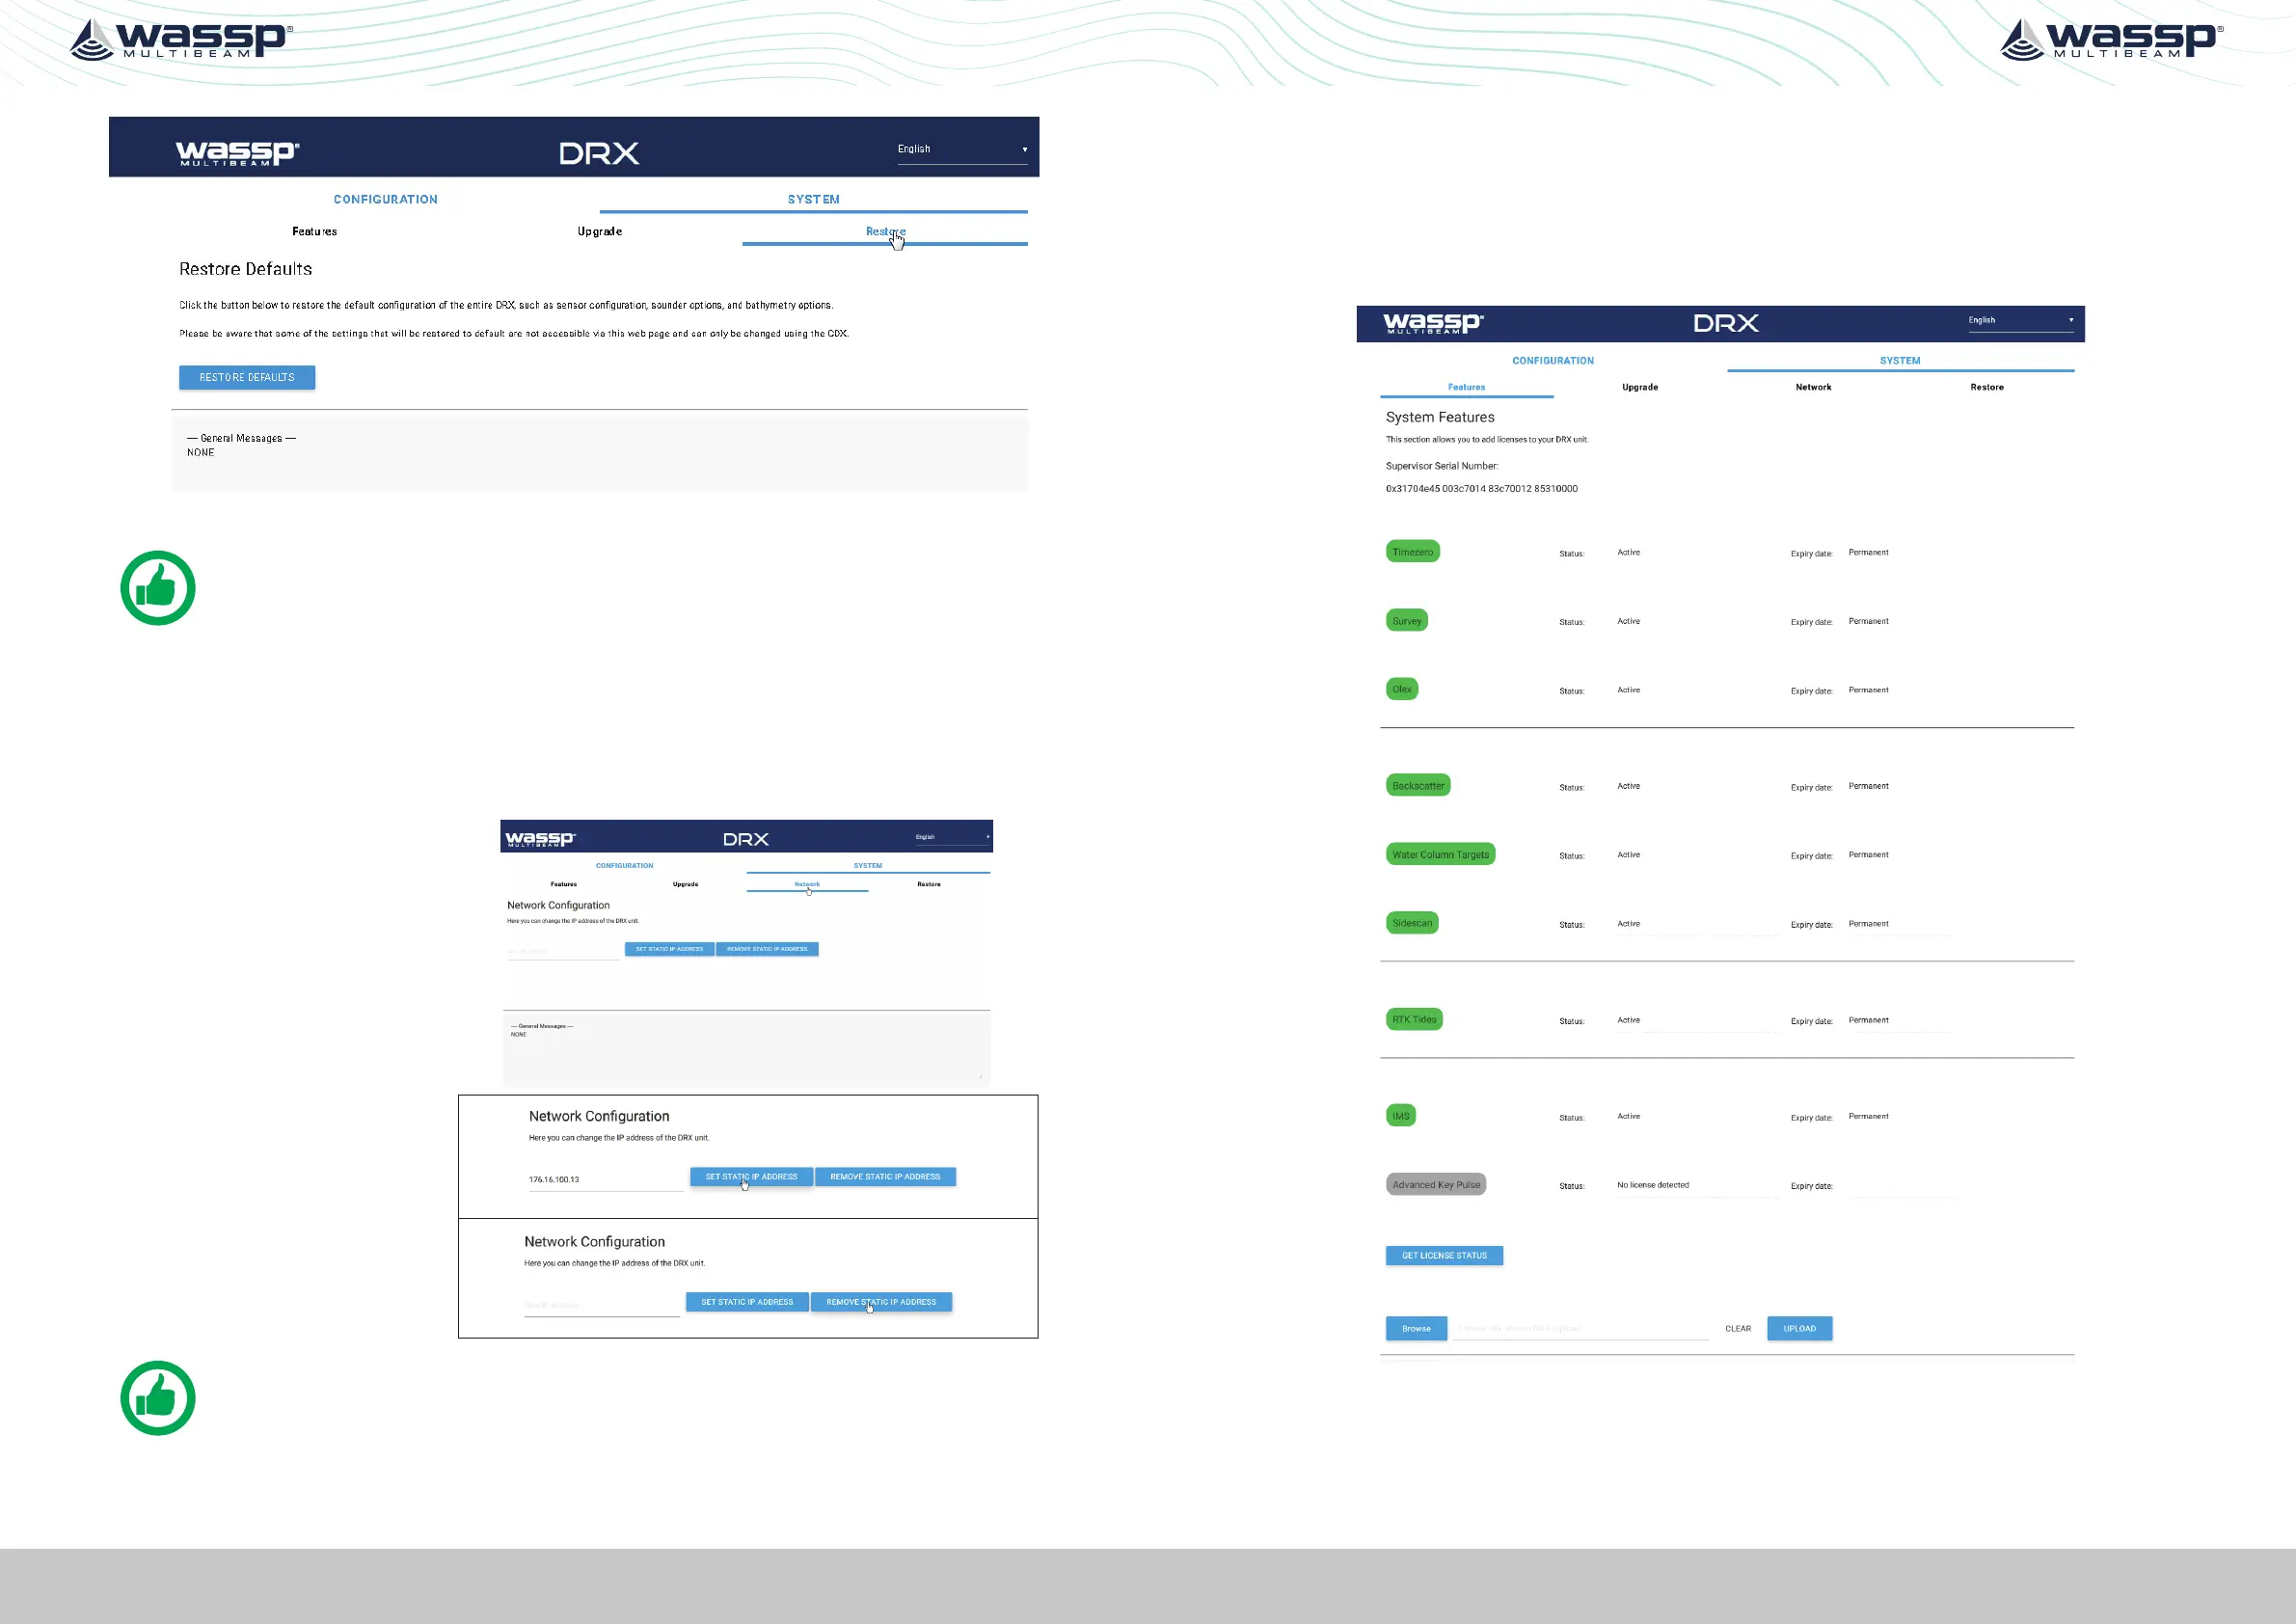
Figure 14. Restore Defaults Tab
NOTE: RESTORE DEFAULTS will restore entire DRX configuration, not just
Sensor Setup.
4.5. NETWORK CONFIGURATION
Network configuration allows setting the DRX to a fixed IP address.
By default DRX will be assigned an IP through Zero-configuration or by a DHCP server if
there is one on the LAN. By setting a fixed IP this will override automatic assignment.
1. Select SYSTEM tab and
select NETWORK tab.
2. Use the SET STATIC IP
ADDRESS button to set a
fixed IP.
3. Use the REMOVE STATIC
IP ADDRESS BUTTON
to revert to automatic IP
assignment.
NOTE: The PC/Client Application needs to be in the same subnet as the DRX
for connectivity. DRX IP address can always be identified using ‘Find my DRX’ ;
see “Figure 9. Find My DRX App” on page 24.
4.6. SYSTEM FEATURES
DRX optional features can be enabled through license keys.
To enable a feature, the appropriate feature license file needs to be purchased through
a WASSP dealer or directly through WASSP Ltd. The license will be supplied as a license
file over email, on a USB flash drive or other media. Available features can be seen by
selecting SYSTEM tab and selecting FEATURES tab.
Figure 15. System Features
 Loading...