Page 38 of 102 Page 39 of 102Doc: DRX Installation
Version: 7.1 January 2021
Doc: DRX Installation
Version: 7.1 January 2021
wassp.com wassp.com
DRX INSTALLATION MANUAL DRX INSTALLATION MANUAL
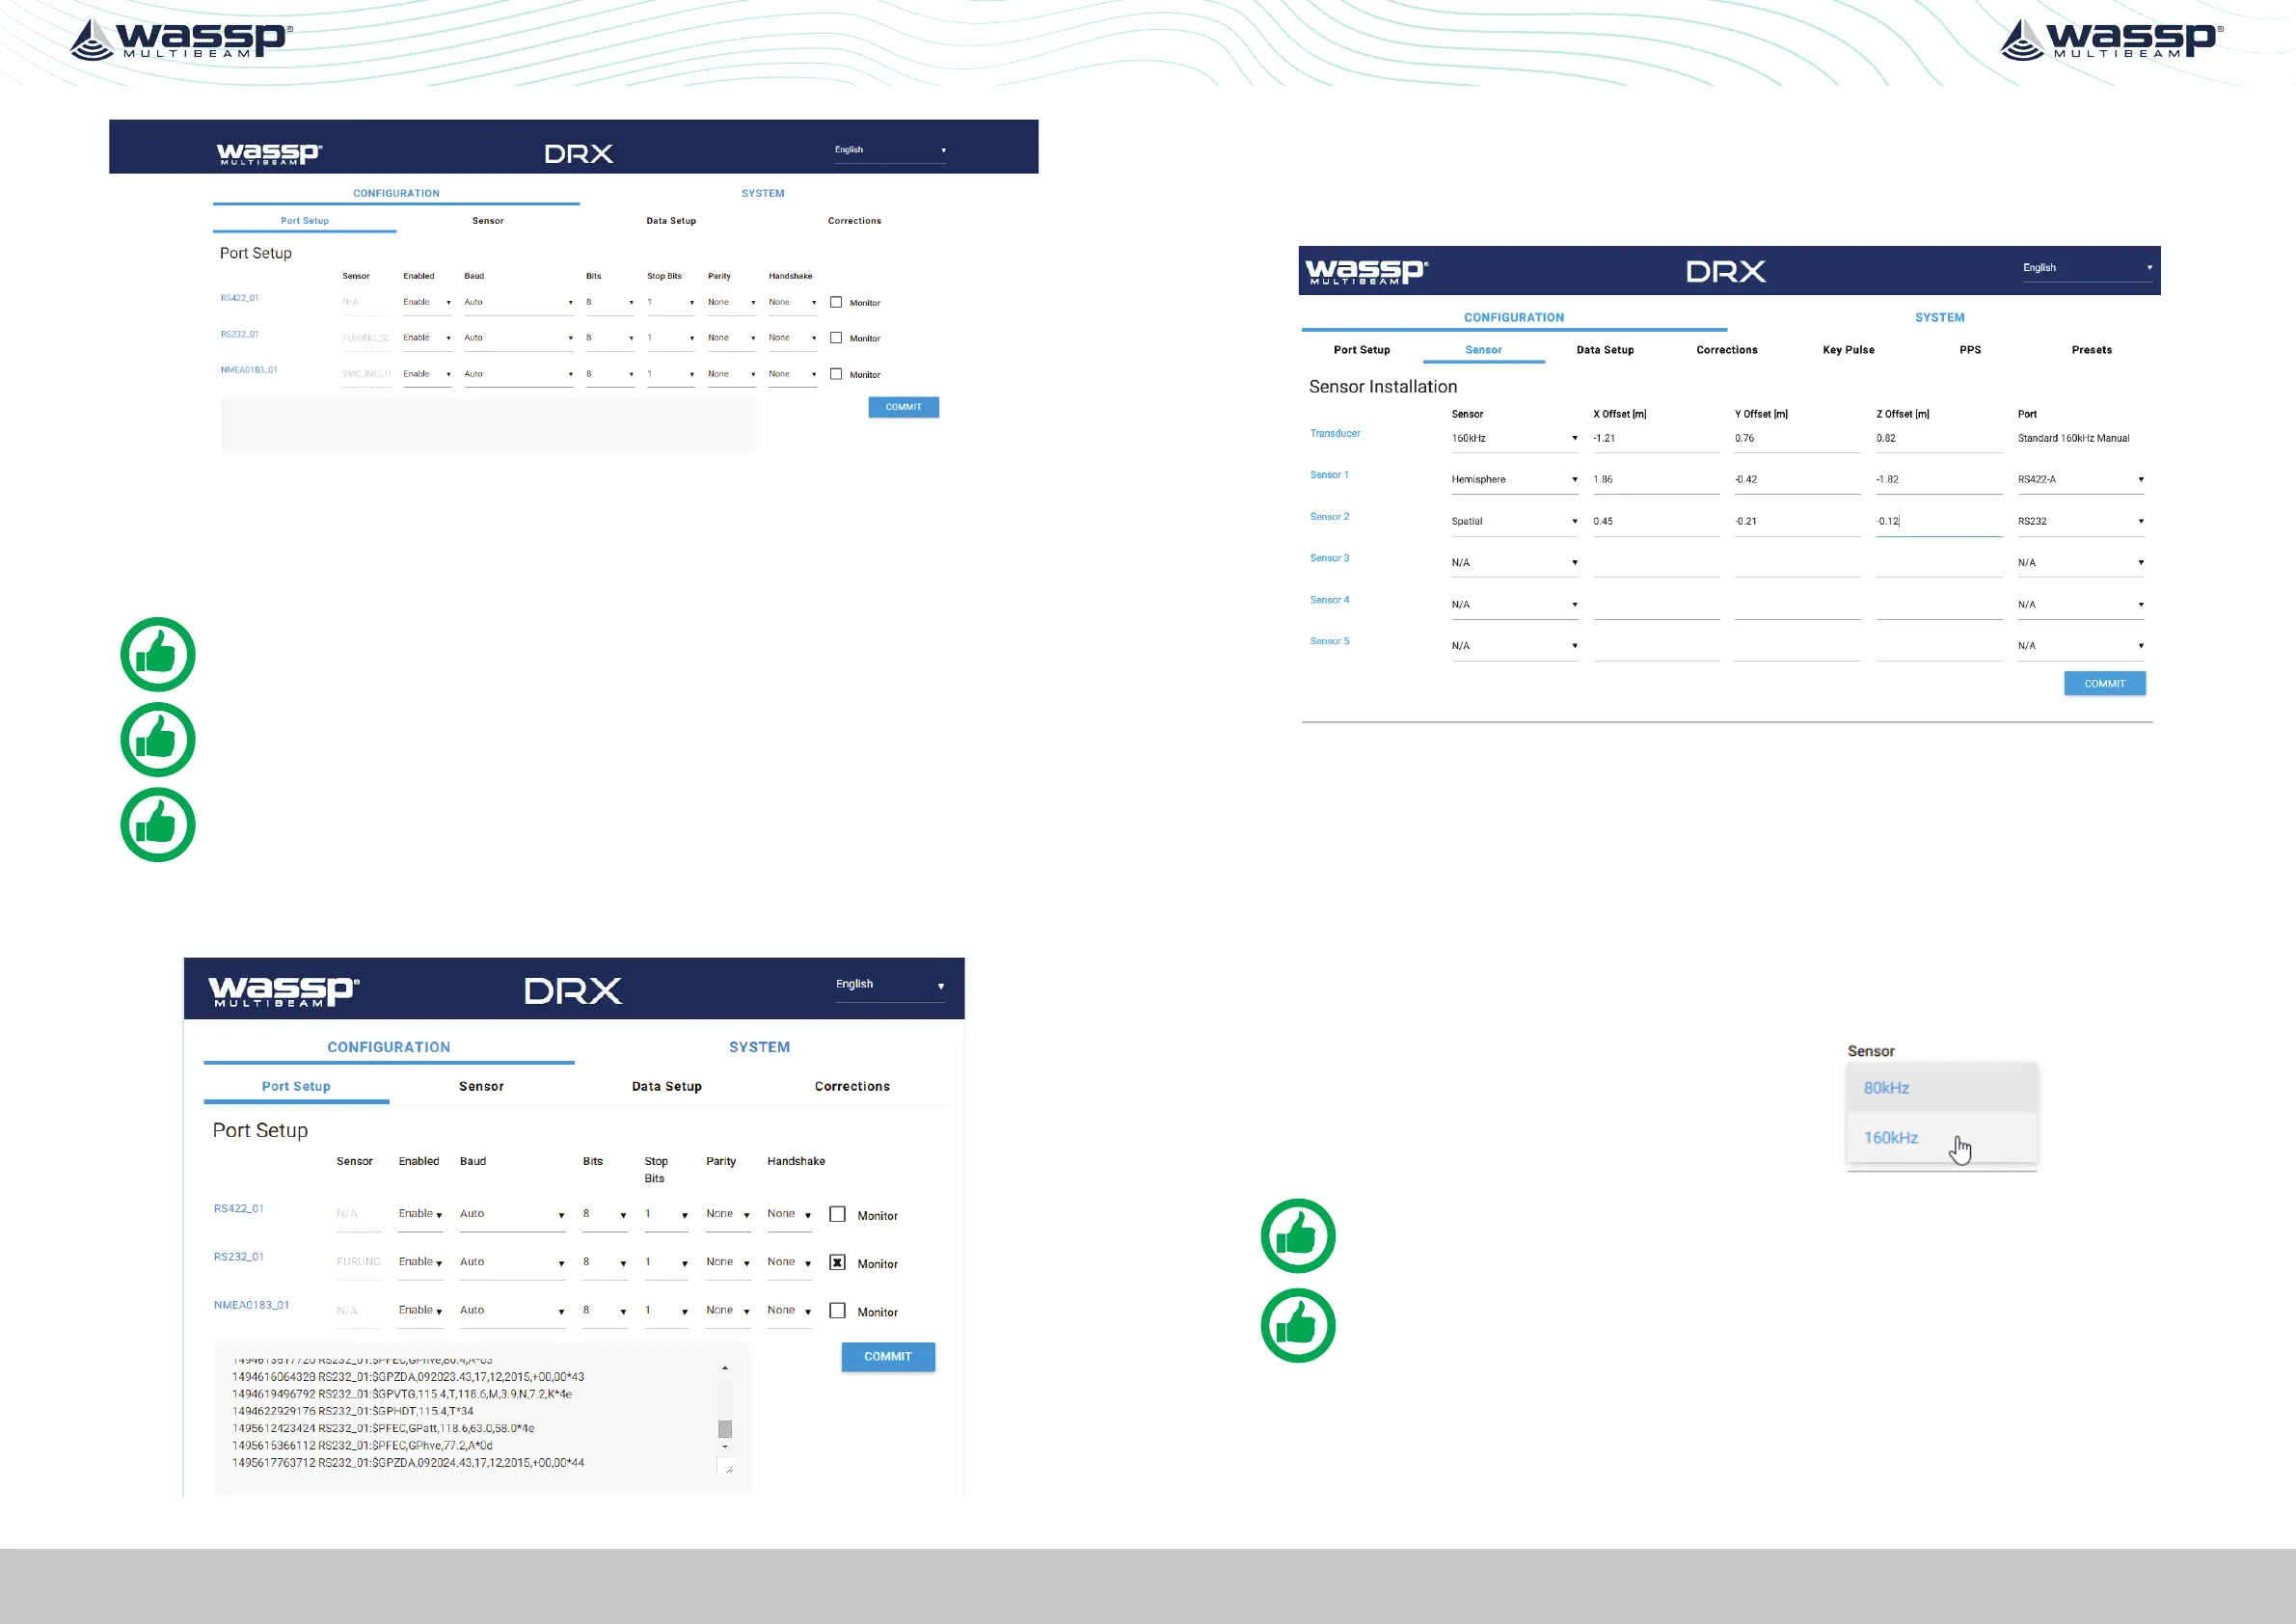
Figure 18. DRX Setup, Port Setup Table
The following options need to be set up for each of the DRX ports being used:
» Enabled; Marks a port as active or not active.
» Baud; Sets port’s baud rate to match the sensor baud rate. Bits, Stop Bits, Parity and
Handshake; Configures the port to match the incoming sentences from the sensor.
NOTE: You must COMMIT or these settings will be lost.
NOTE: Port assigned to sensor in the ‘Sensor’ tab.
TIP: F5 (refresh button) should be pressed if there is any doubt in data
consistency between the Webpage and the DRX.
The monitor check box can be selected to display the incoming sentences on the
specific port. This can be used to identify if the port is configured correctly and the
sensors are outputting the correct data.
Figure 19. DRX Setup, Port Setup Tab with Sensor Data
5.2.3. Sensor Tab
The SENSOR tab is used to configure the physical position of each sensor being used
and which port that sensor is connected to on the DRX. SENSOR tab is also used for
selecting transducer type.
Figure 20. DRX Setup, Sensor Tab
For each Sensor being used, set the following:
» SENSOR; Select the sensor type from the drop down list. Select USER DEFINED if
the sensor being used is not listed (any sensors not listed have not been specifically
tested with DRX).
» X, Y, Z OFFSET; Set the measurement as per section “5.1. Commissioning Step 1:
Ship Measurements” on page 34.
» PORT; Select the physical port on the DRX that the sensor is connected to from the
drop down list.
Transducer selection allows for currently available
WASSP transducer supported by DRX.
NOTE: You must COMMIT or these settings will be lost.
NOTE: Osets should be entered in meters to nearest cm (0.01m).
5.2.4. Data Setup Tab
The DATA SETUP tab is used to setup each external data type that is required by DRX to
function correctly. Each of the data types; position, heading, roll, pitch, heave and time
need to be set.
 Loading...