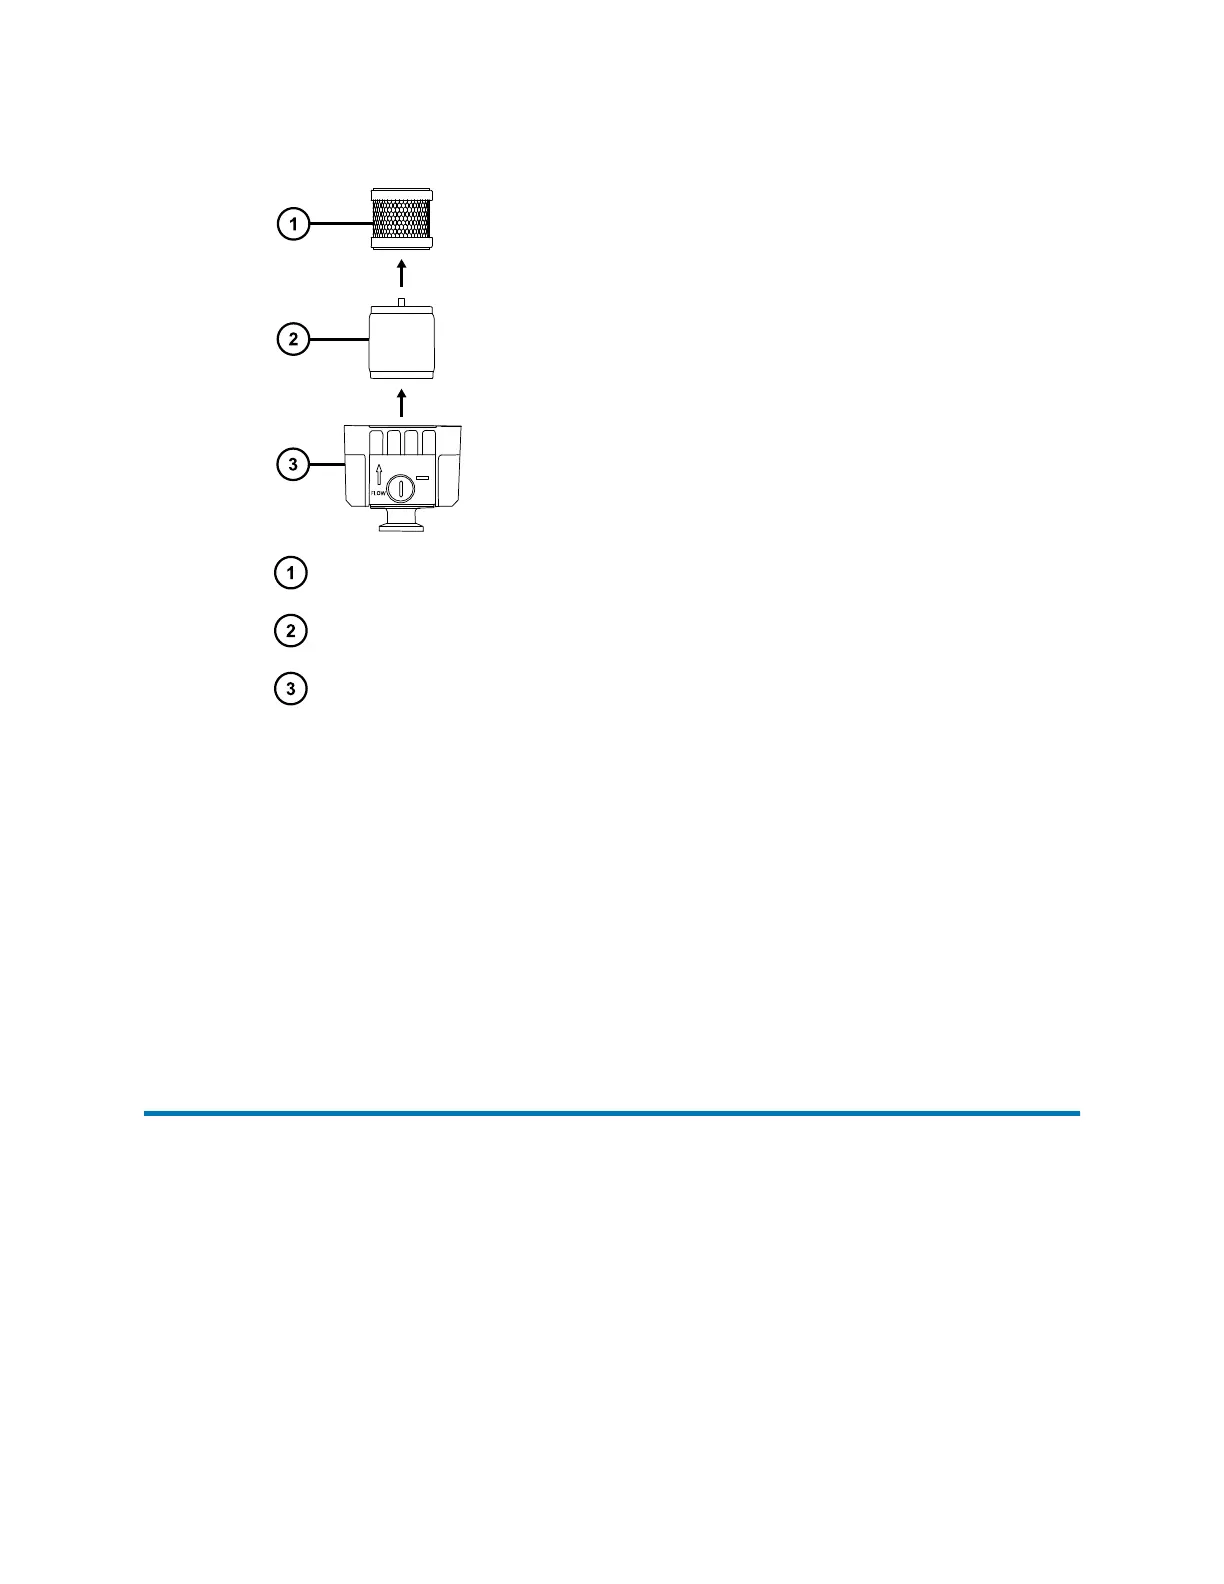
Figure 3–31: Filter elements
Odor element
Mist filter element
Lower filter case
6. Wipe the inside of the upper and lower filter cases with a paper towel or cloth.
Note: Do not remove O-rings from the filter case.
7. Fit the new filter elements.
Note: Ensure that the foam sealing rings on the top and bottom of the elements are
properly seated.
8. Fit the upper filter case to the lower filter case using the four filter case screws.
9. Secure the screws using the 4-mm hex wrench.
10. Connect the vacuum hose to the filter outlet.
3.19 Replacing the fluidics tubing
In the event of a blockage in the tubing connections between the fluidics system components, the
software prompts you to replace the tubing.
• For the probe, see Connecting the probe (Page 78).
August 20, 2021, 715005003 Ver. 04 (Previously released as Revision C)
Page 65