Technical Manual
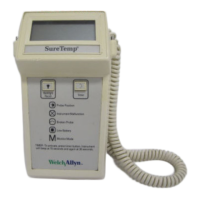
SureTemp
®
Model 670/SureTemp 4
®
Model 675 31
THERMOMETER DISASSEMBLY
Please note that if your thermometer is within the warranty period, you should return the unit to an
authorized service representative for servicing; failure to do so will invalidate the warranty.
WARNING: This instrument contains microelectronic devices which are highly susceptible to damage by
static discharge. Use proper handling and grounding techniques while working on the internal electronics.
1. Withdraw the probe from the probe storage channel.
2. Unplug the probe connector from the thermometer.
3. Peel the
°
F
-
°
C
/
NORMAL
-
MONITOR
label from the top of the thermometer.
4. Lay the thermometer on its front case.
5. Remove the
BATTERY ACCESS
screw from the thermometer back case.
6. Remove the battery door from the thermometer.
7. Remove the batteries.
8. Remove the other three screws from the thermometer back case.
9. Carefully remove the thermometer back case, keeping the thermometer electronics assembly and mid-
frame in the front case.
10. Remove the neck strap or neck strap pins.
11. Remove the two internal screws securing the display board to the thermometer front case.
12. Remove the electronics assembly by gently lifting the mid-frame and display board from the front case.
The electronics assembly can be removed from the mid-frame by carefully desoldering the battery wires
and horn wires from the main PCA, gently pulling outward on the two plastic tabs securing the PCA at
the top of the mid-frame, and carefully sliding the main PCA towards the top of the mid-frame until the
lower edge of the PCA clears the two retaining tabs on the mid frame.
 Loading...