18
PRINTING AND REMOVING MODELS
5.1 Printing a File
Having a 3D design le is the rst step to creating a 3D object. The ModelMaker Printer only
accepts and prints GCODE les. The included MicroSD card has GCODE ready les available for you
to get started. To see what objects are available on the MicroSD card please see page 36.
We highly recommend that you print an object from the MicroSD card rst before attempting to
use 3D designs from other sources. For more information about creating or downloading other 3D
designs please see page 24.
To start printing your rst 3D object:
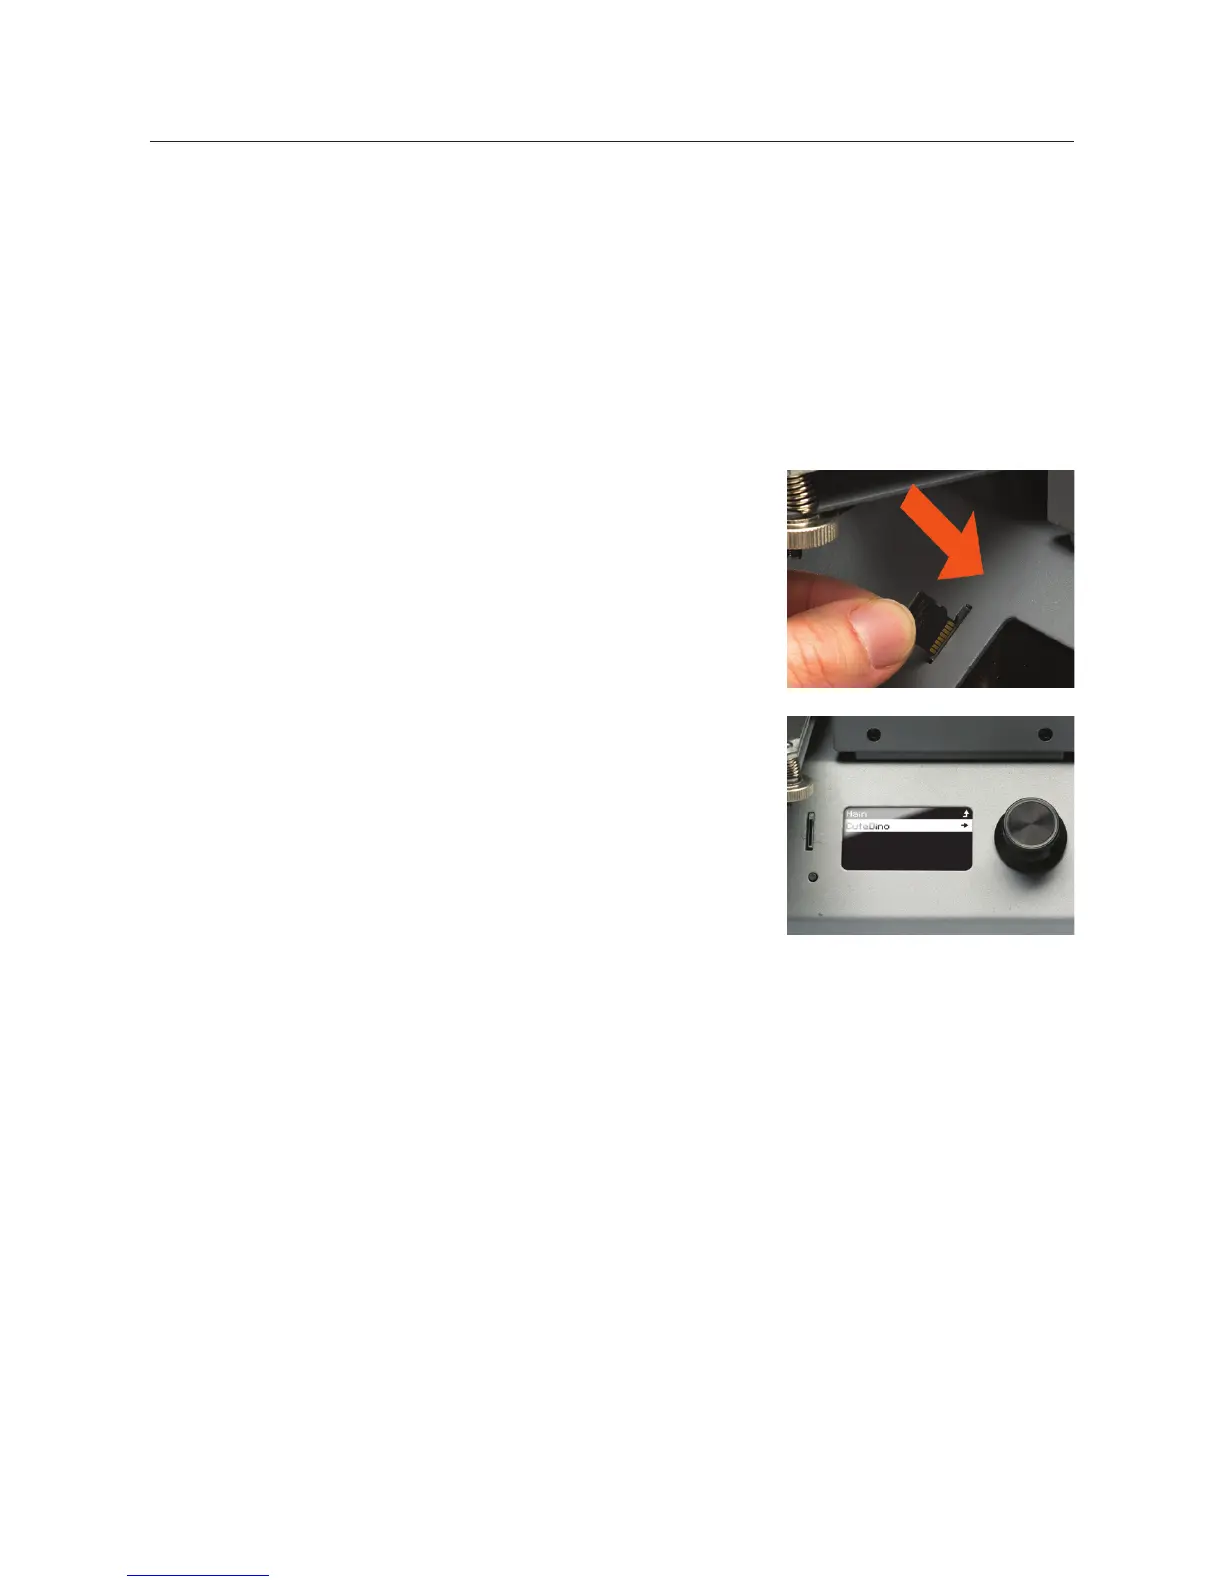
1. Check the print bed has been levelled correctly
2. Insert the included MicroSD Card into the memory card slot
next to the LCD screen with the label facing to the left as
shown
3. Enter the main menu and select Print File
4. Select the le you would like to print
5. The printer will return to the status screen and display
“Heating…” in the upper left corner of the display. The nozzle
temperature will heat until it reaches the target temperature
6. Once the nozzle reaches the target temperature the printer
will automatically begin printing the le
NOTE:
• MicroSD Memory Cards (up to 32GB) should be formatted to FAT32. If there is no MicroSD Card
inserted the Main Menu will display No SD card and no les will be available to print
• If your le is not printing correctly, press the main dial button and select ‘Stop print’ from the
menu. Ensure the extruder is raised prior to removing the print o the print bed
• Immediately turn o the machine if any of the motors are jamming or forcing against the chassis
• If you cannot access the Print menu, it is likely the MicroSD Card is not mounted properly. Try
removing and reinserting the MicroSD Card.
Instructions for printing les direct from your PC via USB are detailed on page 26