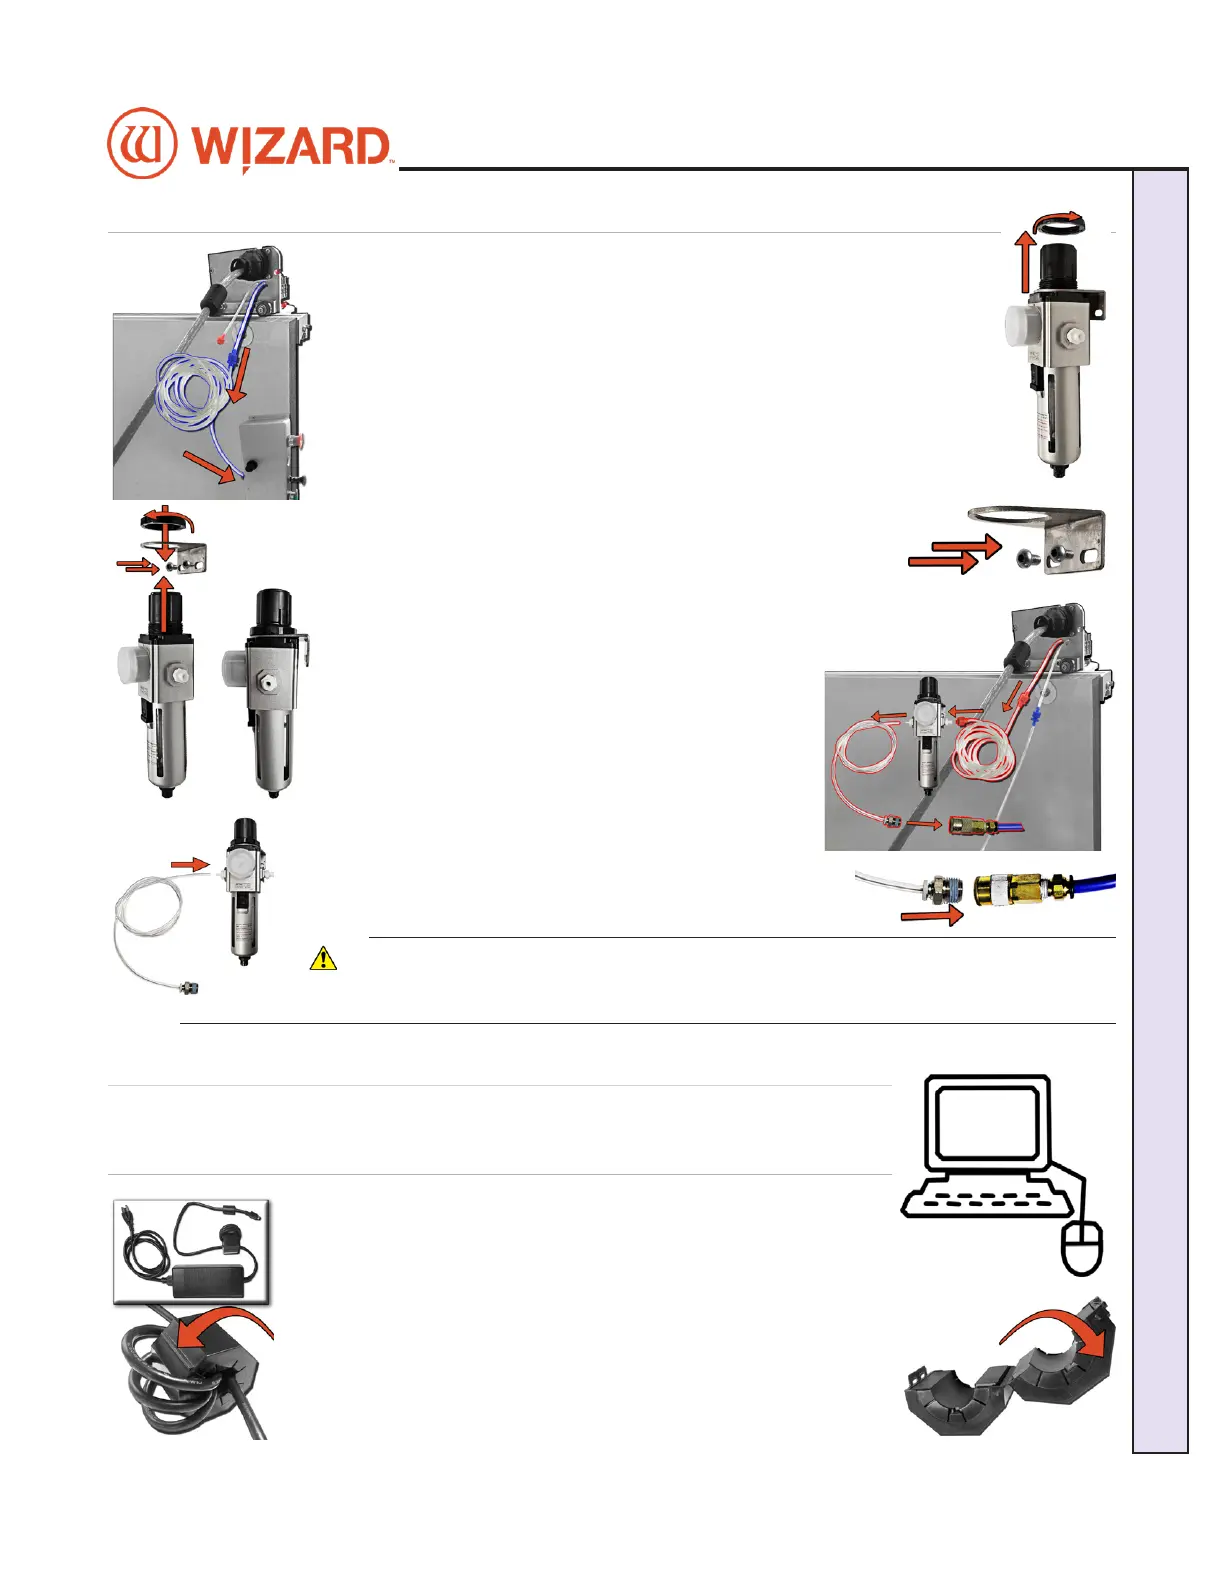
Attaching the Air Lines
1. Follow the air line with the blue connector from the top of the gantry.
Make sure that it is connected to the blue connector on the control panel
box on the back of the board, and that none of the air lines are crimped.
2. Unscrew the locking ring from the top of the air regulator and remove
the air regulator bracket.
3. Screw the air regulator bracket into the left large wall bracket or the
back left leg of the stand. Make sure the screws are positioned at the
bottom of the bracket.
4. Insert the air regulator up through the air regulator bracket with the
glass bowl down. Replace the locking ring to the top of the
air regulator to secure it into place, making sure not to crimp
any air lines. The hardware to connect the air regulator to the
stand is included in the air regulator kit.
5. Follow the air line with the red connector from the
top of the gantry. Connect it to the right side of the air
regulator by inserting the red connector on the end
and twisting it into place.
6. If it’s not already connected, insert the air regulator
line (short air line with quick disconnect) onto the left
connector of the air regulator.
7. Plug the quick disconnect located on the short air
line from the left side of the air regulator into the main
air supply.
8. The air compressor should supply at least 100psi.
9. Turn on the air.
* CAUTION: The air regulator is factory-set. Do not
make adjustments to it.*
Connect the Computer and Driver Pack/ECU
Hook up Computer and Peripherals
1. Place the computer on the computer stand.
2. If your ECU has an external power supply (blue ECU), locate
the Ferrite tube, which looks like a black donut. Open the Ferrite
tube, wind the ECU power supply output cable around the inside of
the Ferrite three times, then close it shut.
20-34300-1A GettingStartedManual9K-70FrameShop
02/23/24
11
Wizard CMC Model 9000 Hardware and Software Getting Started Manual
Wizard™ CMC Model 9000 Hardware and Software Getting Started Guide