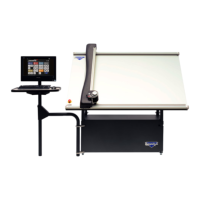
Using the Pen Cartridge
Changing the Pen in the Pen Cartridge
The pen cartridge is unlabeled and is black with a metal pen holder
column attached to the base. The pen icon within the software is a
small stylus symbol.
1. Push blade cartridge release down to eject the pen cartridge.
2. Turn the pen locking screw counter-clockwise to loosen it and slide the pen
locking bolt away from the cartridge base.
3. Remove the existing pen by extracting it from the pen holder.
4. Replace with a new pen by placing the tip in rst and inserting the pen into the
pen holder.
5. Slide the pen locking bolt back into place
and tighten the pen locking screw clockwise
snug (do not overtighten screw) to lock it
into place.
6. Place the pen cartridge into the head. The
pen holder should be to the right, with the
pen tip facing toward the CMC.
7. Continue to the Install Pen utility on the
pen congurations tab. You may need to run
this utility again if you change pen types.
8. If the pen is not going to be used for a while, please remove it from the pen
holder and replace the pen cap to keep it from drying out.
Blades and Cartridges
See the FrameShop Getting Started Cartridge Manual at https://wizardcutters.atlassian.net/wiki/x/7g4qYw
to nd additional information on the other cartridges and on changing the blades.
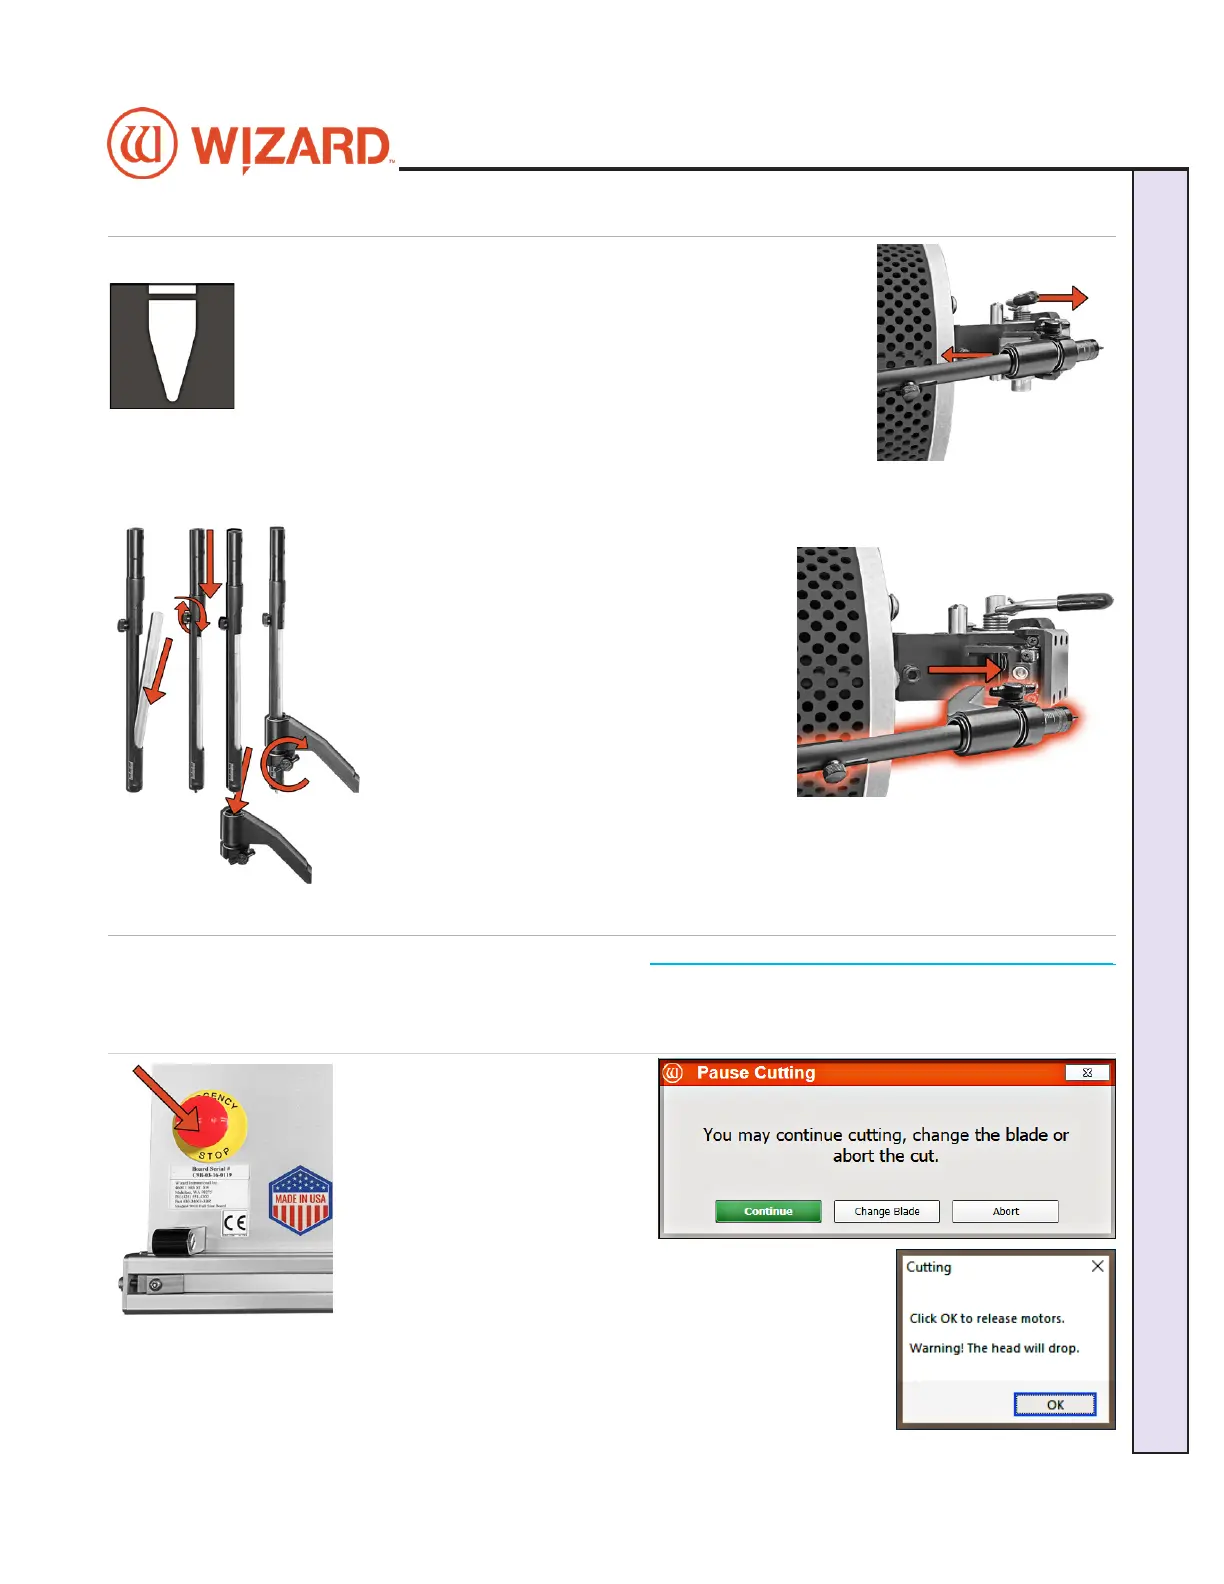
Aborting a Cut
1. Hit the Emergency Stop
button to abort the cut. You
could also hit any key on the
keyboard to abort the cut.
Alternatively, hitting the
spacebar pauses the cut and
gives option to abort.
2. A prompt to click OK to release the motors will display. Click OK and the motors
will immediately release.
20-34300-1A GettingStartedManual9K-70FrameShop
02/23/24
25
Wizard CMC Model 9000 Hardware and Software Getting Started Manual
Wizard™ CMC Model 9000 Hardware and Software Getting Started Guide