EVOM™ Manual
World Precision Instruments 15
4. Press
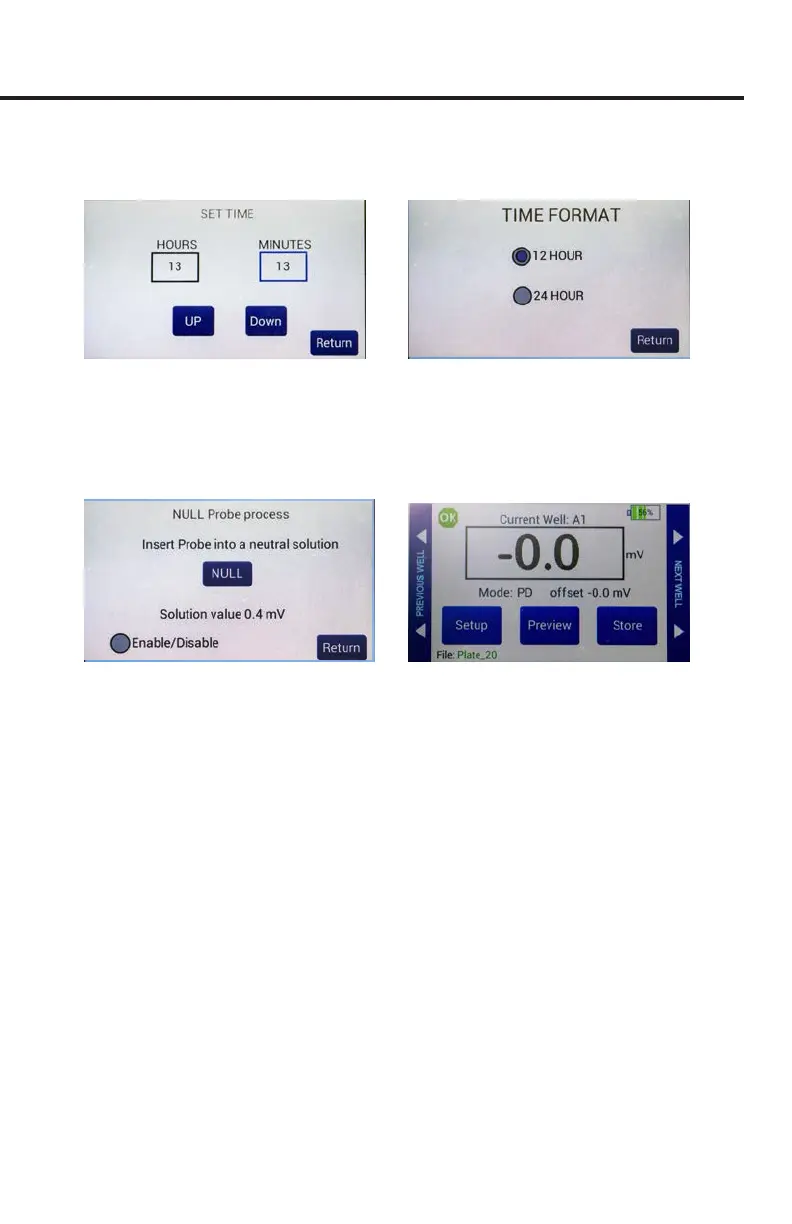
Set Time
(Fig. 19). Set the appropriate time and press
Return
.
5. Press
Time Format
(Fig. 20). Choose 12 hour or 24 hour and press
Return
.
Fig. 19—(Left) Set the time and press Return
Fig. 20—(Right) Choose the time format and press Return
Probe Null
1.
Press Probe Null on the Setup page to access the NULL Probe Process screen (Fig. 21).
Fig. 21—(Left) Null probe process.
Fig. 22—(Right) The potential dierence oset shows on the main screen under the reading.
2. Place the electrodes in a saline media.
3. Push the
NULL
button. Wait for the second message stating ”Solution value 0.0”
before returning. This action removes any voltage osets on the electrodes and
neutralize the oset charge on V
1
-V
2.
4. Select the
Enable/Disable
radio button to use the oset.
5. Press
Return
. The potential dierence oset shows on the main screen under the
reading. An electrode check should show 0.0 mV. The saved data le reects the
oset (Fig. 22).
Storing Data
The EVOM™ Manual has two options to save data.
• Data may be saved to a USB ash drive plugged into the USB port on the side of
the unit.
• Data may also be stored on a PC with the use of the EVOM™ Companion
Application. The EVOM™ Manual can store up to three plates of data without