Xerox DocuMate 3920
User’s Guide
64
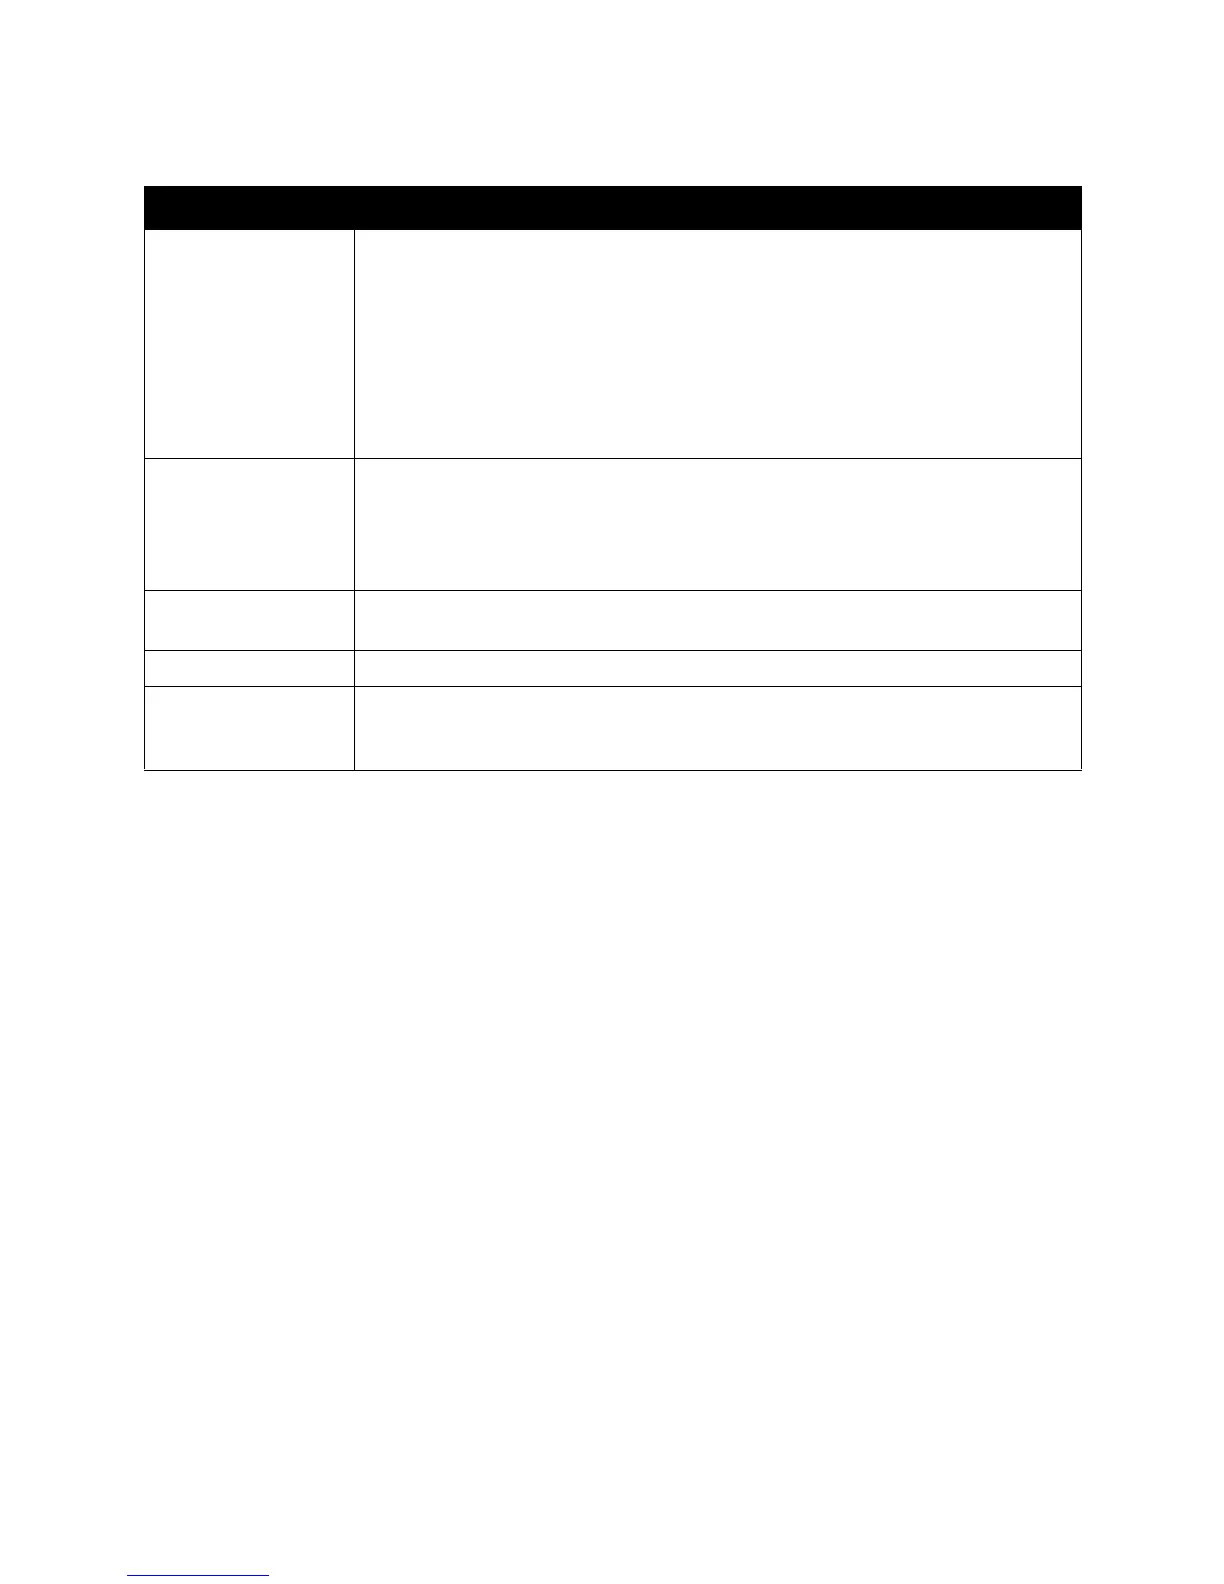
Option Description
Target URL Choose the type of protocol of your filing server in the first field.
Choices include FTP, HTTP, CIFS, HTTPS.
Enter the target URL in the second field. You can enter either the domain name or the
IP address with the directory path. Note that the directory will be varied due to differ-
ent protocols. The route starts from the root directory in FTP, HTTP, HTTPS, and CIFS.
For example, ftp://, http://, and file:\\, https://.
Important note:
You must use this CIFS filing format, file:\\IP\computer name\folder name, to set CIFS
URL.
Port # Enter the port number for the server where you want to store your scanned document.
Default values: ftp:21, http:80, CIFS:139, https:443
If the default value is different from the real case, input the correct port number in
this field. Touch anywhere on the “Port” field to bring up the soft keyboard to enter
the text.
File Name The file name of your scanned document without a file extension. If you have not
entered a value in the box, the system will set a default file name.
Report to e-mail Enter an e-mail address if you wish to send the filing report to an e-mail.
Create a Subfolder Choose ON to enable the server to create a subfolder when sending the scanned
image to the destination server. (Check if you are authorized to write under the desti-
nation server.)
 Loading...