Xerox DocuMate 4790
User’s Guide
62
In the Scan Configuration Properties window, the Scan Settings, Page Settings, Advanced Settings,
and Redaction Settings tabs are always available. When the Kofax VRS module is installed, the VRS
Settings tab will also be available for all destinations.
Based on the selected destination, additional settings tabs may also be available. If you see one of
these additional settings tabs please refer to the appropriate section, as listed below, for instructions
on configuring these destination specific options.
•Use the Storage Options tab to choose the storage folder for scans sent to the Transfer to
Storage destination, as described on page 77.
•Use the Device Settings tab to configure Printer or Fax destinations, as described on page 85.
•Use the PaperPort tab to choose the destination folder, in the Nuance PaperPort application, as
described on page 87.
•Use the SharePoint tab to specify a SharePoint site, user credentials, and destination folder, as
described on page 89.
•Use the FTP Settings tab to specify an FTP site, user credentials, and destination folder, as
described on page 92.
•Use the SMTP Configuration tab to specify an SMTP server, user credentials, and destination
email address, as described on page 95.
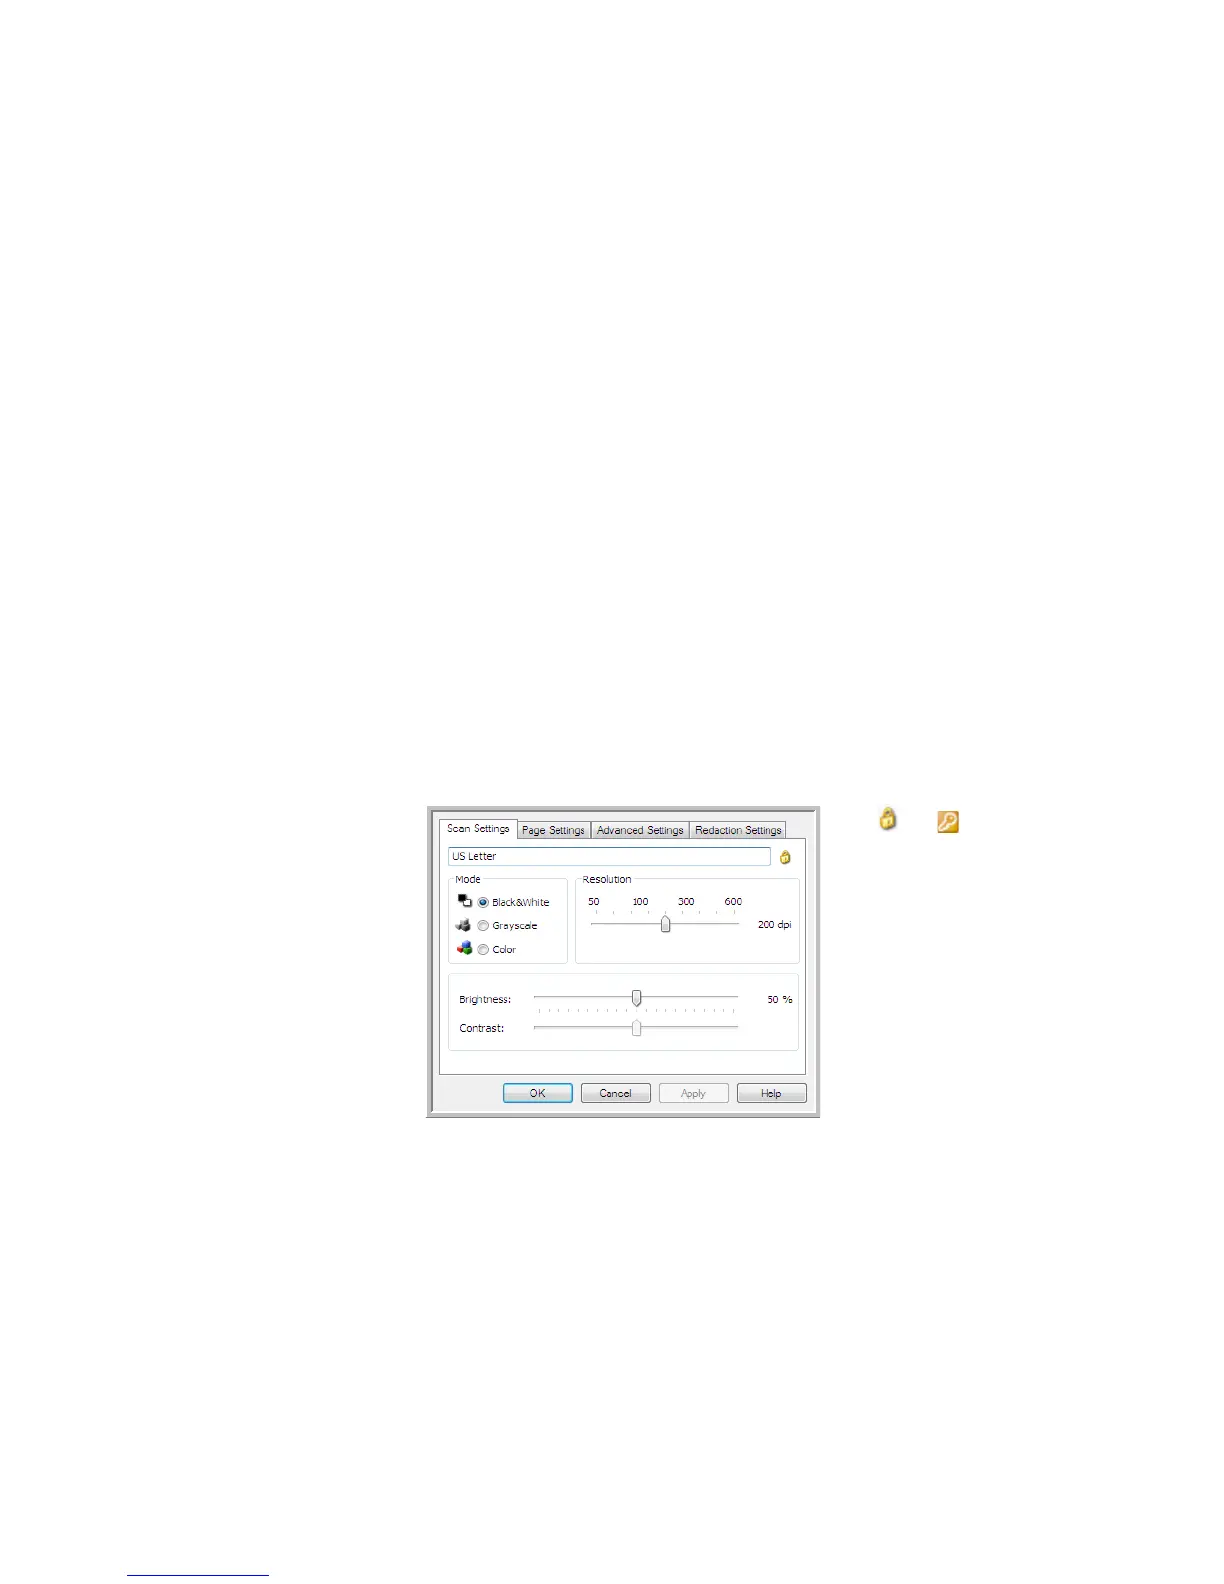
Scan Settings Tab
On the Scan Configuration Properties dialog box, type a name.
Mode—Select a scanning mode:
• Black&White to scan in black and white. For example, letters and memos are usually scanned in
black and white.
• Grayscale to scan items such as documents containing drawings or black and white photographs.
• Color to scan color photographs and other color items. Color scans have the largest file size.
Resolution—Drag the slider to the right or left to adjust the dots per inch (dpi) of the resolution. The
higher the dpi setting, the sharper and clearer the scanned image. However, higher dpi settings take
longer to scan and produce larger files for the scanned images.
If the configuration is
locked, click the lock
to unlock it. The icon
becomes a key.
Type a new name for the
configuration.
Select the scan mode
and drag the slider to set
the resolution.
Drag the sliders to set the
Brightness and Contrast.
 Loading...