June 2014
4-11
Xerox® WorkCentre® 3025 Multifunction Printer Service Manual
REP 1.6
Repairs
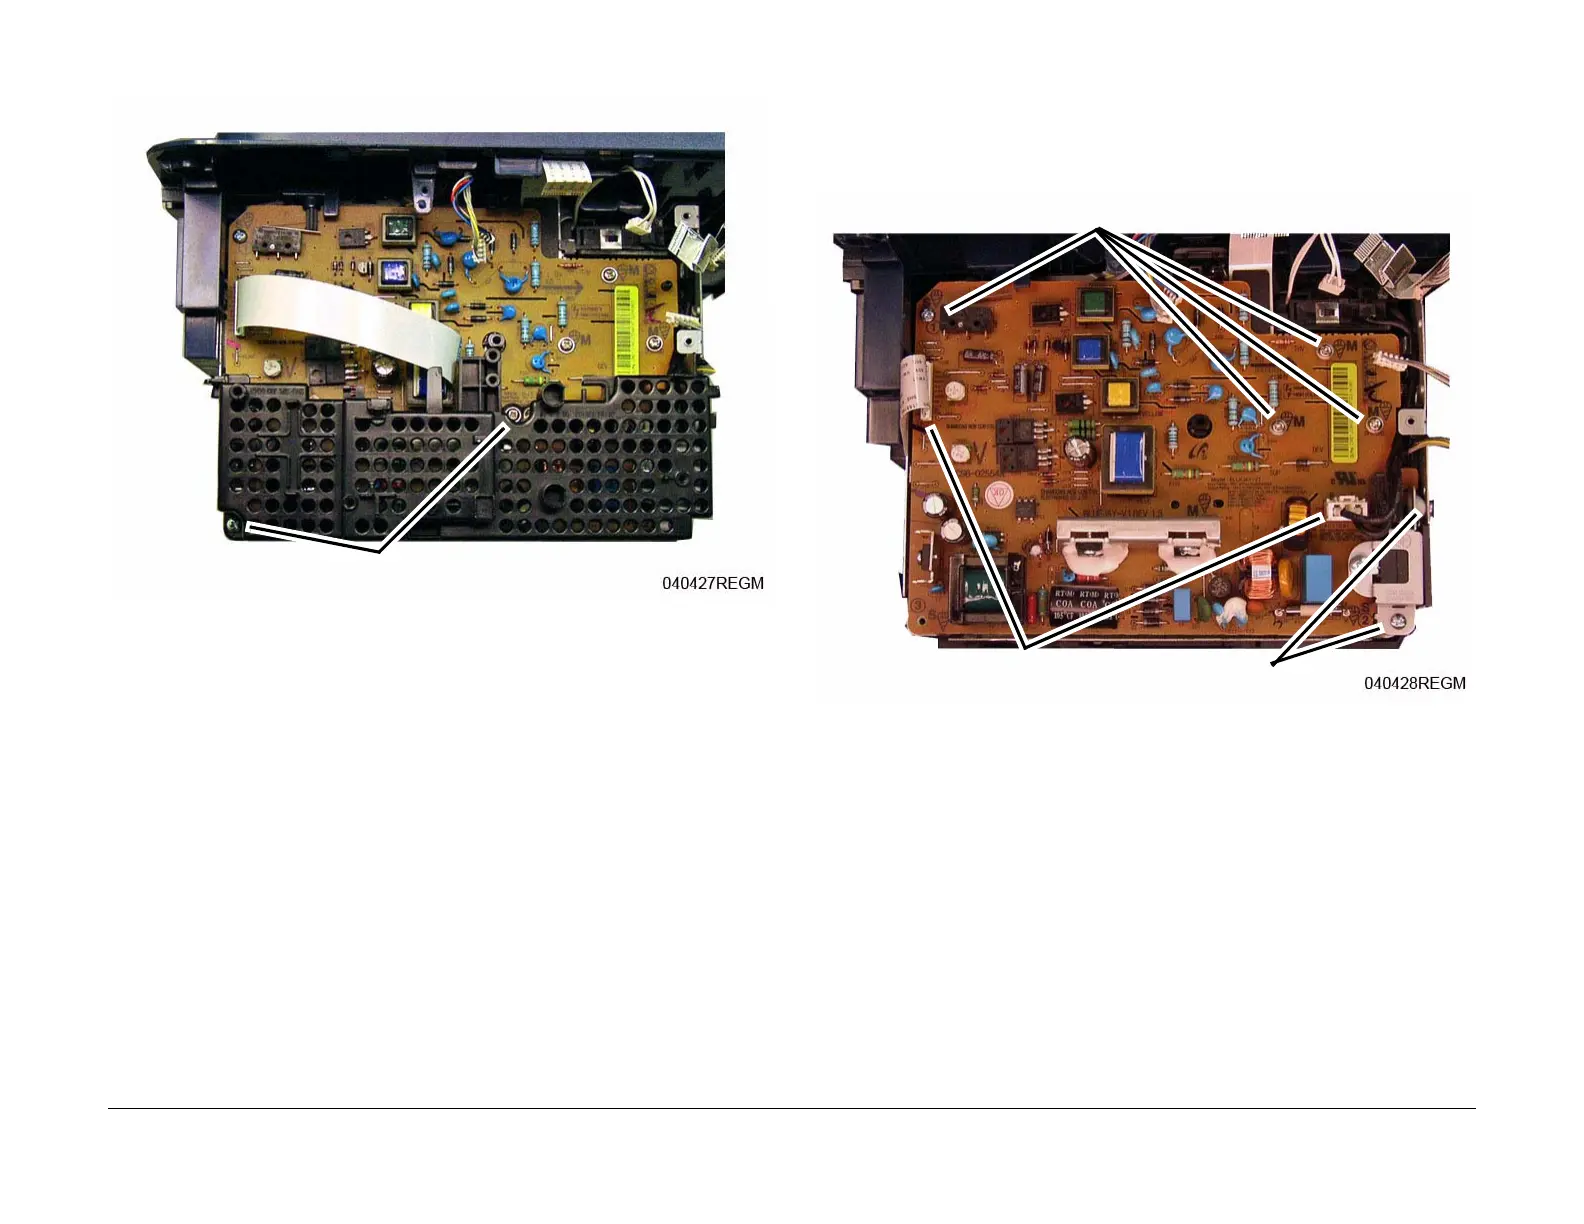
5. Remove the Plastic Shield (2 screws) (Figure 2).
Figure 2 Plastic Shield Screws
NOTE: Be careful not to lose the High Voltage Spring Contacts when removing the SMPS
/ HVPS PWB from the Frame.
6. Remove the LVPS / HVPS PWB (Figure 3).
a. Disconnect the Fuser and Main PWB connectors.
b. Remove the screws (6) and the LVPS / HVPS PWB.
Figure 3 SMPS /HVPS PWB Screws
Replacement
NOTE: Tapered Plastic Screws and Round Machine Screws are used to hold the PWB to the
frame. Make sure that the Plastic Screws go into plastic components and Machine Screws go
into the metal frame.
Install the components in the reverse of removal.
Screws
Screws
Connectors
Screws
 Loading...


