7
Installation
(continued)
Follow the steps below to properly set up your Xerox WorkCentre.
A
D
C
E
B
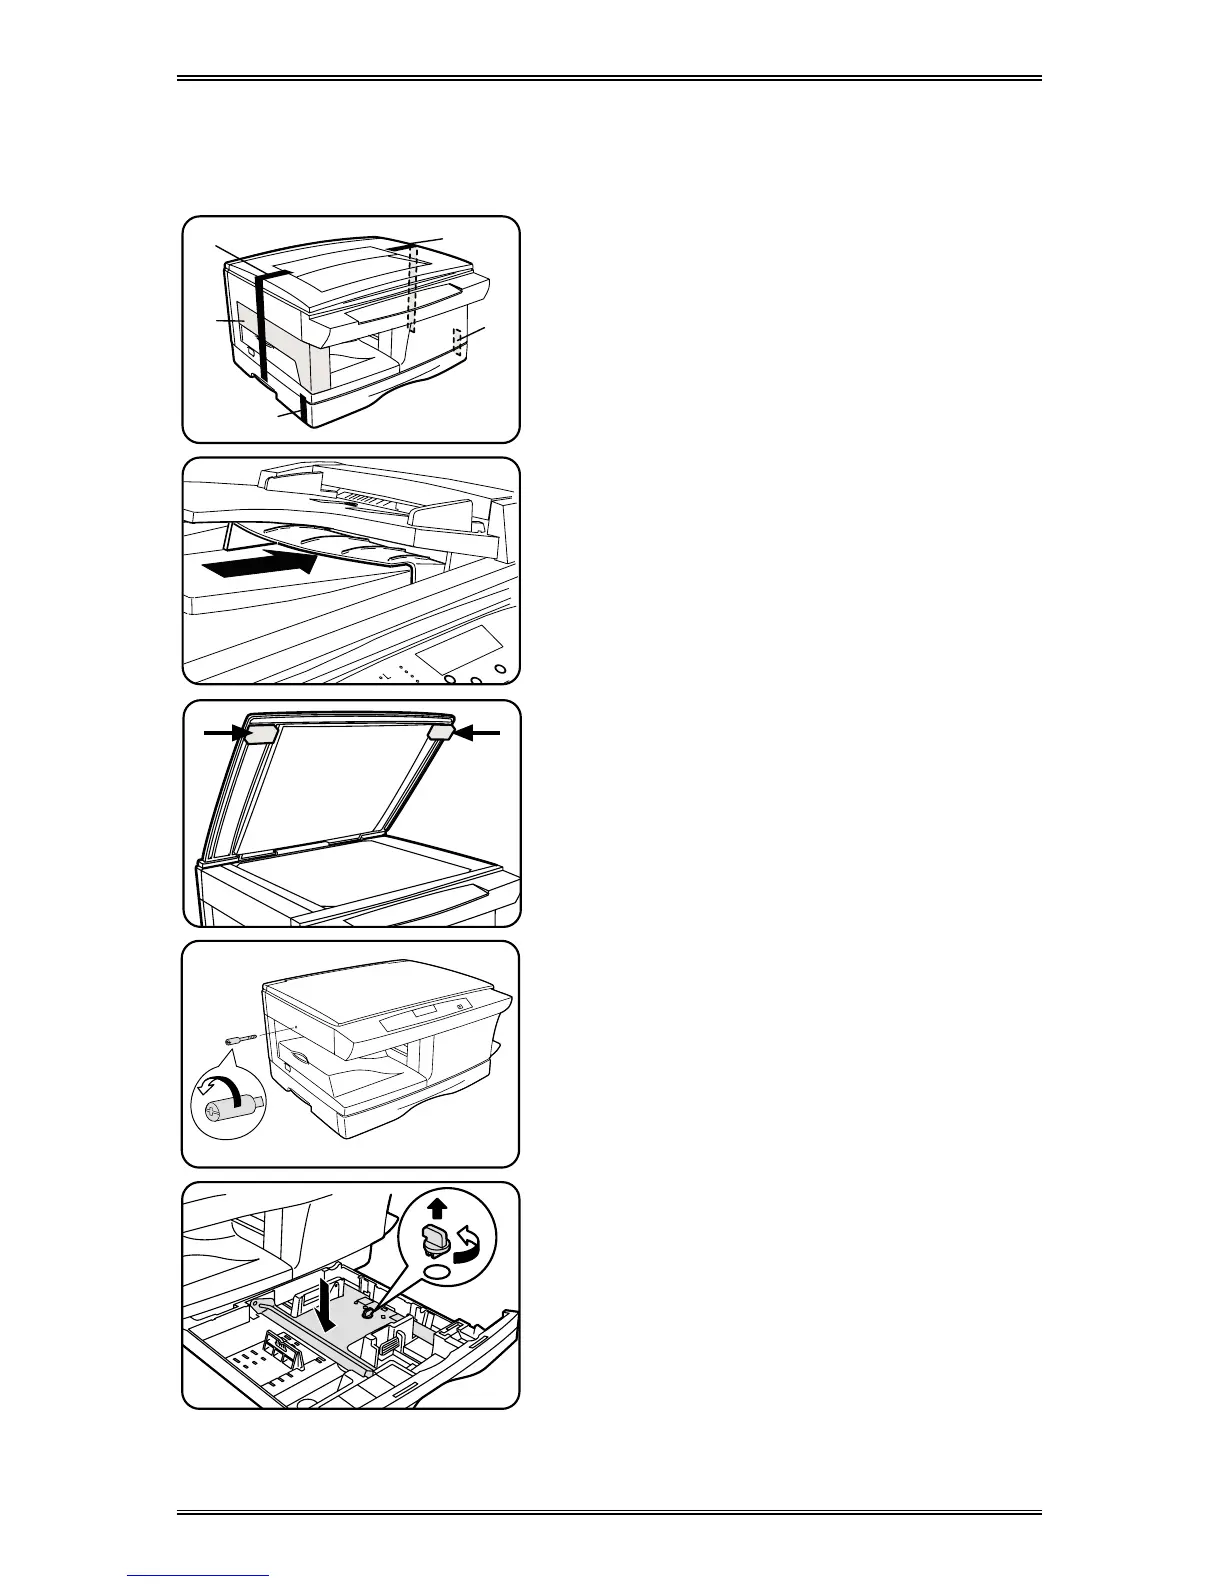
1. Remove the bag from the WorkCentre.
2. Remove the pieces of tape
A, B, C,
D,
and the packing material
E
.
XD130df/155df copier only
Remove the tape and the packing material
supporting the clear plastic 2-sided tray.
XD130df/155df copier only
To ensure the 2-sided tray is in the correct
position, gently push it in the direction
shown by the arrow.
3. Open the document cover and remove
the packing materials shown.
4. Unscrew and remove the shipping
screw from the left side of the
WorkCentre.
CAUTION:
The WorkCentre will
malfunction if the shipping screw is not
removed.
5. Lift and pull open the paper tray. Turn
and remove the paper tray button.
CAUTION:
Paper will misfeed if the paper
tray button is not removed.
For the XD
120f/
130df/
155df copier
only
Note:
Be sure to remove the pressure
plate lock from both paper trays.