8
Installation
(continued)
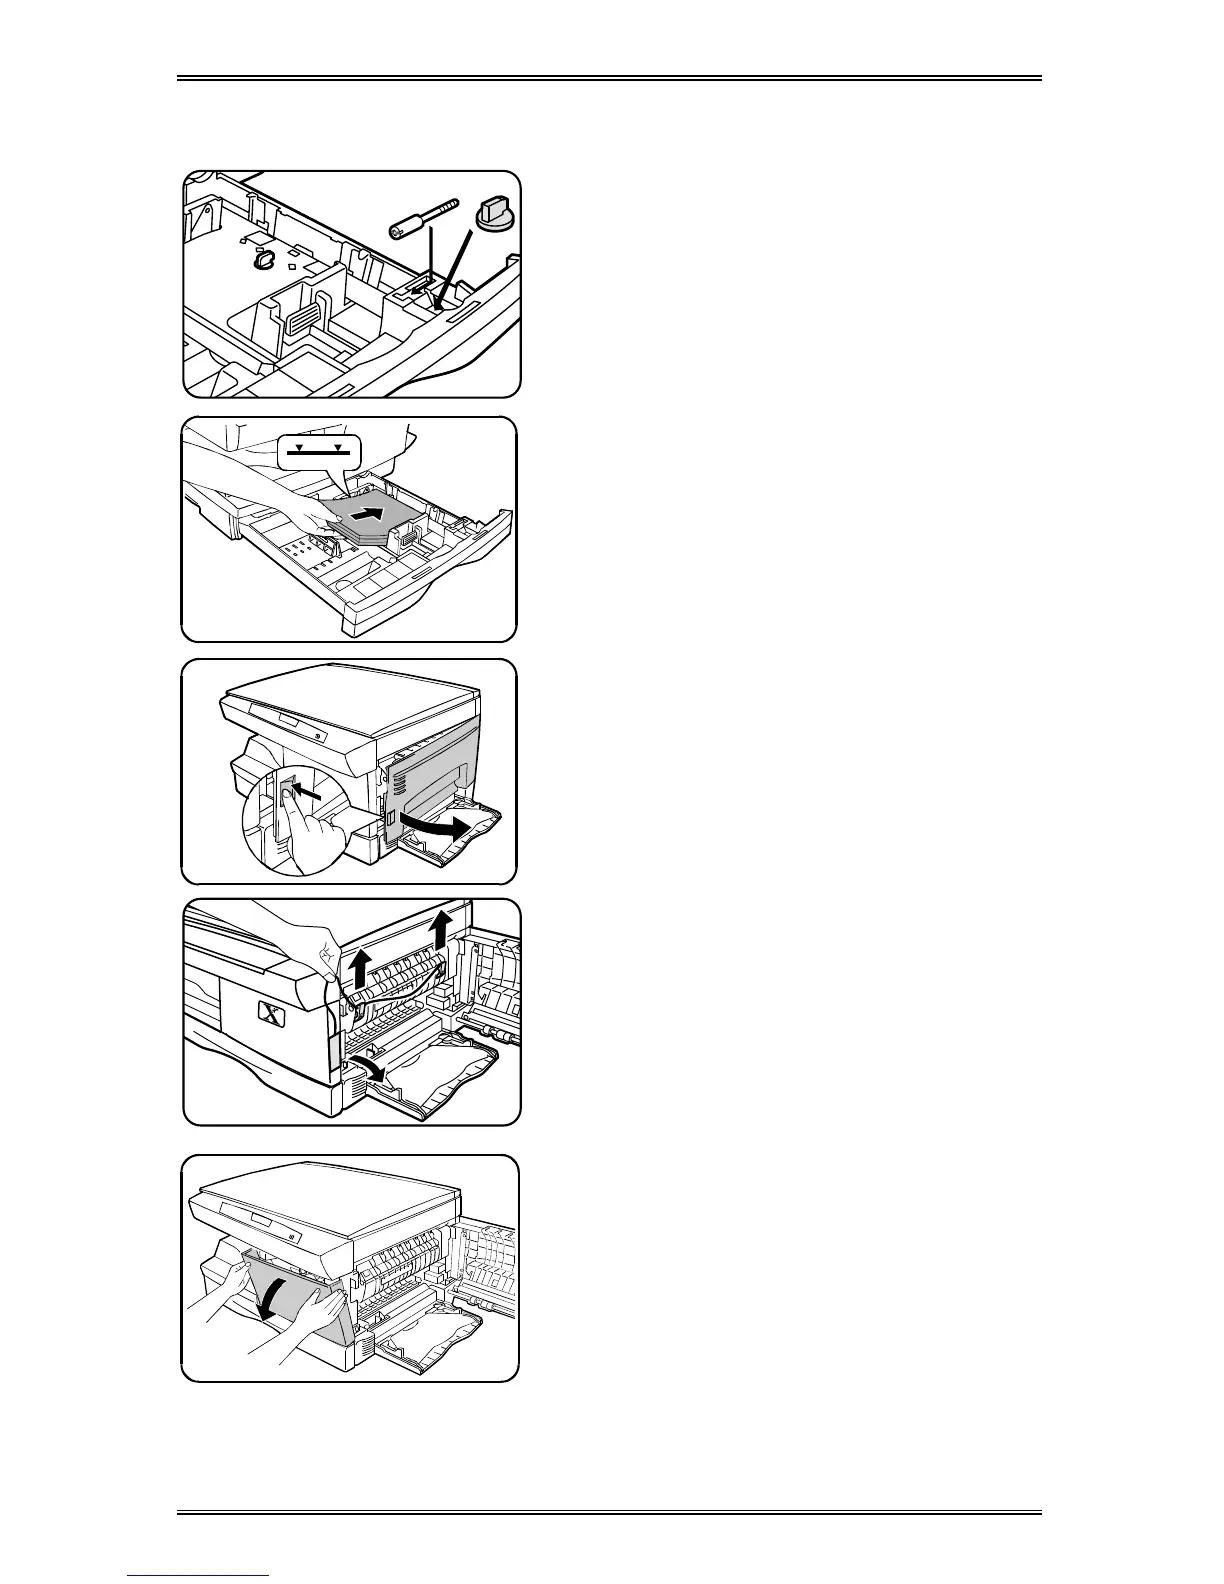
6. Secure the paper tray button and the
shipping screw in the locations shown.
•
Turn the paper tray button to secure
its storage position.
Note:
Save the paper tray button and the
shipping screw. They will be needed if the
WorkCentre has to be moved.
7. Load paper into the tray.
•
Refer to the
Loading Paper
section
for additional information.
•
Do not fill above the max line.
8. Push the paper tray firmly back into the
WorkCentre.
Note:
Ensure that the alternate paper tray
is lowered (XD 104/
130df/
155df only).
9. Press the release lever to open the side
cover.
10. Remove the Caution tape from the
cover.
11. Remove the two red fuser pins by
pulling the string upward one at a time.
•
Discard the fuser pins.
Note:
Misfeeds will occur if the fuser pins
are not removed.
CAUTION:
Ensure that the side cover is
always open before opening the front
cover.
12. Press the front cover release buttons to
open the front cover.
 Loading...


