9. If using the ATX supply 8-pin (2x4) PCIe power connector, plug the connector into VCU128
board JP1. The PC can now be powered on.
FPGA Configuration
The VCU128 board supports two of the ve UltraScale+™ FPGA conguraon modes:
• Quad SPI ash memory (2 Gb)
•
JTAG using:
○ USB JTAG conguraon port (U8 FT4232HL + USB J2 micro-AB)
○ Xilinx
®
Plaorm Cable USB II, 2 mm, keyed at cable header (J4)
Each conguraon interface corresponds to one or more conguraon modes and bus widths, as
listed in the following table. The mode switches M2, M1, and M0 are on SW1 posions 2, 3, and
4, respecvely. The FPGA default mode seng M[2:0] = 001 selects the master SPI
conguraon mode.
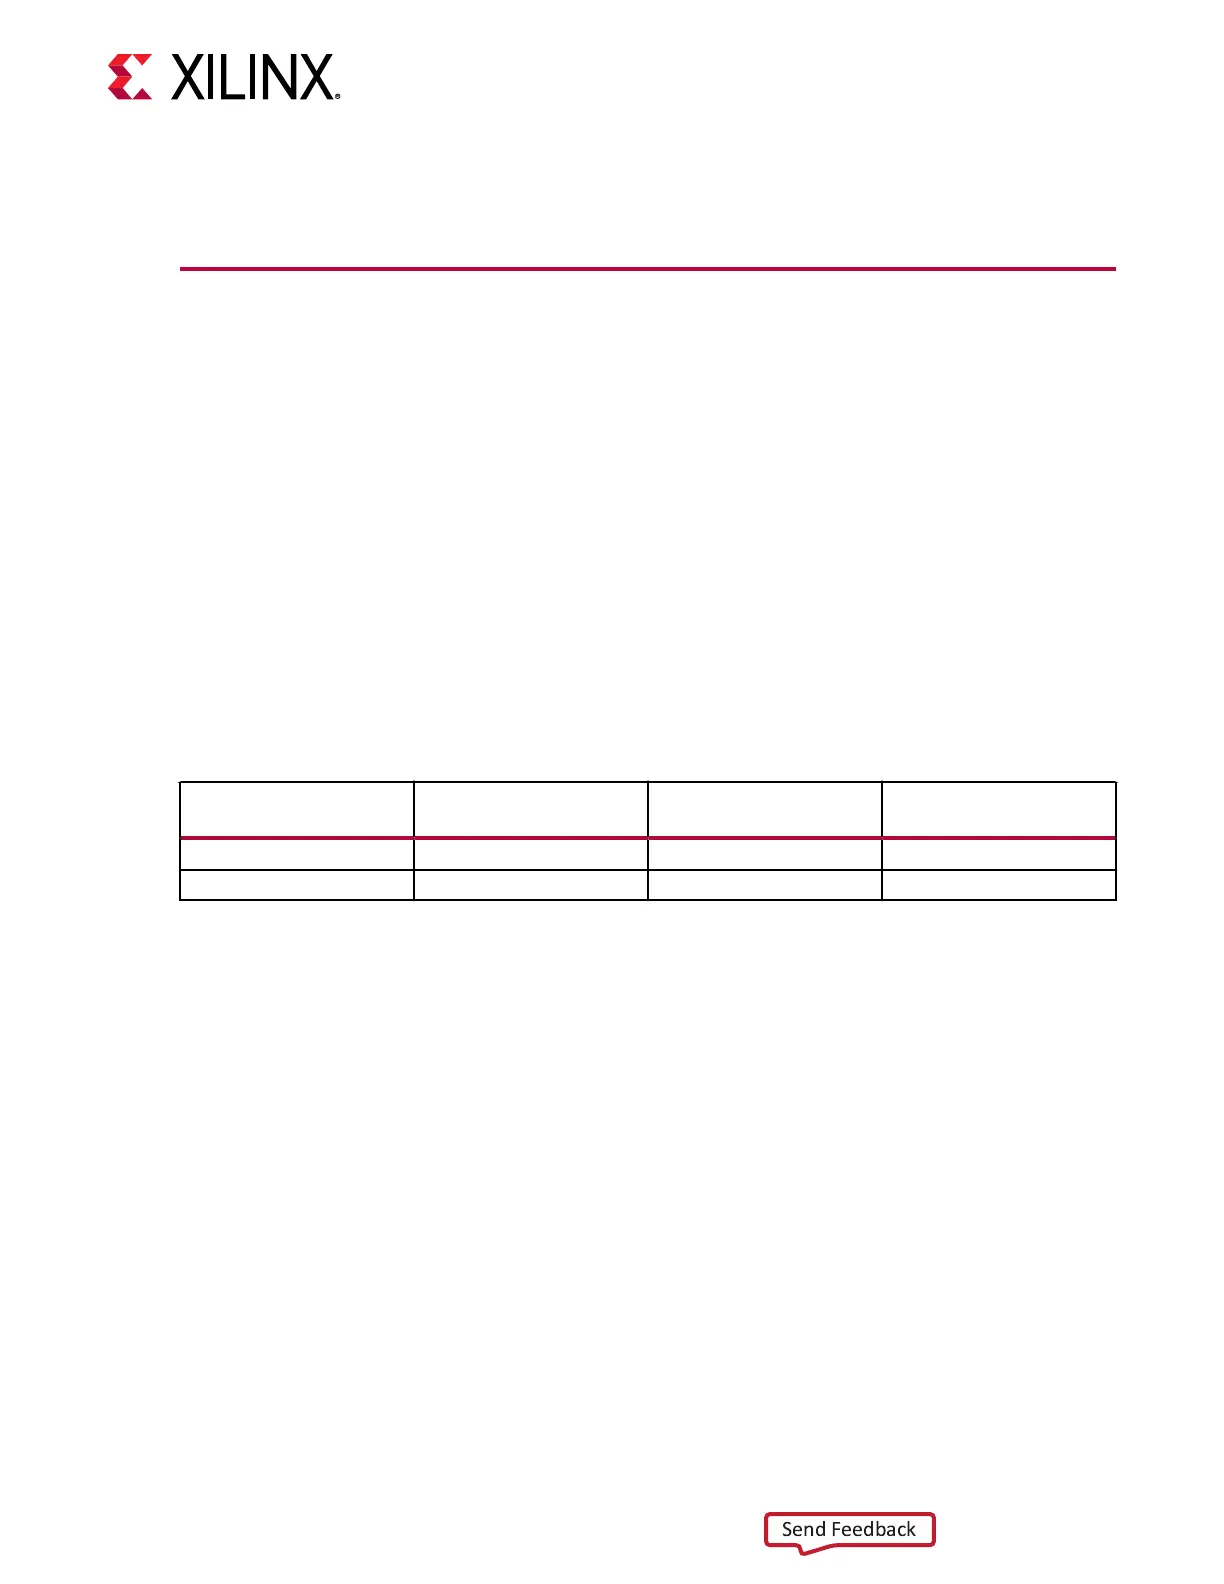
Table 4: Configuration Modes
Configuration Mode
SW1 DIP Switch
Settings M[2:0]
Bus Width CCLK Direction
Master SPI
1
x1, x2, x4 Output
JTAG
101
x1 NA
For complete details on conguring the FPGA, see UltraScale Architecture Conguraon User Guide
(UG570). The following gure shows the conguraon mode DIP switch SW1 JTAG switch
posions.
Chapter 2: Board Setup and Configuration
UG1302 (v1.0) December 21, 2018 www.xilinx.com
VCU128 Board User Guide 16