32
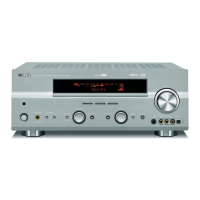
RX-V1800/HTR-6190/DSP-AX1800
RX-V1800/HTR-6190/
DSP-AX1800
ユーザーモードで書き込む方法
● 必要なツール
・ DVDまたはCDプレーヤー(DIGITAL OUTPUT
(OPTICALまたはCOAXIAL)端子付き)
・ 光ファイバーケーブル(OPTICAL端子使用時)
・ デジタル音声ピンケーブル(COAXIAL端子使用時)
・ 最新のファームウェアCD
※ 最新のファームウェアCDは、最新のファーム
ウェアを指定のダウンロード先からダウンロー
ドして製作してください。
● 操作方法
※ 本機およびDVD/CDプレーヤーの電源コードをAC
コンセントから抜いてください。
1. 本機とDVD/CDプレーヤーを下記のように接続しま
す。(Fig.16)
Writing method using USER mode
● Required tools
• DVD or CD Player with DIGITAL OUTPUT (OPTI-
CAL or COAXIAL) terminal
• Optical cable (when OPTICAL terminal is used)
• Digital audio pin cable (when COAXIAL terminal is
used)
• Latest firmware CD
* To make the latest firmware CD, download the
latest firmware from the specified download
source.
● Operation procedures
* Disconnect the power cable of the main unit and
DVD/CD player from the AC outlet.
1. Connect the main unit and DVD/CD player as shown
below. (Fig. 16)
When OPTICAL IN terminal is used / OPTICALIN端子使用時
Fig. 16
2. DVD/CDプレーヤーの電源コードをACコンセント
に接続します。
3. 本機のSTRAIGHTキーを押しながらMASTER
ON/OFFキーを押し、アドバンスドセットアップ
を起動します。(Fig.17)
4. 本機のSLEEPキーを約3秒間押し続けます。
(Fig.17)
<CDDAUpgrader1800>が表示されます。
2. Reconnect the power cable of DVD/CD player to
the AC outlet.
3. Press the “MASTER ON/OFF” key of the main unit
while simultaneously pressing the “STRAIGHT”
key of the main unit. Then the ADVANCED SETUP
mode is activated. (Fig. 17)
4. Press and hold the “SLEEP” key for about 3 sec-
onds. (Fig. 17)
<CDDA Upgrader 1800> is displayed.
Main unit / 本機 DVD/CD player / DVD/CDプレーヤー
Optical cable
光ファイバーケーブル
 Loading...