8-13
Lower unit
Face the identification mark b on the ball
bearing toward the forward gear.
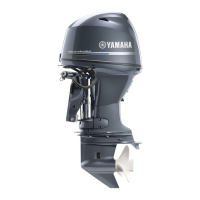
Installing the drive shaft
1. Install the forward gear a.
2. Install a new clip b to the drive shaft c.
NOTICE: Do not reuse a clip, always
replace it with a new one.
3. Install the washer d, pinion e, and drive
shaft c, and then install the E-clip f.
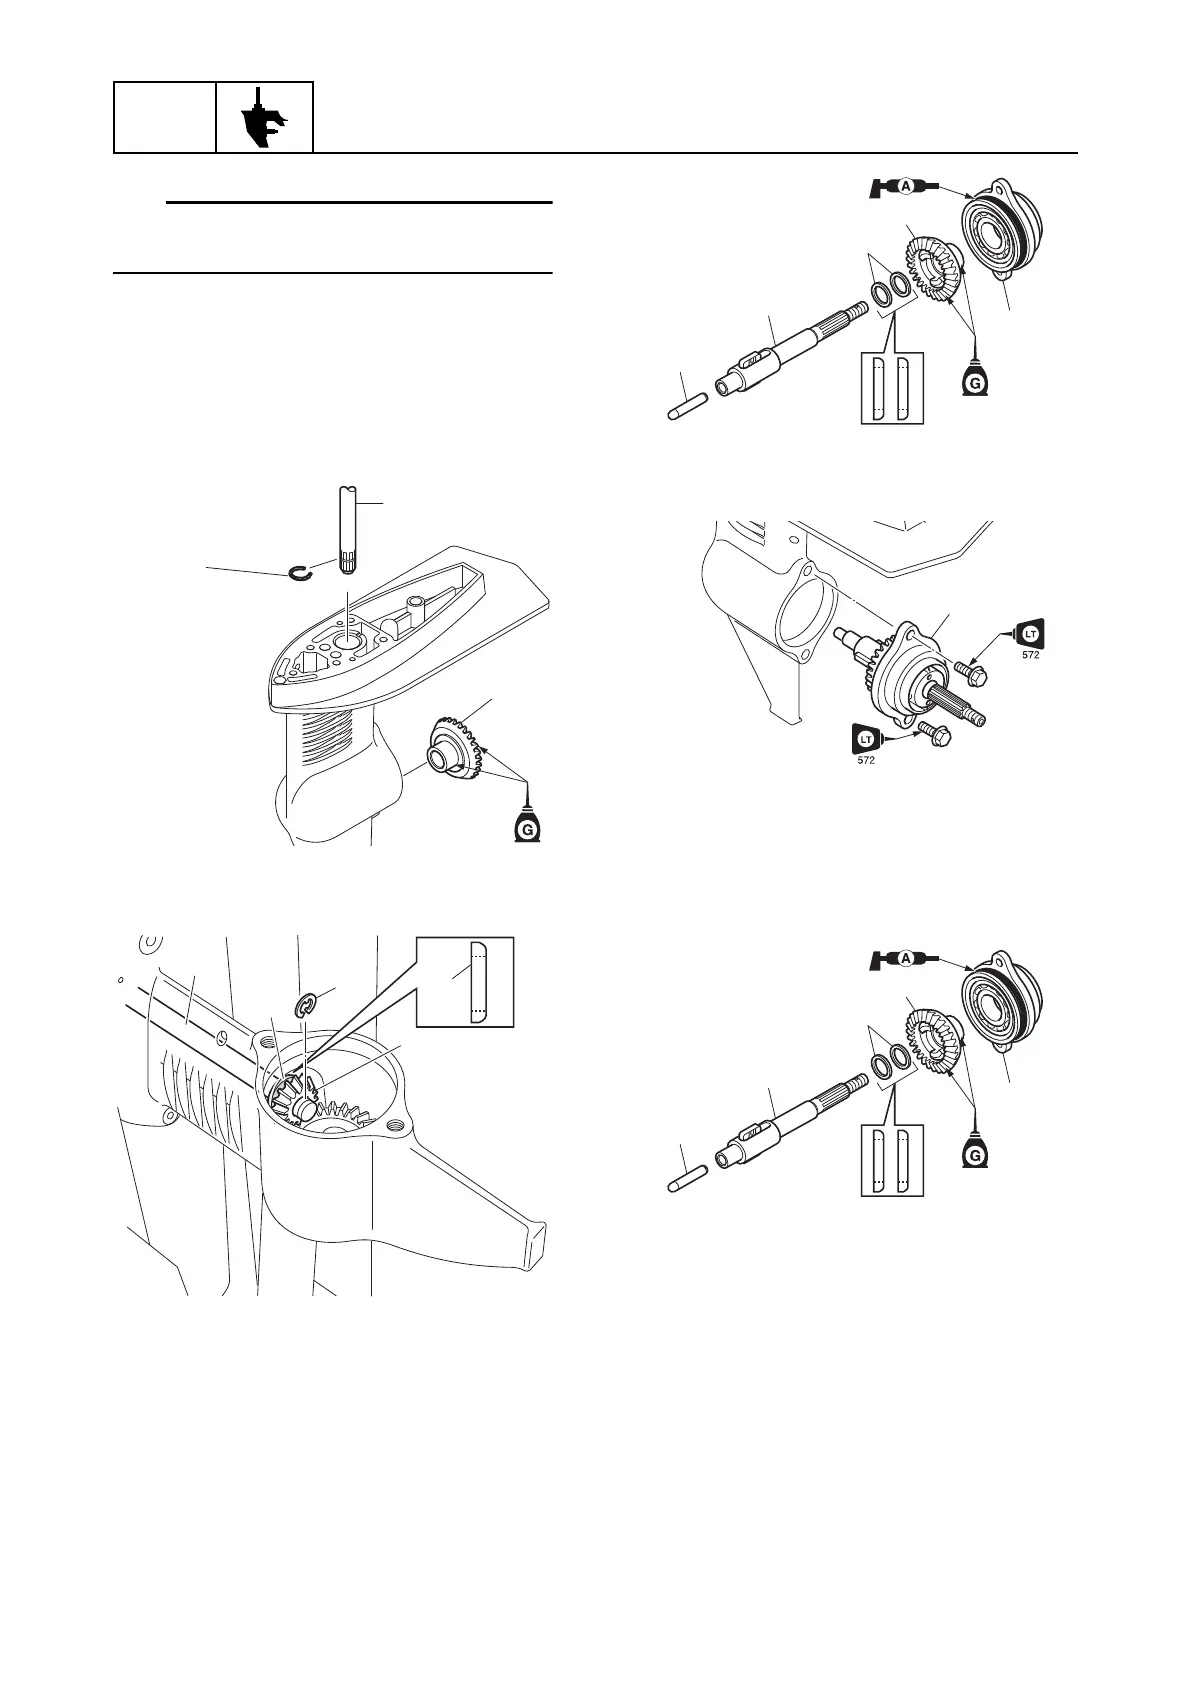
Installing the propeller shaft housing
assembly (S-transom model)
1. Install the reverse gear a, washers b,
drive shaft c, and shift plunger d to the
propeller shaft housing e.
2. Install the propeller shaft housing
assembly f.
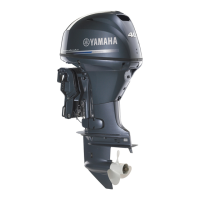
Installing the propeller shaft housing
assembly (L-transom model)
1. Install the reverse gear a, washers b,
drive shaft c, and shift plunger d to the
propeller shaft housing e.
2. Install the lower case mounting bolt f
into the hole in the rear of the lower case
g, and then install the propeller shaft
housing assembly h.
c
b
a
c
d
e
f
d
e
a
b
c
d
e
a
b
c
d