LOWR
Lower unit
59
69W3D1X
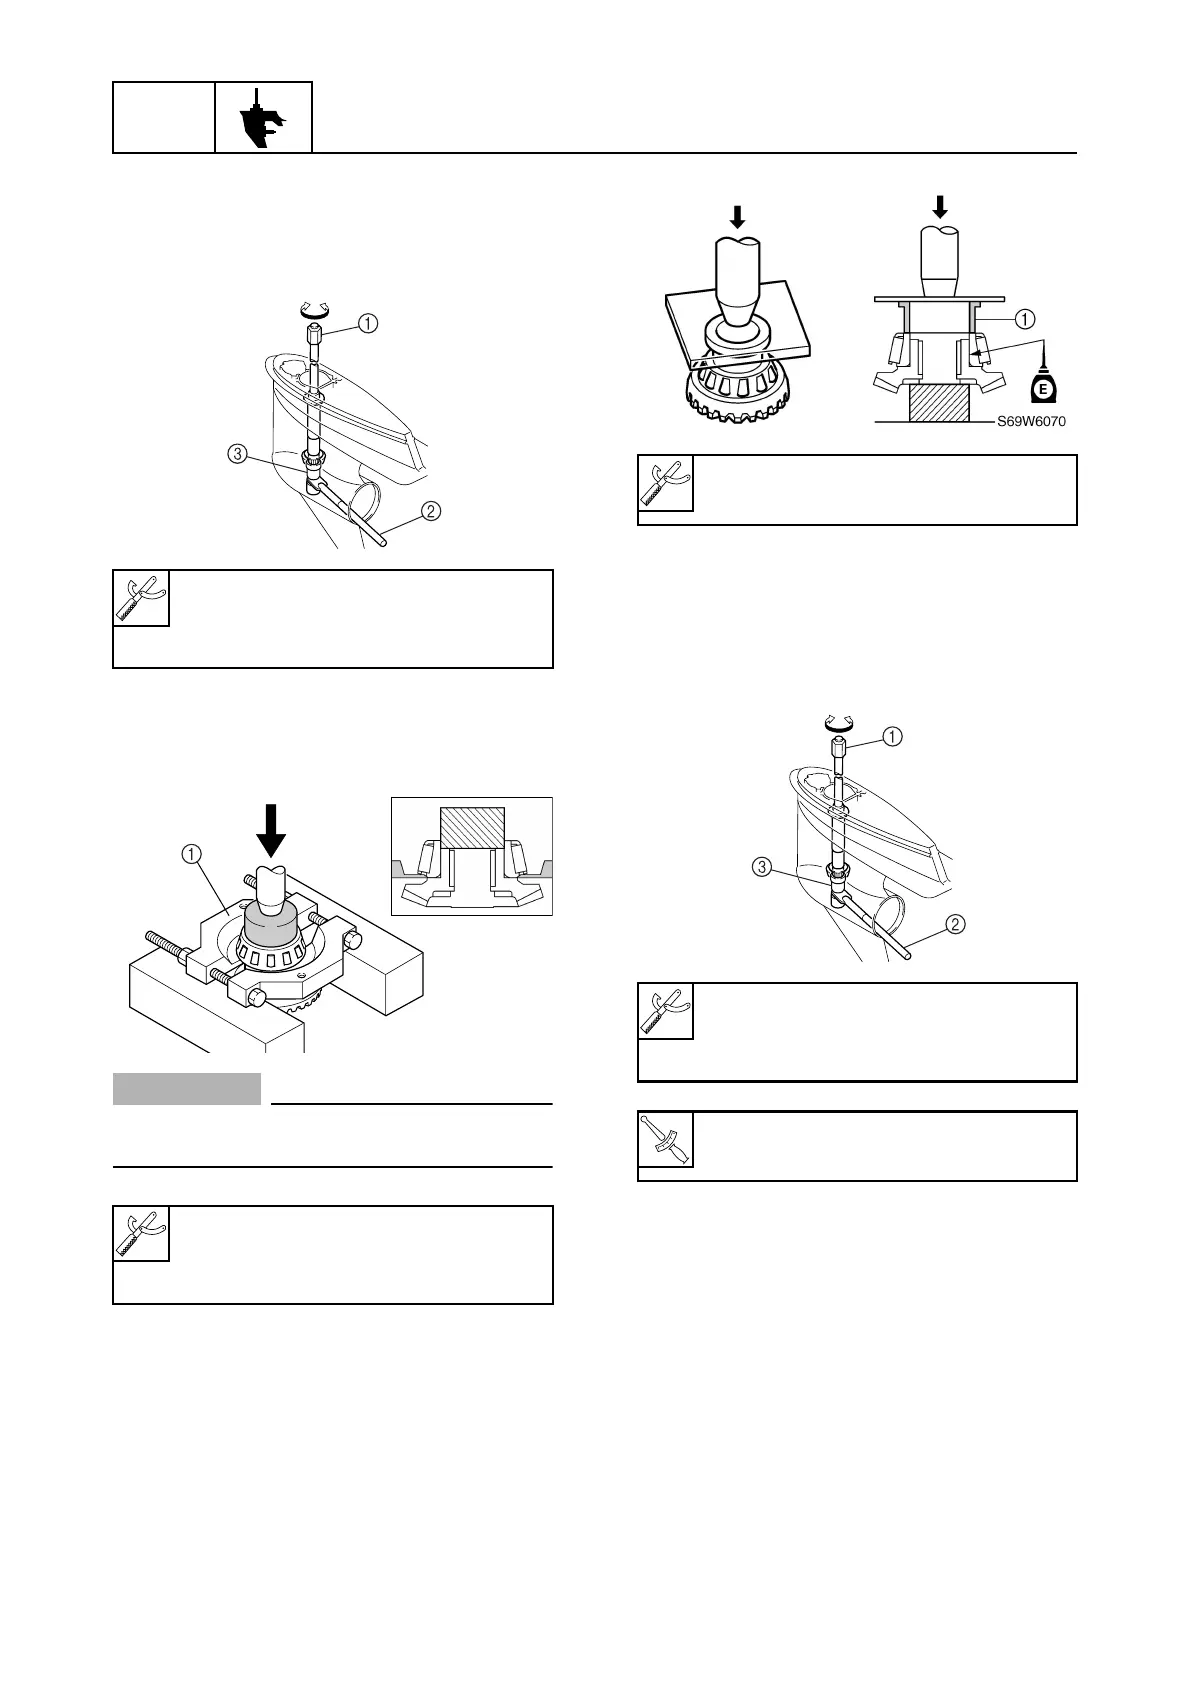
Removing the drive shaft
1. Remove the drive shaft assembly and
pinion, and then pull out the forward
gear.
Disassembling the forward gear
1. Remove the taper roller bearing from the
forward gear using a press.
CAUTION:
Do not reuse the bearing, always replace
it with a new one.
Assembling the forward gear
1. Install the new taper roller bearing into
the forward gear using a press.
Installing the drive shaft
1. Install the forward gear, then the drive
shaft assembly, pinion, and pinion nut,
and then tighten the nut to the specified
torque.
Drive shaft holder 4
1
: 90890-06518
Pinion nut holder
2
: 90890-06505
Socket adapter 1
3
: 90890-06506
Bearing splitter plate
1
:
(commercially obtainable)
Bearing separator
1
: 90890-06534
S69W6020
S69W6030
Bearing inner race attachment
1
:
90890-06643
Drive shaft holder 4
1
: 90890-06518
Pinion nut holder
2
: 90890-06505
Socket adapter 1
3
: 90890-06506
Pinion nut:
75 N·m (7.5 kgf·m, 54 ft·lb)
S69W6020