4-9
FRONT WHEEL
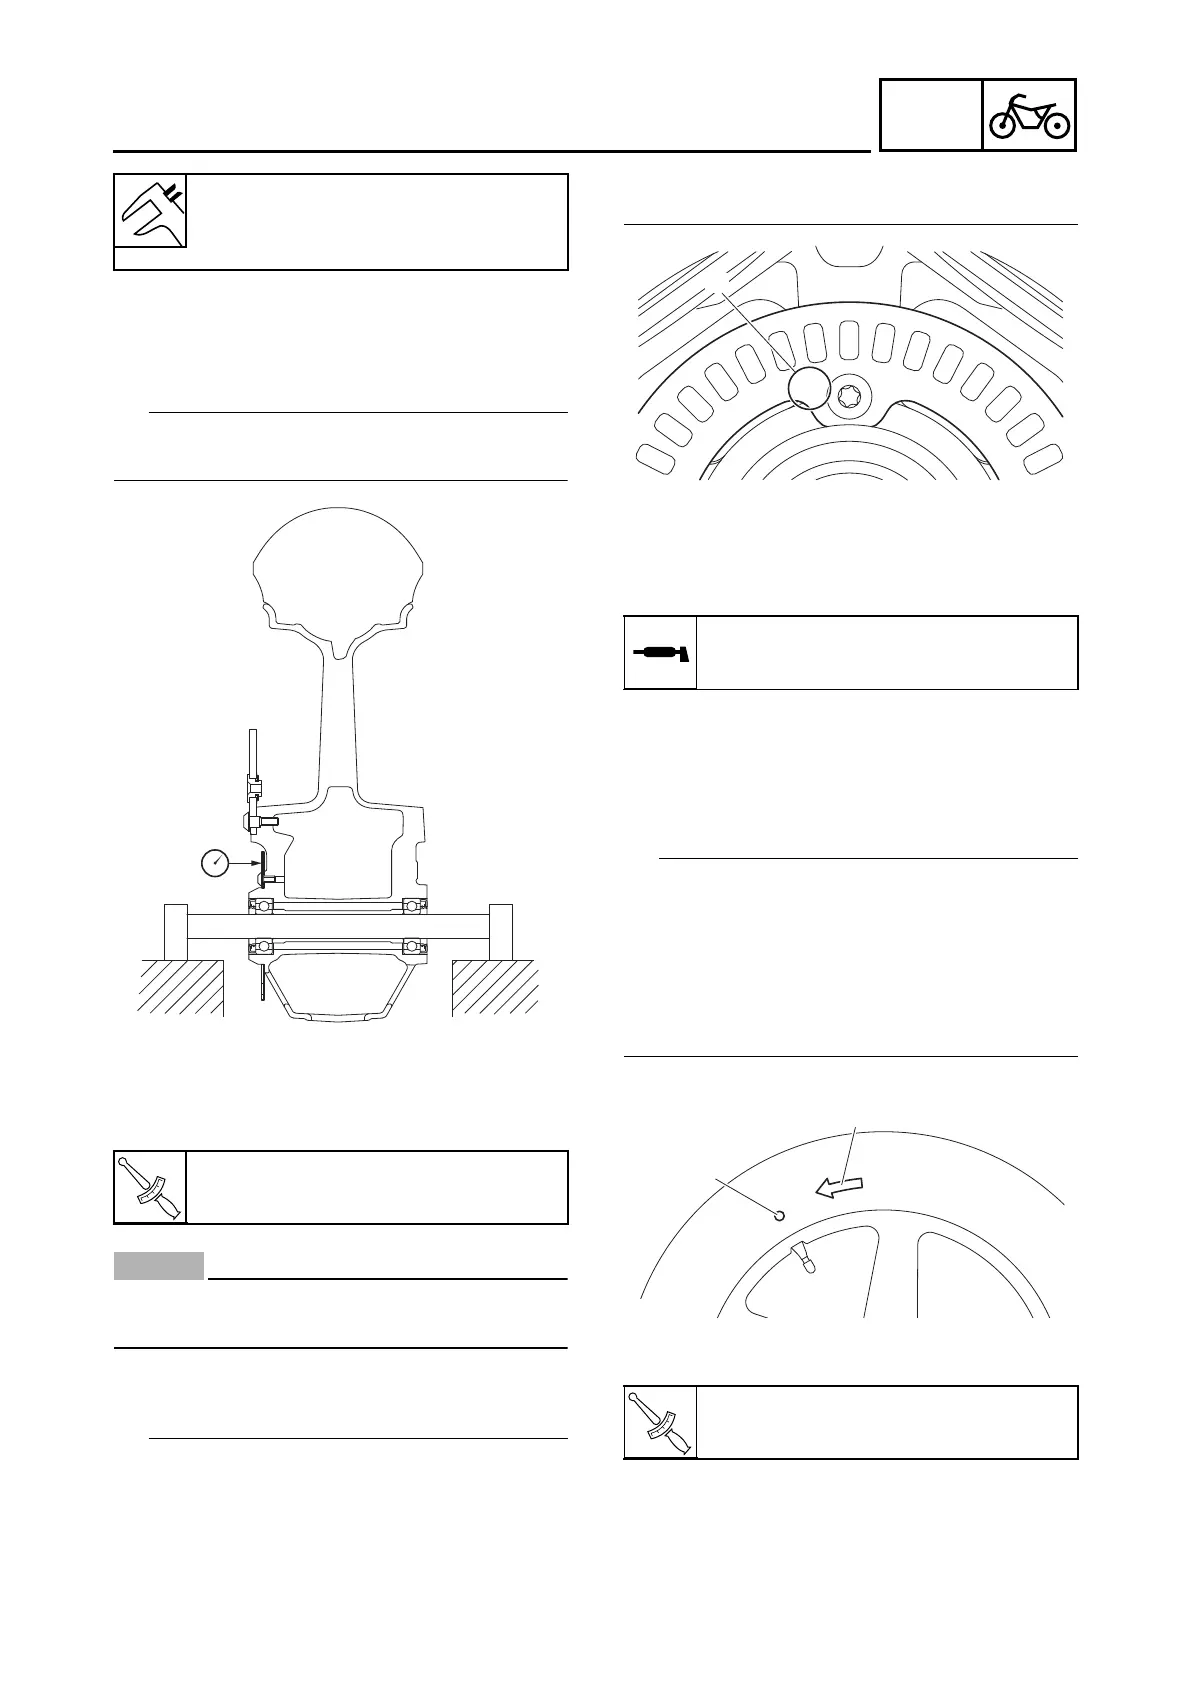
a. Hold the dial gauge at a right angle against
the wheel sensor rotor surface.
b. Measure the wheel sensor rotor runout
limit.
Do not touch the surface of the wheel sensor ro-
tor with a sharp object.
c. If the deflection is above specification, re-
move the sensor rotor from the wheel, ro-
tate it by one or two bolt holes, and then
install it.
ECA18100
Replace the wheel sensor rotor bolts with
new ones.
d. If the deflection is still above specification,
replace the wheel sensor rotor.
• Install the wheel sensor rotor with the stamped
mark “a” facing outward.
• Use “Torx bit T-25” for opening/tightening
wheel sensor rotor bolt.
EAS30932
INSTALLING THE FRONT WHEEL
1. Lubricate:
• Oil seal lips
2. Install:
• Collars
• Front wheel
• Front wheel axle
• Front wheel axle nut
• Install the tire and wheel with the mark “1”
pointing in the direction of wheel rotation.
• Align the DOT mark “2” with the tire air valve in-
stallation point.
• Apply lithium-soap-based grease to the con-
tact surface and threads of the front wheel axle
nut.
3. Tighten:
• Front wheel axle nut
Wheel sensor rotor runout limit
limit
0.25 mm (0.0098 in)
Front wheel sensor rotor bolt
8 N·m (0.8 kgf·m, 5.9 lb·ft)
Recommended lubricant
Lithium-soap-based grease
Front wheel axle nut
38 N·m (3.8 kgf·m, 28 lb·ft)
B9X-F8197-E0.book Page 9 Thursday, July 16, 2020 2:28 PM