200 PSR-A3000 Owner’s Manual
By using a USB wireless LAN adaptor (sold separately), you can connect the PSR-A3000 with an iPhone/iPad via
a wireless network. For general operating instructions, refer to the “iPhone/iPad Connection Manual” on the
website. This section covers only operations that are specific to the PSR-A3000.
Before starting operations, make sure that the USB wireless LAN adaptor is connected to the [USB TO DEVICE]
terminal and call up the setup display via [FUNCTION] TAB [ F] MENU 2 [H] WIRELESS LAN.
NOTE If the USB wireless LAN adaptor is not recognized by the instrument, “WIRELESS LAN” for the [H] button is not shown. When “WIRELESS LAN” is not shown even
though a USB wireless LAN adaptor has been connected, turn the instrument off then on again.
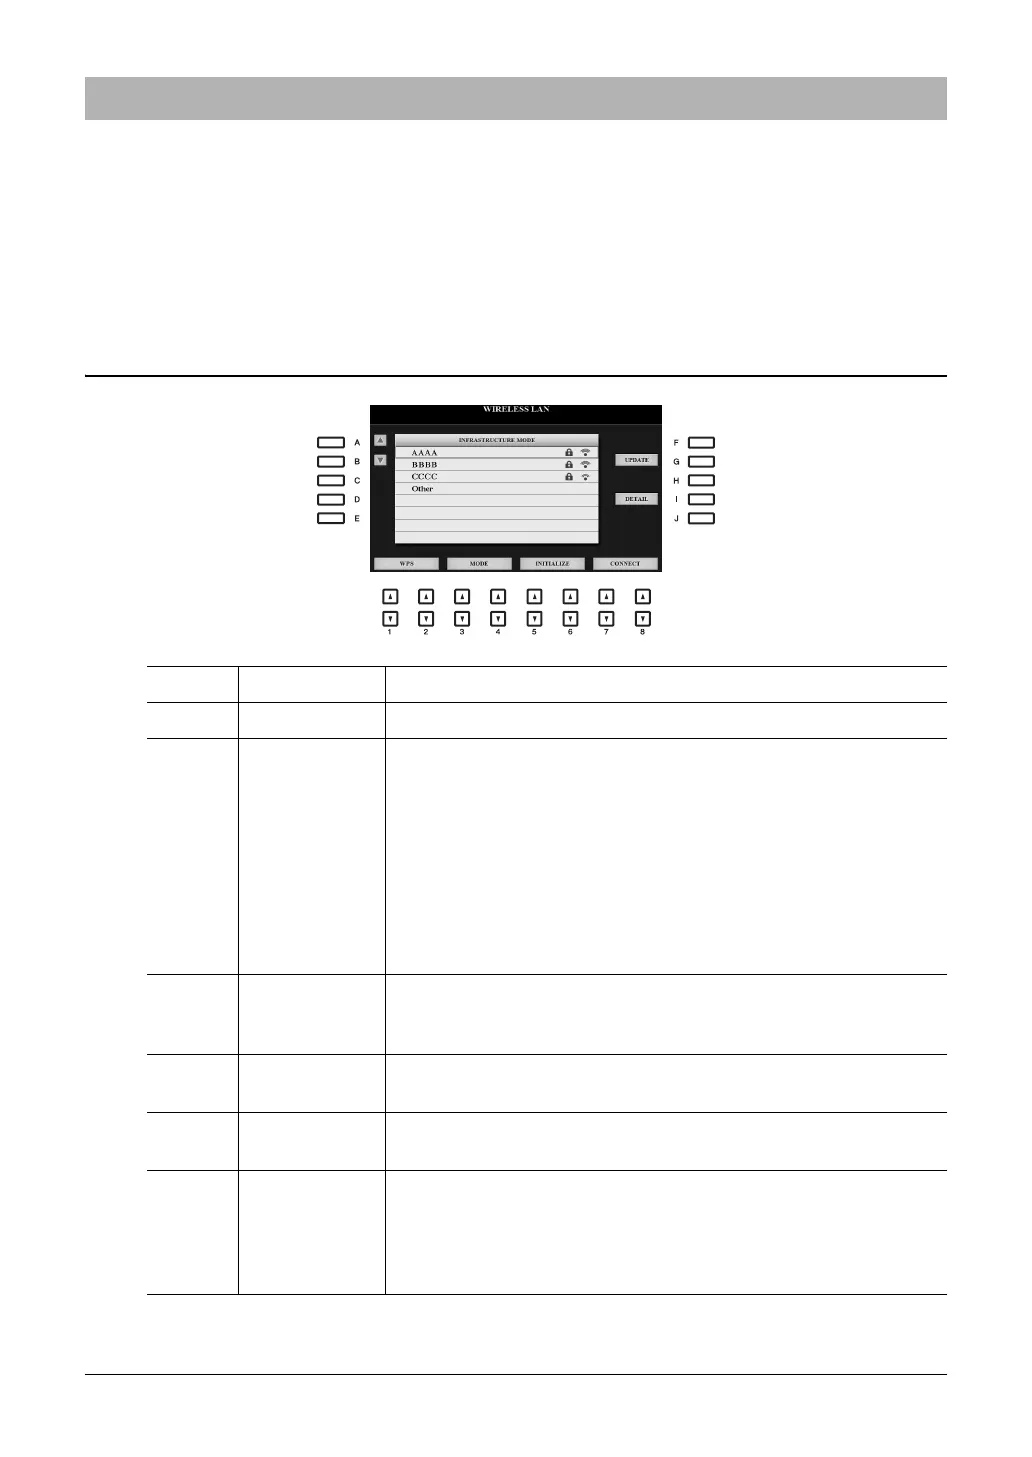
Infrastructure Mode
Connecting with an iPhone/iPad via Wireless LAN
[A]/[B] Selects the network.
[G] UPDATE Updates the network list on the display.
[I] DETAIL For setting the detailed parameters on the pages below. After making these
settings, press one of the [7 ]/[8 ] (SAVE) button to actually save
them.
IP ADDRESS: Sets the IP address and other related parameters.
OTHERS: When the instrument is connected to the network with the Infra-
structure Mode, the current time is shown on the Main display. You can
set the Time Zone via the [B] button and Daylight Saving Time via the
[C] button for your local time.
If you want to enter the host name, press the [A] button.
[1 ]/
[2 ]
WPS Connects this instrument to the network via WPS. Press this button fol-
lowed by the [G] (YES) button, then press the WPS button on your access
point within two minutes.
[3 ]/
[4 ]
MODE Switches to the Access Point Mode.
[5 ]/
[6 ]
INITIALIZE Initializes the connection setup to the default factory status.
[7 ]/
[8 ]
CONNECT Connects to the selected network.
If you select “Other” by using the [A]/[B] buttons, this calls up the Manual
Setup display in which you set the SSID, security method, and password.
After entering those, press one of the [7 ]/[8 ] buttons in the Man-
ual Setup display to connect to the network.
 Loading...