A.
Removal
and
Disassembly
WARNING:
Securely
support
the
motorcycle
so
there
is
no
danger
of
it
falling
over.
1 . Disconnect the speedometer cable.
Remove the brake drum and the front
wheel. Remove the front fender.
2. Remove the rubber cap from the
top
of
each fork.
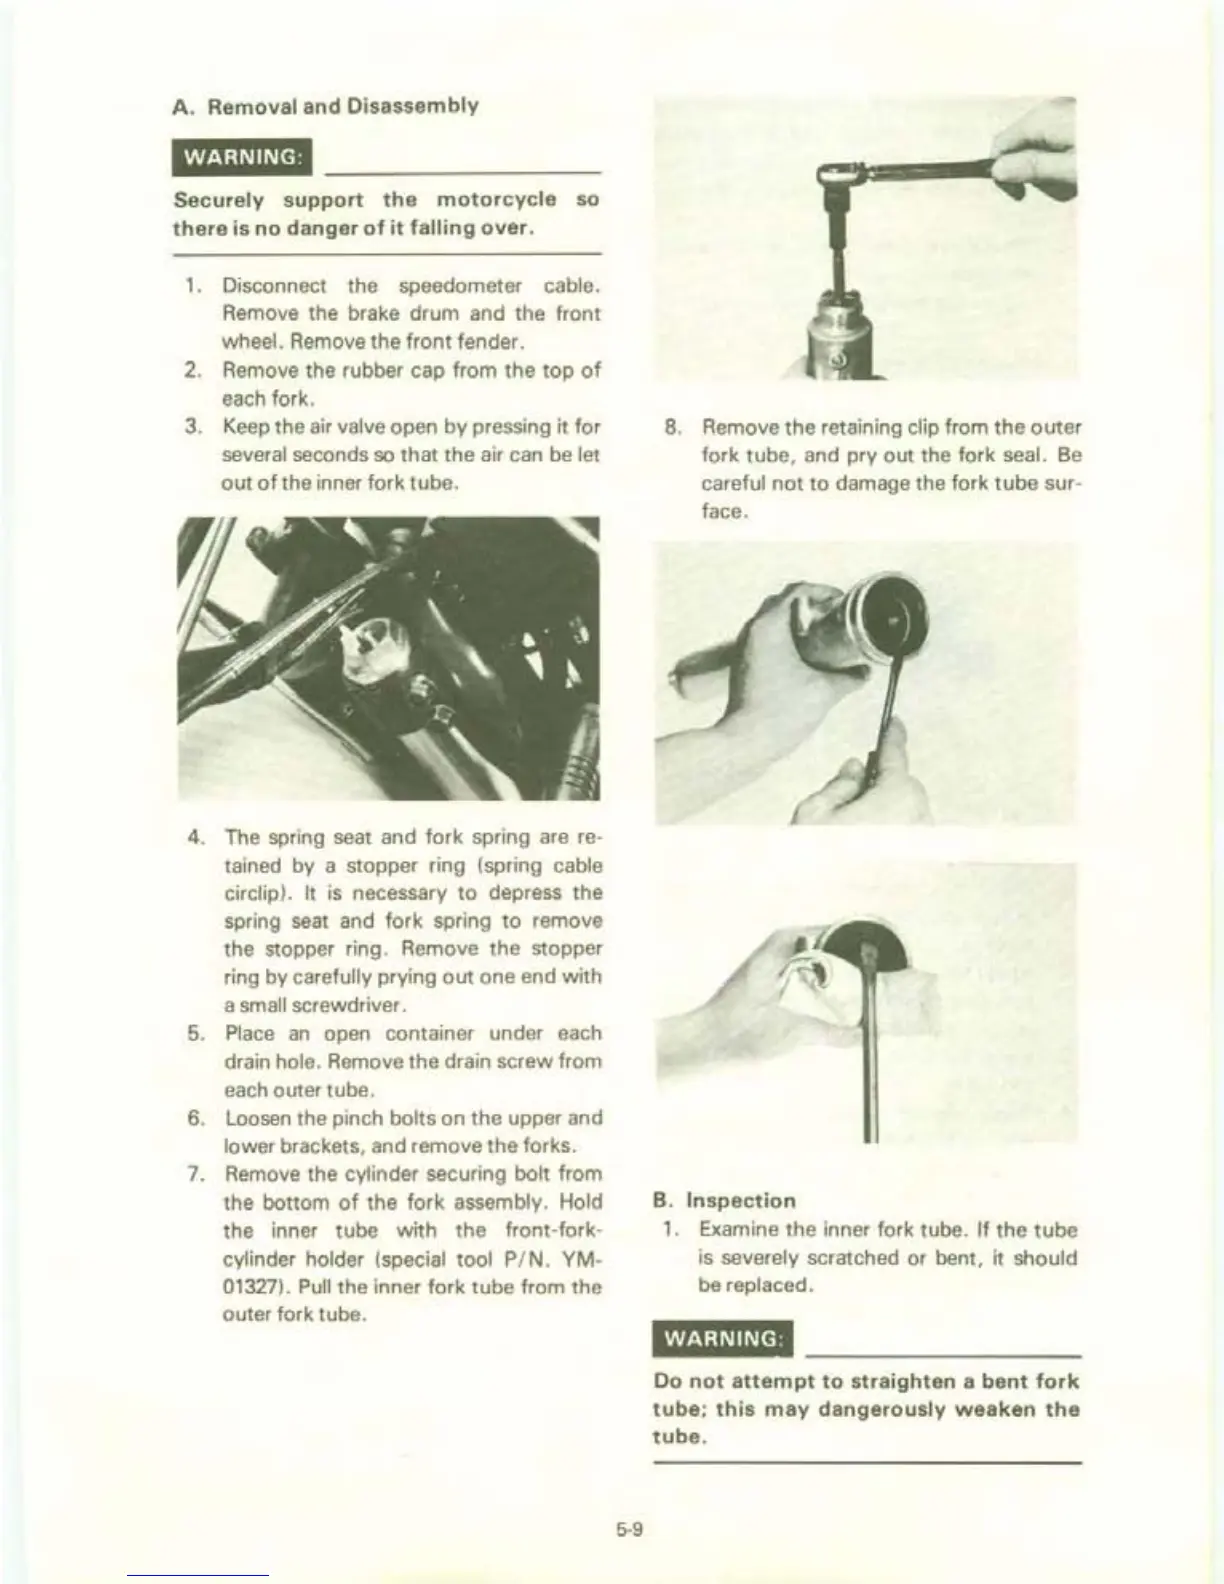
3.
Keep
the air valve open by pressing it for
several seconds
so
that the air
can
be
let
out
of
the inner fork tube.
4.
The spring seat and fork spring are
re-
tained by a stopper ring (spring cable
circlipl.
It
is
necessary
to
depress the
spring seat and fork spring
to
remove
the stopper ring. Remove the stopper
ring by carefully prying
out
one end with
a small screwdriver.
5.
Place
an
open container under each
drain hole. Remove the drain screw from
each
outer tube.
6.
Loosen
the pinch bolts on the upper and
lower brackets, and remove the forks.
7.
Remove the cylinder securing bolt from
the bottom
of
the fork assembly. Hold
the inner tube with the front-fork-
cylinder holder (special tool P / N. YM-
01327).
Pull
the inner fork tube from the
outer fork tube.
5-9
8.
Remove the retaining clip from the outer
fork tube, and pry out the fork seal.
Be
careful not
to
damage the fork tube sur-
face.
B.
Inspection
1.
Examine the inner fork tube. If the
tube
is severely scratched or bent, it should
be
replaced.
WARNING
:
Do
not
attempt
to
straighten
a
bent
fork
tube;
this
may
dangerously
weaken
the
tube.


 To Next Page